Small Glass Houses - Diatoms and Floating Glass
Moving on from the previous test pieces in the clear glass, we are now experimenting with the coloured glass. Ian has looked back through my drawings and wants to try to capture the more ‘squashed’ spherical form in glass. We are using a turquoise colour with clear glass and perhaps adding in some opaque white cane for decoration/pattern.

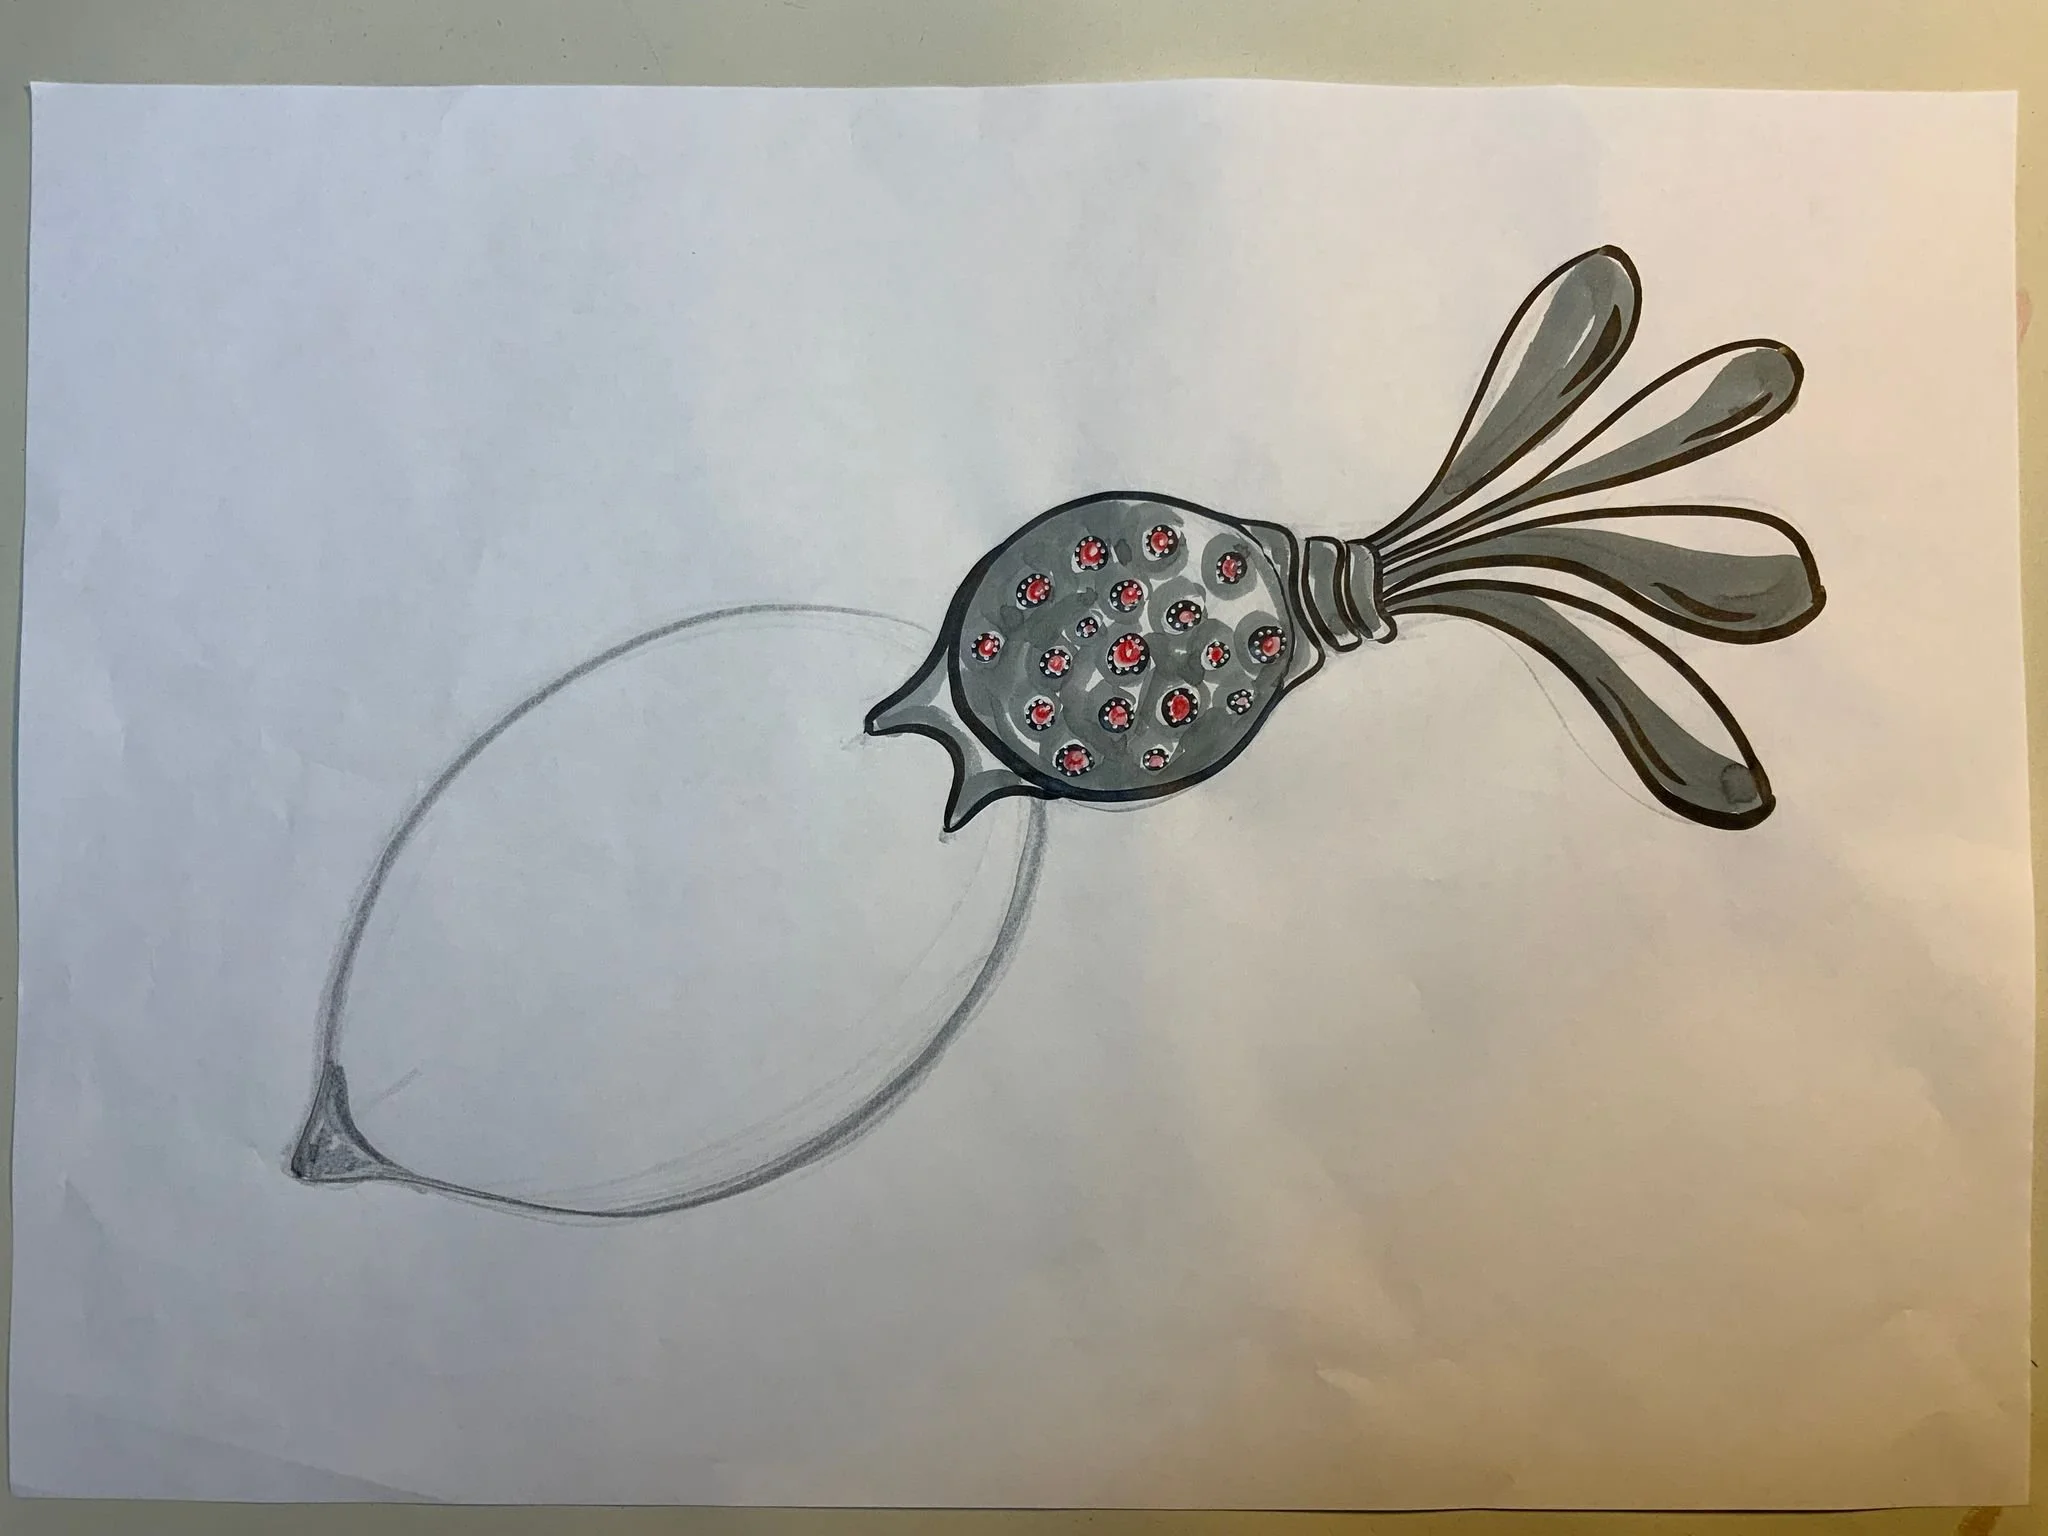
Sketchbook detail showing the squashed spherical forms
The video above shows a CAD model of a new design idea. This idea includes a ‘lid’ or top piece which will fit perfectly onto the main form.
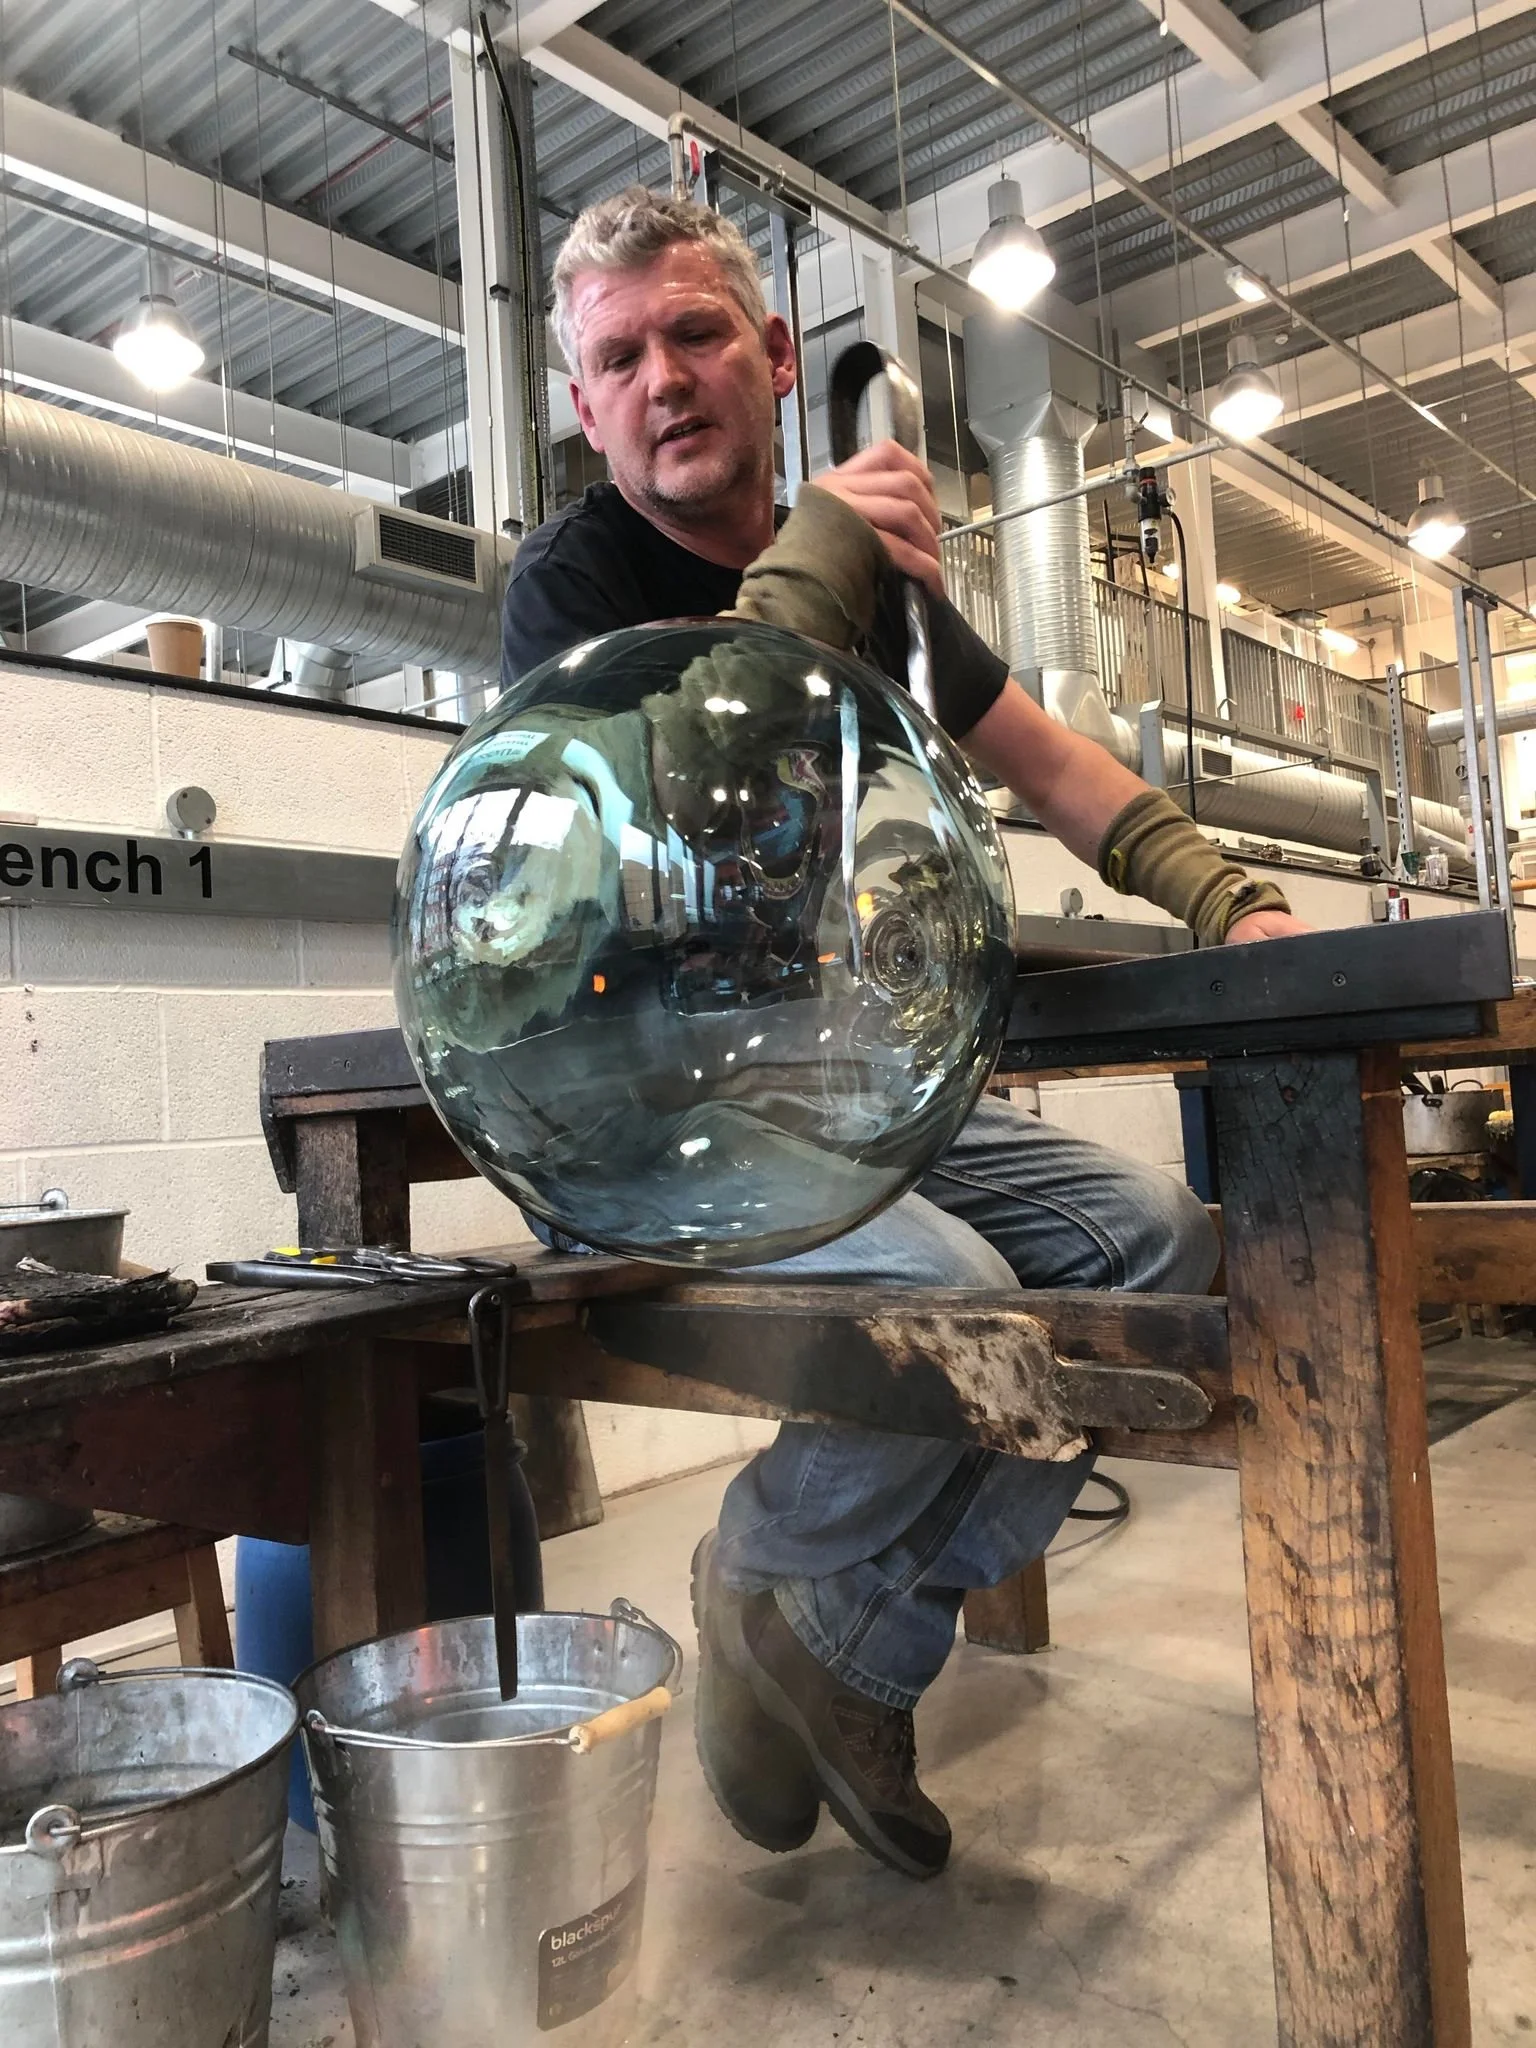
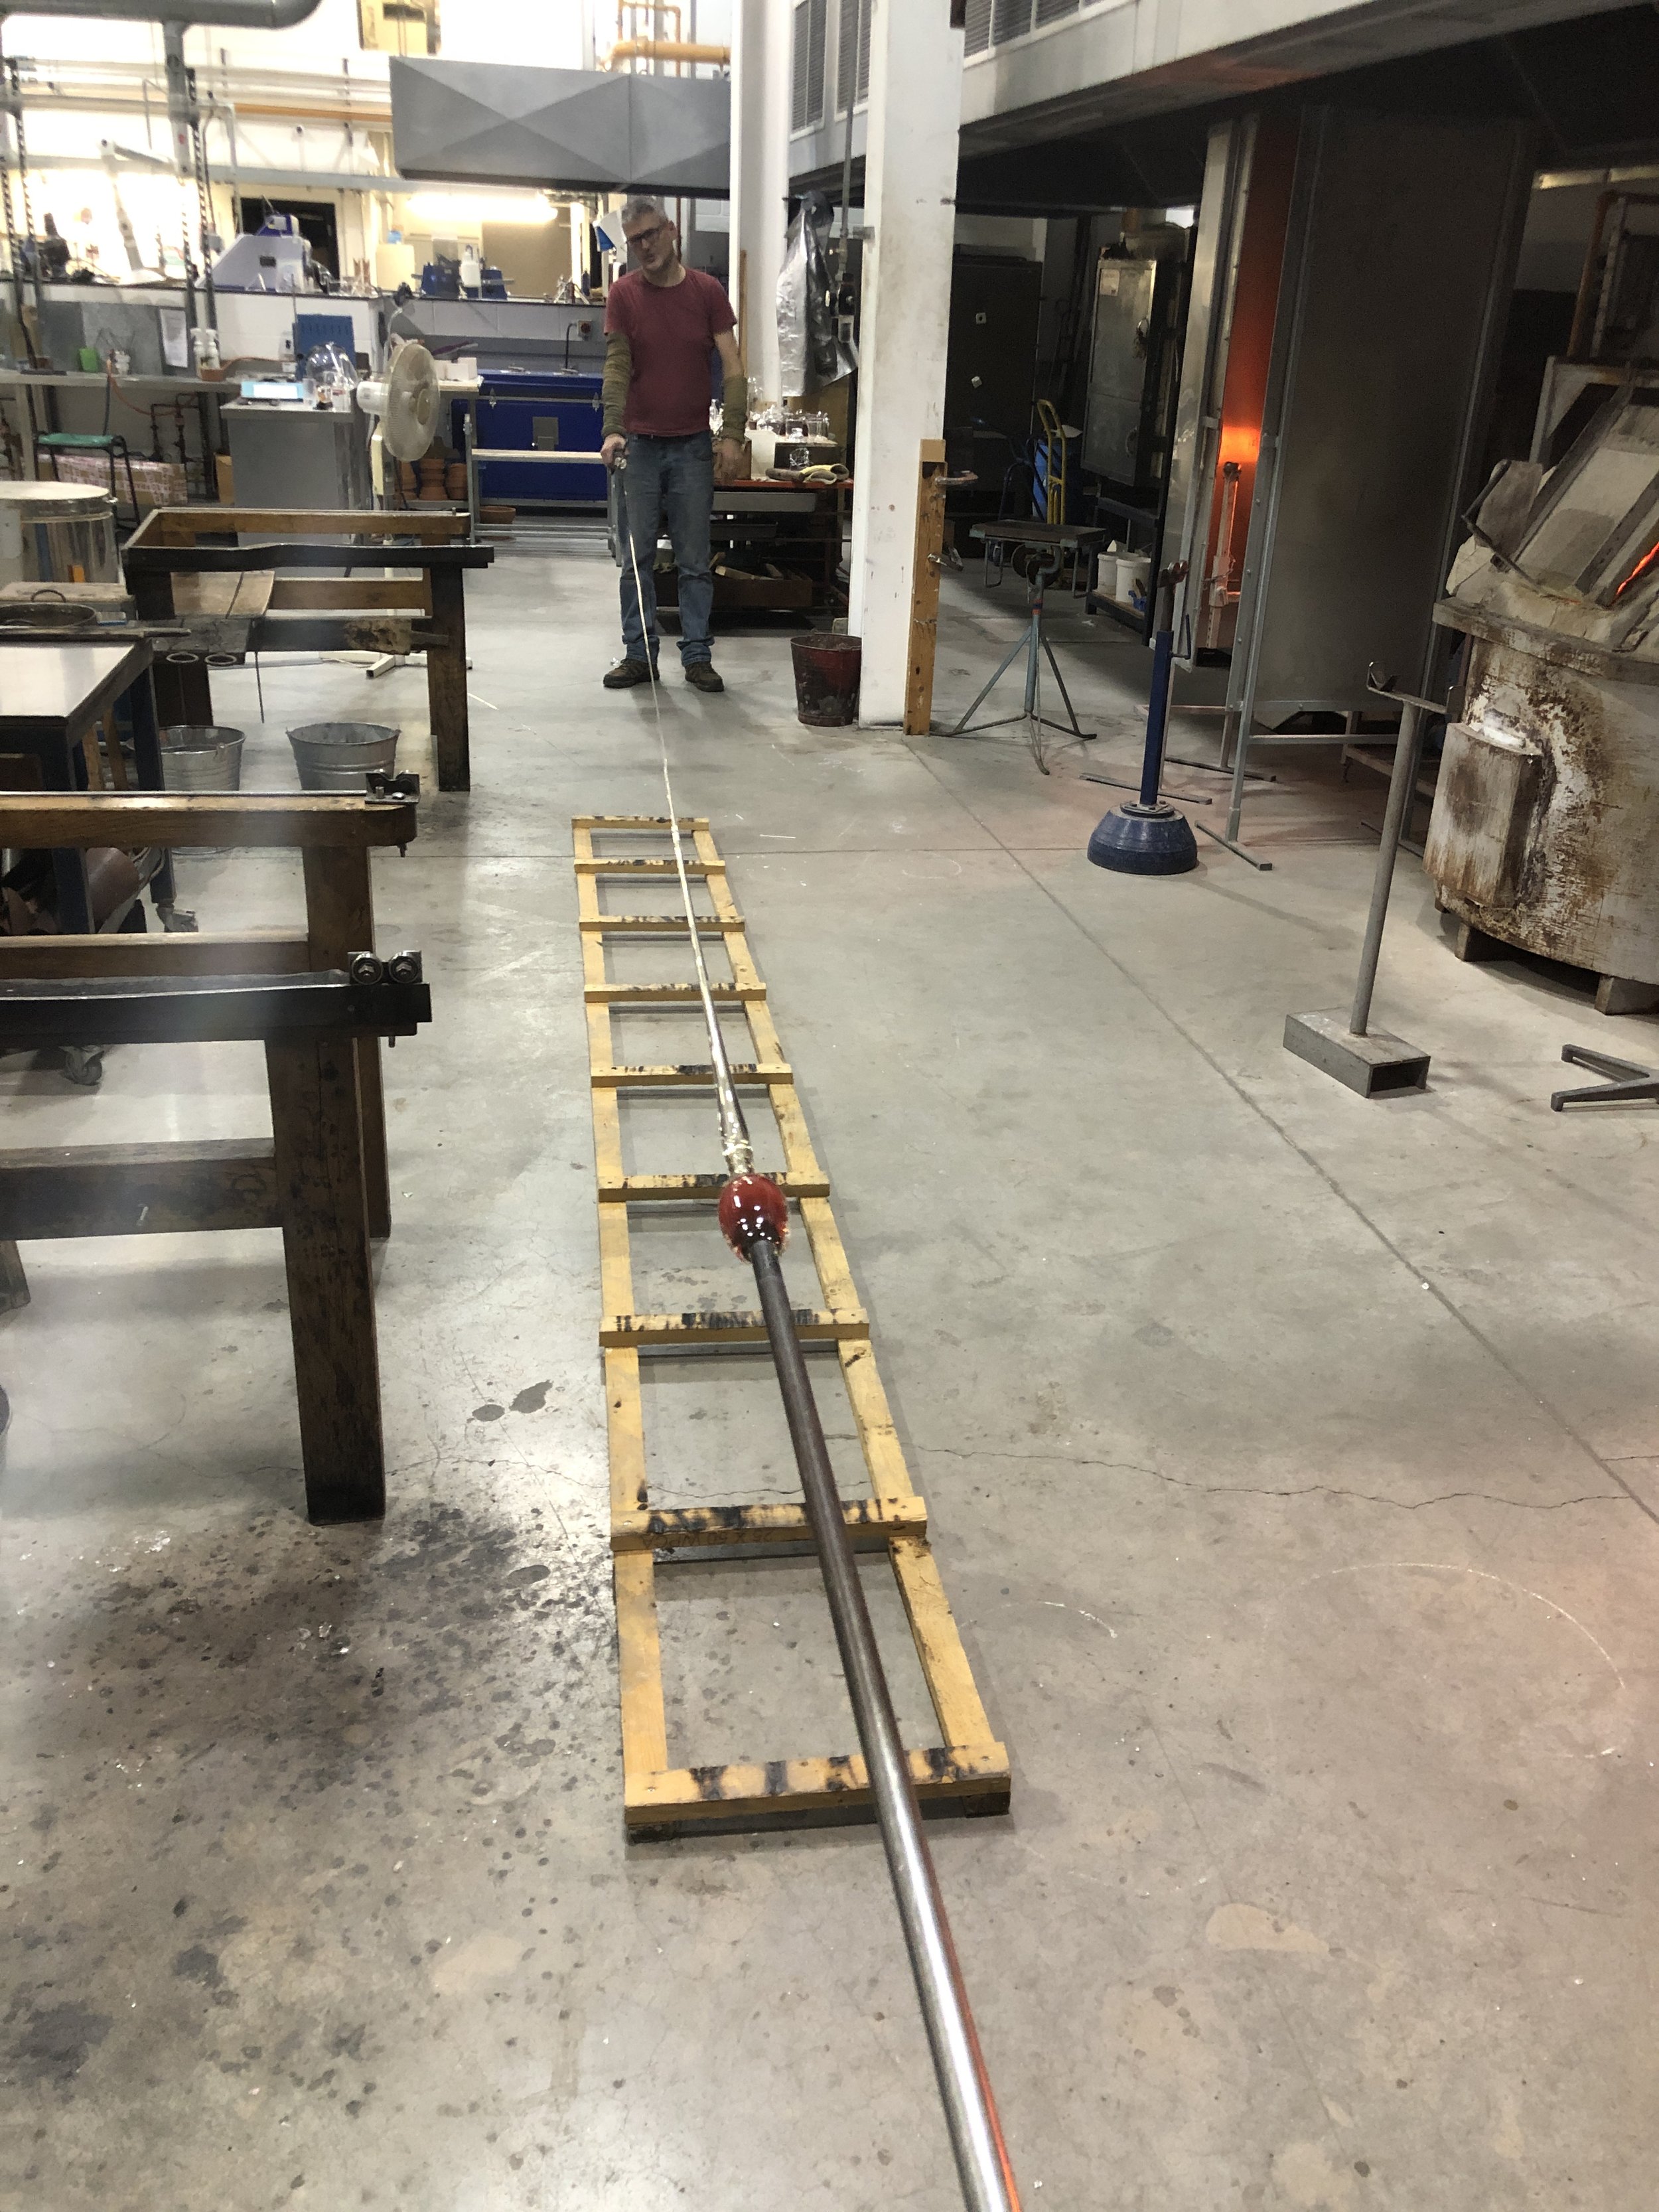
Ian making the large-scale glass form


Ian making the glass section which will be inserted inside the long blue piece below to emulate the ‘raphe’ section of some diatom forms.

Finished pieces
It’s really exciting seeing the pieces come together. Even though our aim for this development time isn’t about creating ‘finished pieces’ as such, we have still come up with some design concepts and work which is completed. The experimenting and development of this body of work is paramount, so we are open to how these pieces could lead on to future inspiration and designs.
We are still considering what we can add to the inside vessel of the piece below, maybe something is a bright colour, not necessarily glass, it could be a different material, even possibly a water sample in the test tube-type vessel.


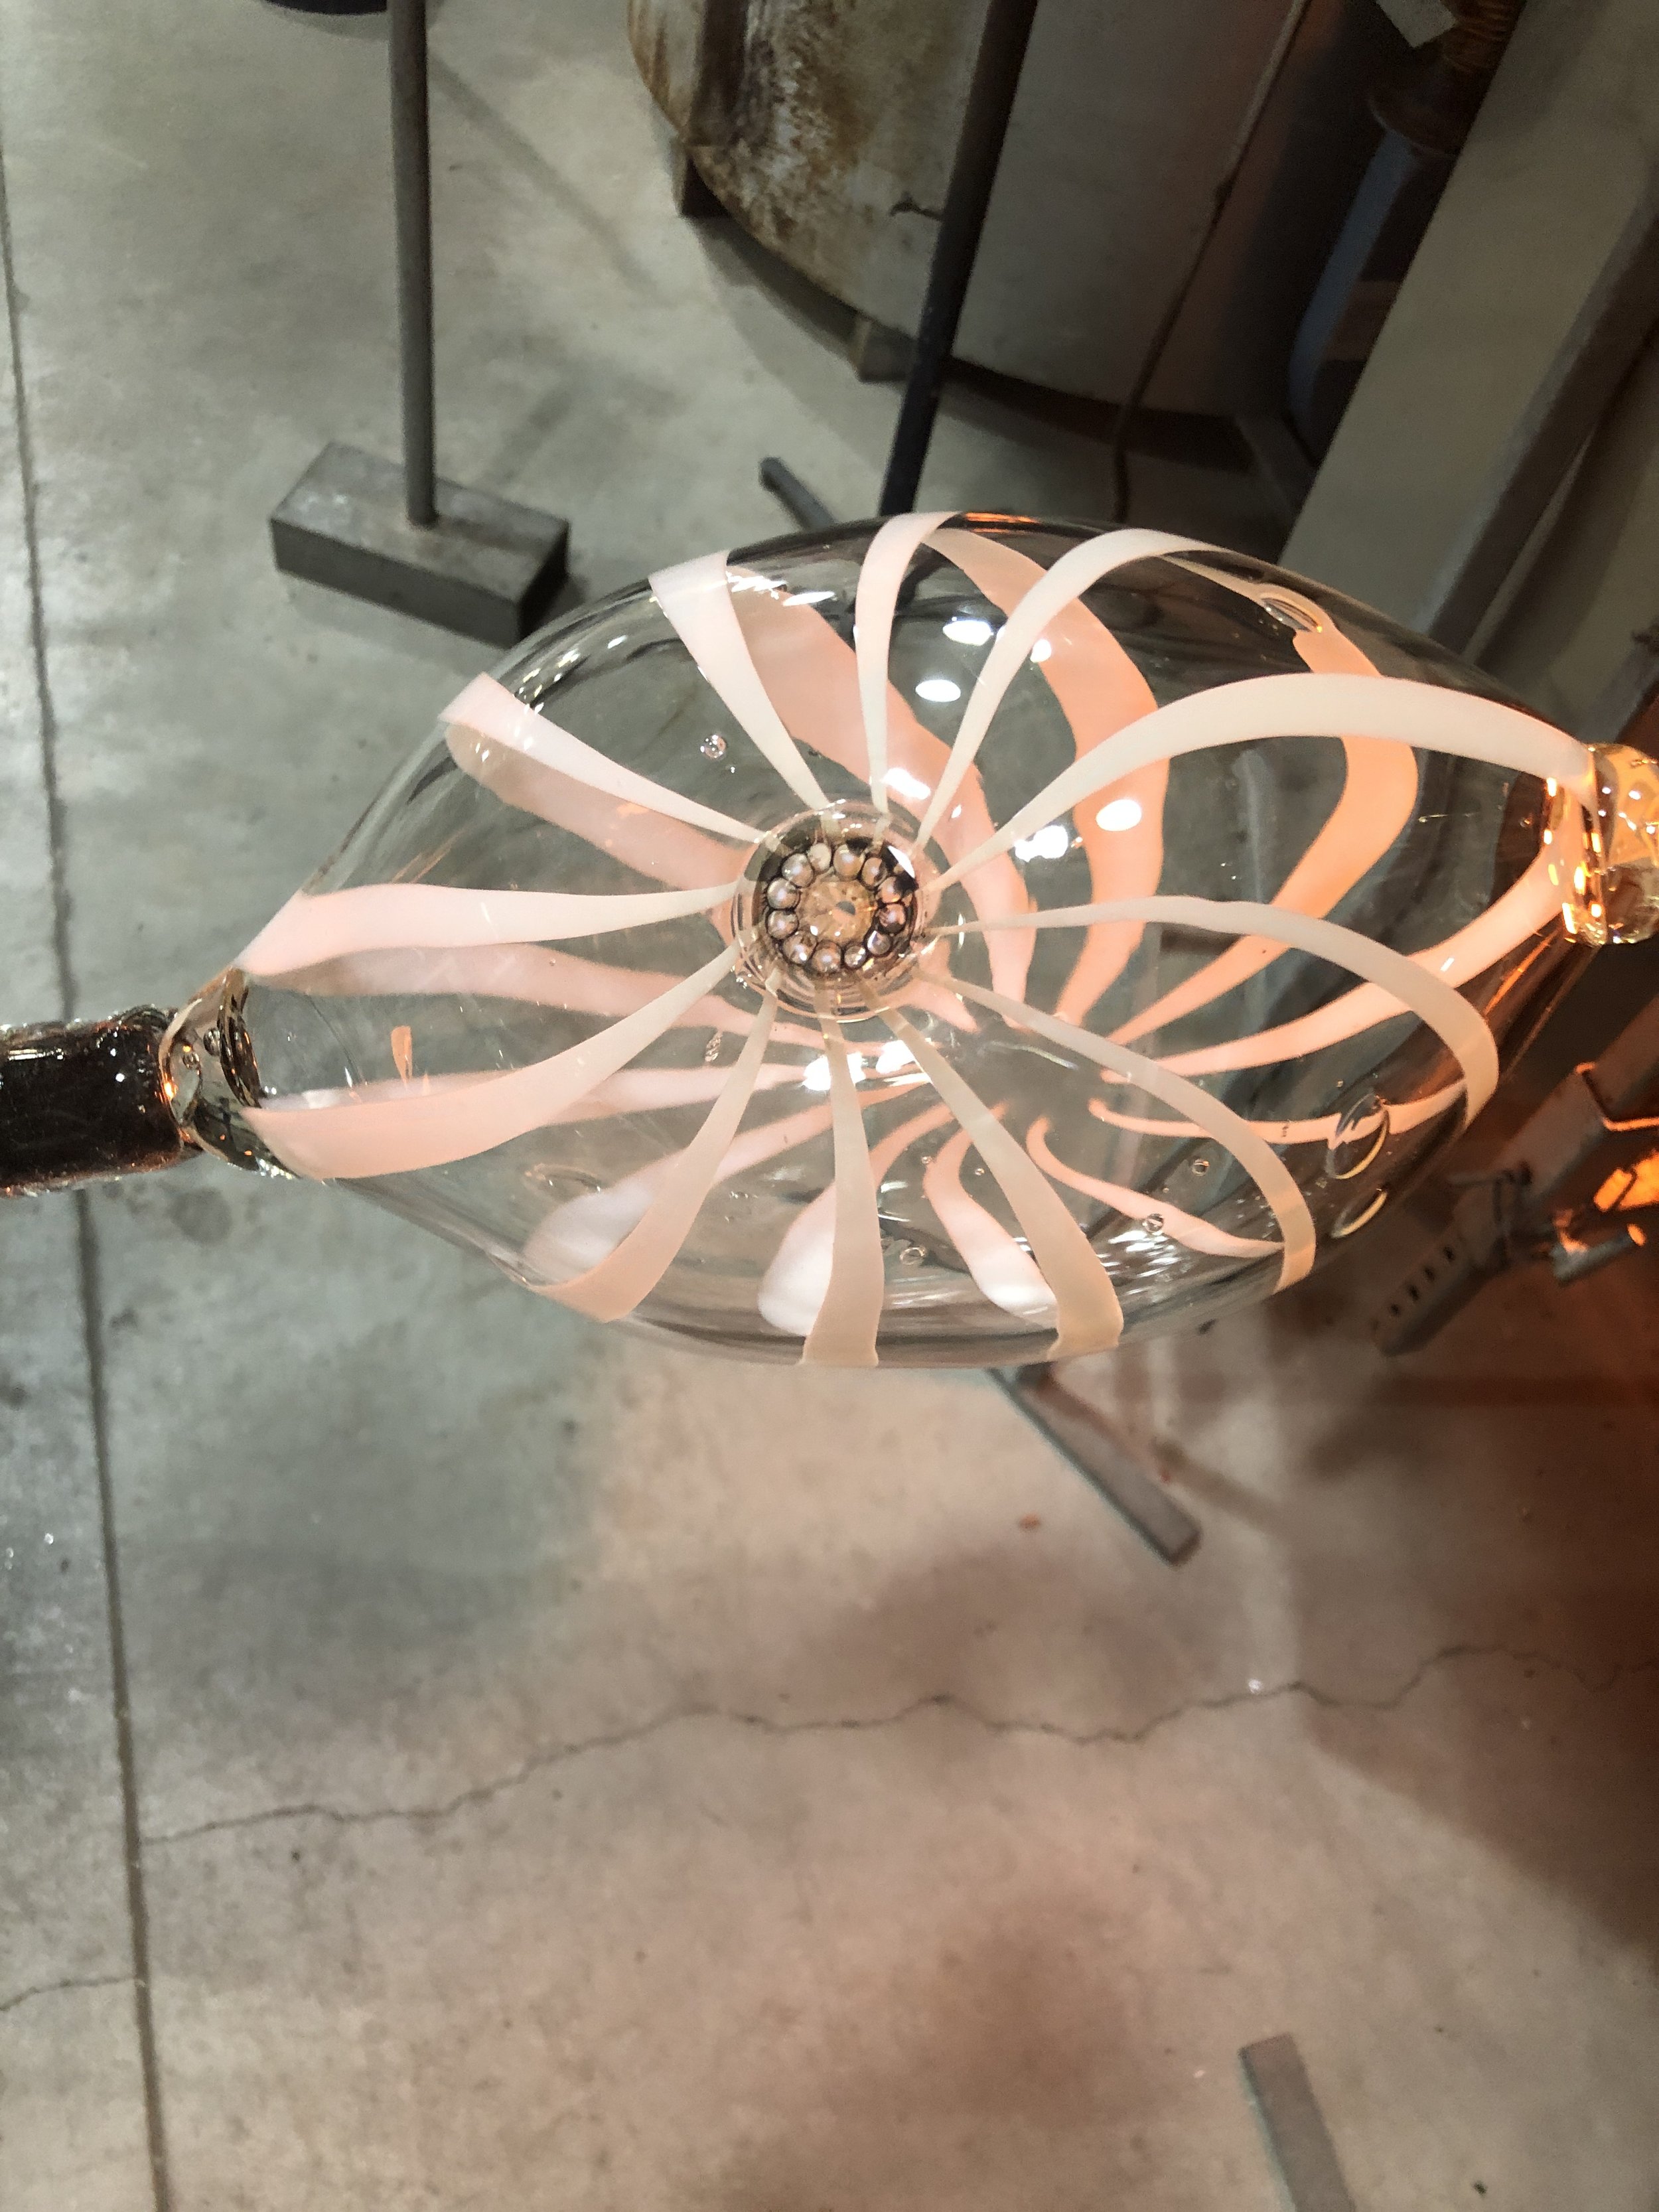
Originally this piece say the other way up, with the white lines being at the top of the form, however we both preferred it this way up, I love the way you can look into the piece and view the white lines from above.
We still want to make another ‘stopper’ piece for this one which will be attached to the opposite end. The piece with then lay on its side and hopefully float in water, reminiscent of an old fishing float.
Concept Designs
Ian asked me to come up with some ideas for the top of one of the vessels. I spent some time playing around with forms inside the glass and coming out of the top. I looked closely at the forms of the diatoms but also at the patterns and textures to come up with the concept designs.


These were to give ian a starting point for how he might manipulate the glass, he tried a few initial experiments, but will come back to it at a later date.


Creating a stand and CAD

As the test piece was evolving and getting bigger and more vulnerable to damage, we decided to make a stand to display the piece in the upright position and to protect it from breakages.
Ian plotted a stand out in CAD, which looked very impressive.


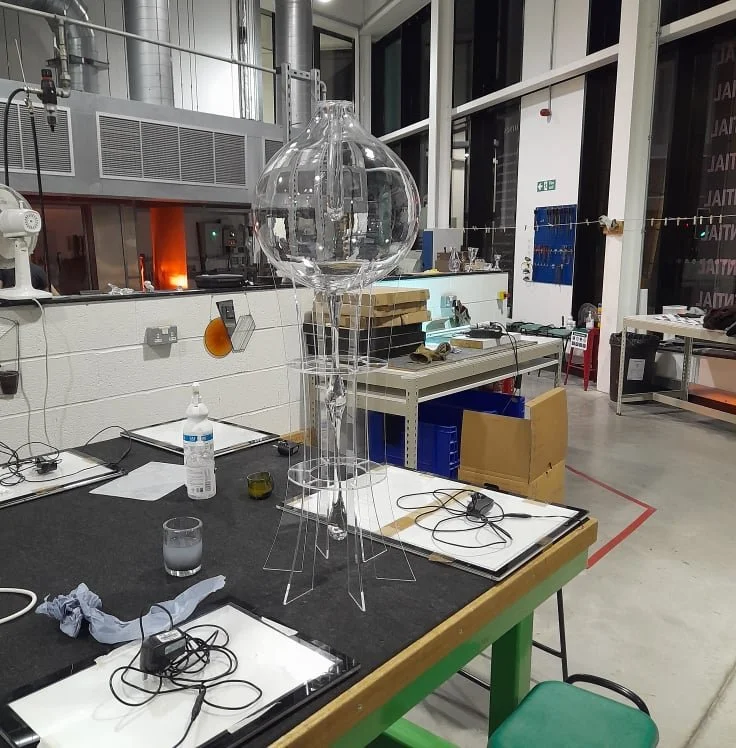
I love how the piece looks almost sci-fi, like something from the film Metropolis! It really shows off the scale now seeing it standing.

The test piece collection is growing
Millefiori experiments
Millefiori is a decorative glass technique which is frequently associated with Venetian glassware. The term millefiori is a combination of the Italian words "mille" (thousand) and "fiori" (flowers).

Example of Millefiori glassware
Ian tried experimenting with this technique, unfortunately the traditional flower ones broke because of colour incompatibility so he tried putting rods together. He tied them up with wire and picked them up out of a kiln.

The canes tied with wire inside the kiln


The finished test pieces show the level of detail and pattern which can be achieved with this technique. I love how the colours pop using the dark background and how the form of the glass helps to magnify certain areas, Ii really reminds me of looking through the microscope and seeing the details close-up.


We are both excited to where this highly decorative work can take us. Having a simple vessel form with a very decorative stopper which attracts attention. Once the cold work is finished we can start to think about how we will go about this.
Cold work and finishing
Ian created another glass form to insert into the larger vessel. We like the idea of there being something inside, and in colour taking inspiration from an earlier sketch I did. I love the way the lip rests perfectly on top of the larger vessel opening.

we could glue it permanently or use silicon sealant. There's a little hole in the wall of the insert so hopefully it won't mist up too much. We can put stuff in the large chamber and a small red object at the bottom of the test tube. I'm already thinking of having a bigger opening and having the insert a more fluid shape with a larger flat rim in future pieces. So we have an extremely ornate lid instead of a stopper which is inspired by one of your drawings
Ian Hankey


Smoothing off the rough edges
Ian has been spending time finishing off the test pieces. Nerve wracking stuff as they have large, heavy pieces to manipulate. We’re both really pleased with how they have turned out. We are starting to think about making a stand for the larger piece. This will protect it from damage and also allow us to see the piece in an upright position.
Colour and cane
Ian and Nathan have been back in the Hot Shop, this time introducing colour to the glass. The following images show the fascinating and mesmerising process and the end result.
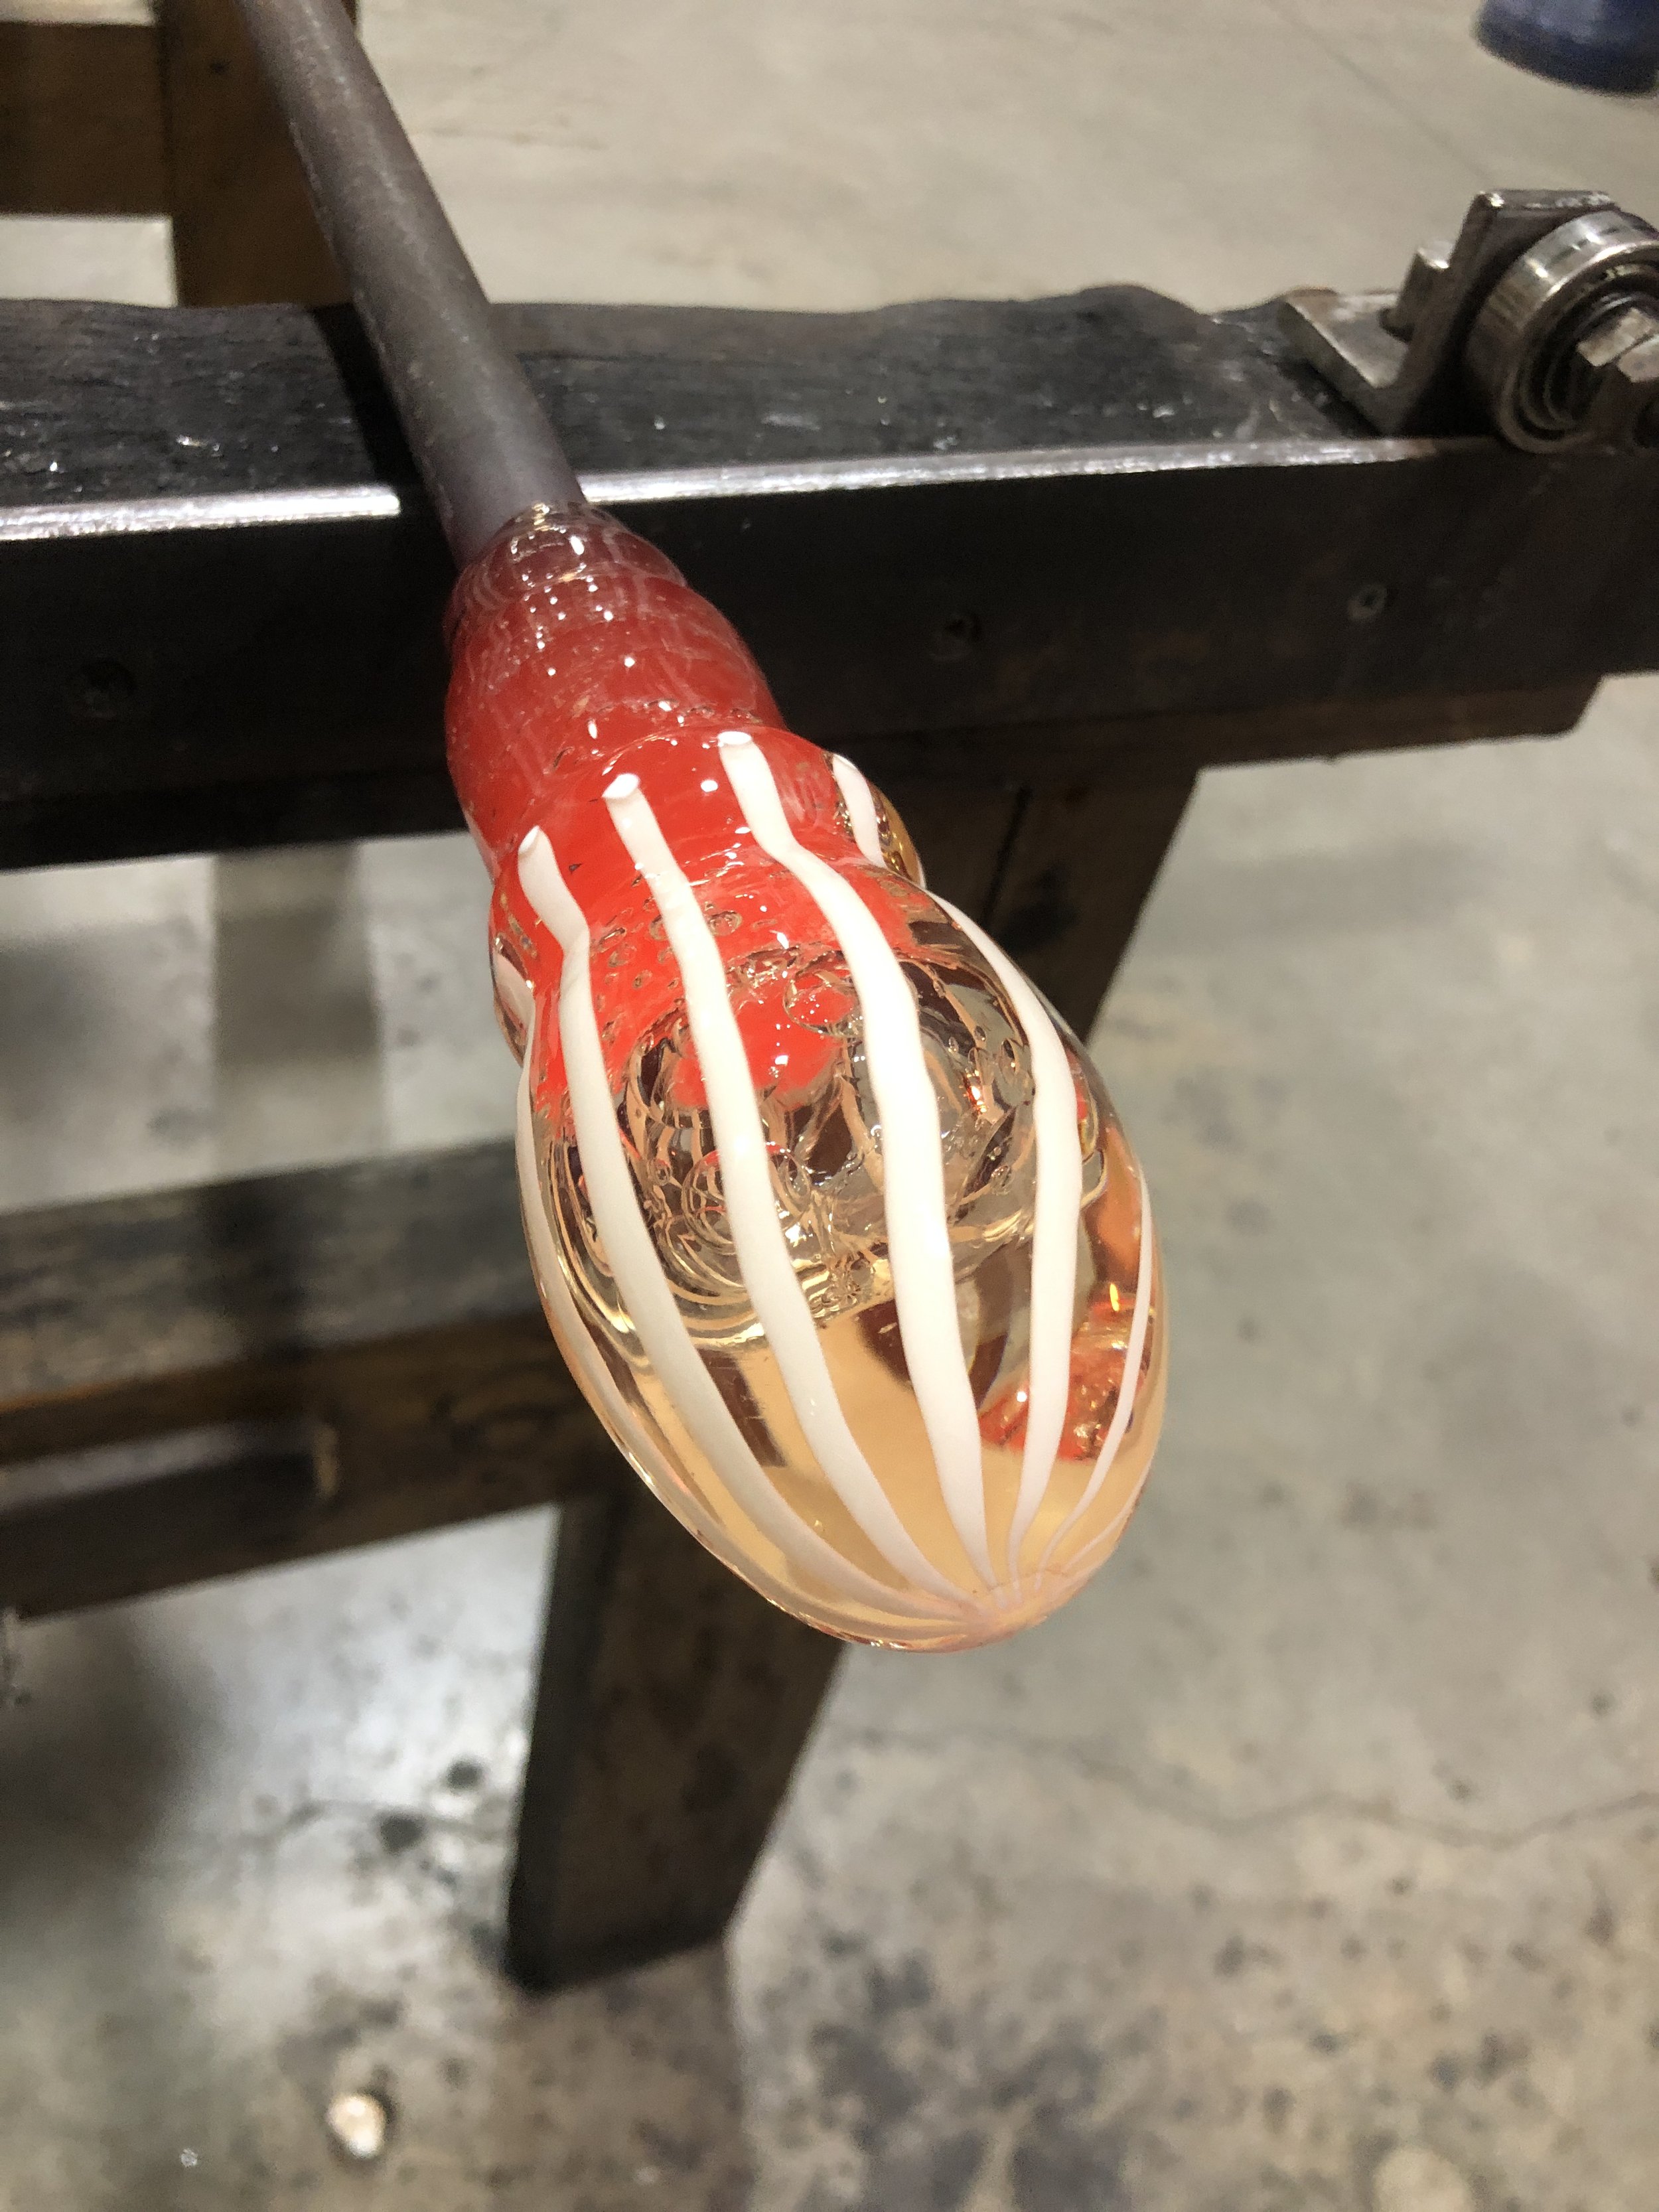
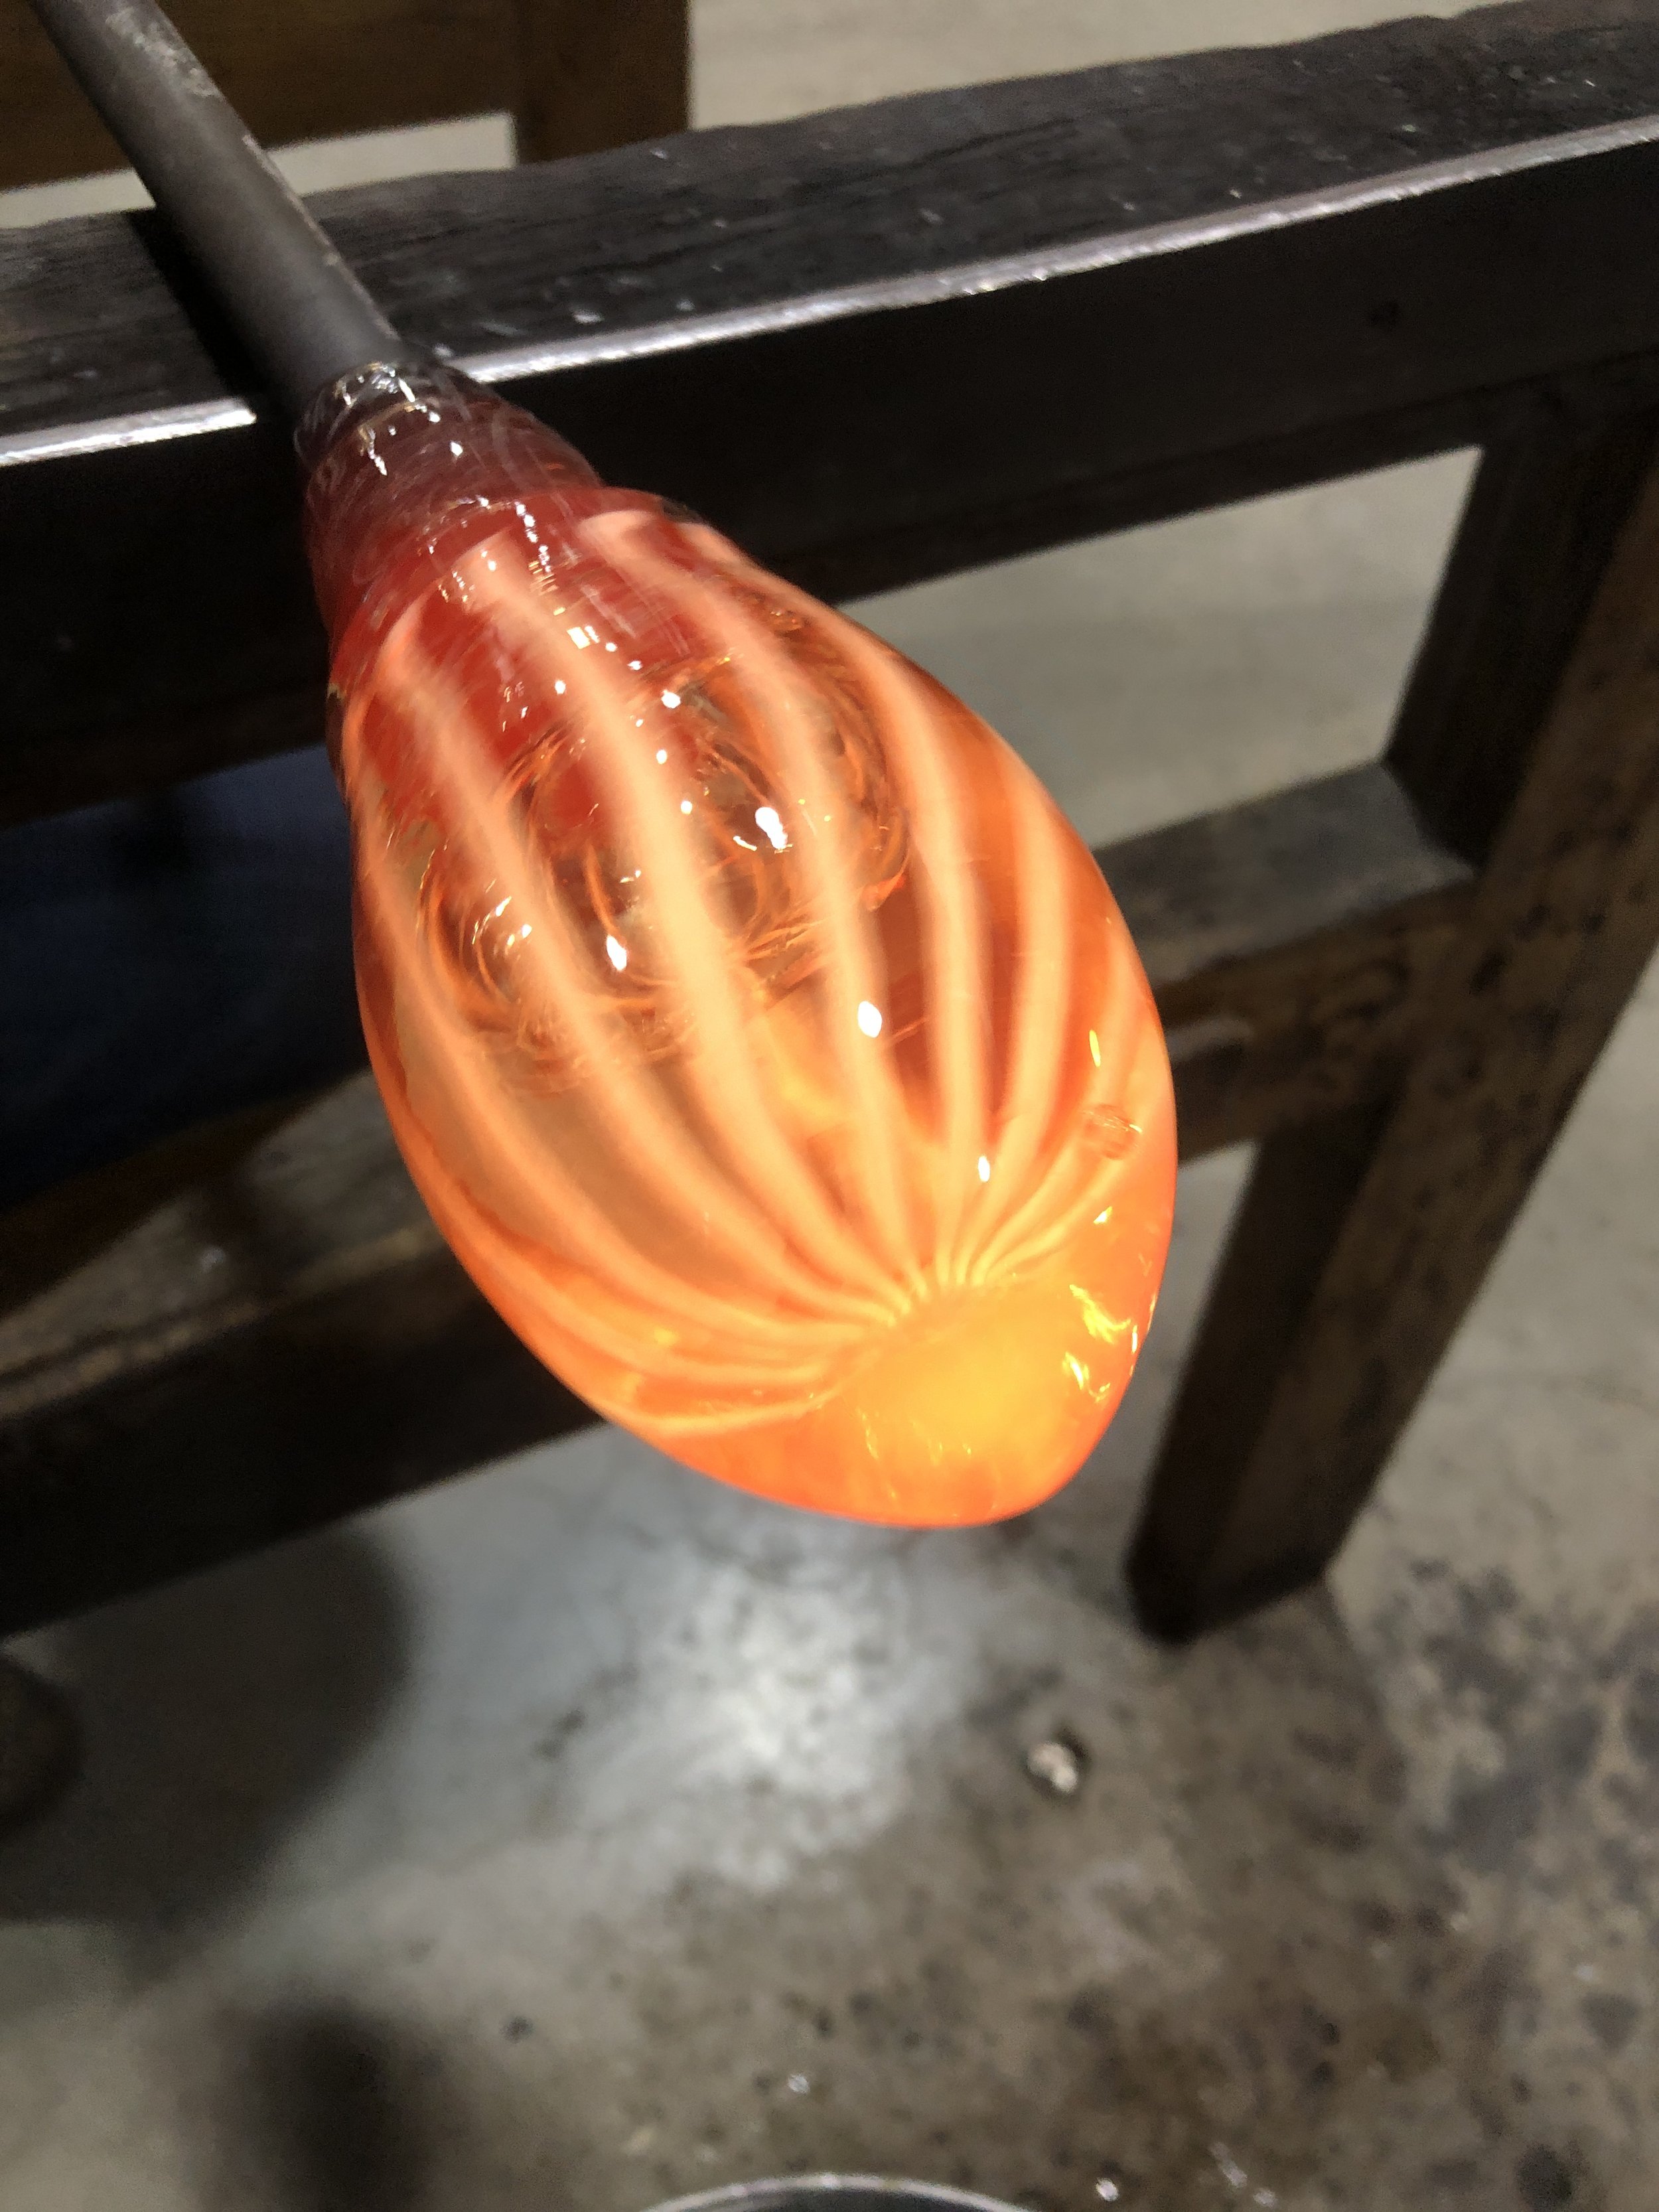


Cooled down and ready for the next stage
Photography documentation by Nathan Soper
The World of Glass
23/10/21
St Helens World of Glass
I signed up for this introduction to glass blowing course at the St Helens World of Glass. Although I am not going to be the glass maker during this development time, I wanted to experience the glass making for myself. This has definitely helped me to understand the different techniques and process, so when I am discussing things with Ian I can visualise and comprehend each stage much better.
I was lucky to have a one-to-one session with glass maker Nicola Steel @nikisteelglassdesign Niki took the time to explain all the different elements to making a glass paperweight and a blown glass bauble. I documented her process before having a go myself.
I was surprised at how physical it was, from collecting the molten glass to re-heating and manipulating the glass. It has certainly given me a greater appreciation at the extreme patience, tenacity and dexterity it requires to master this ancient glass forming technique.
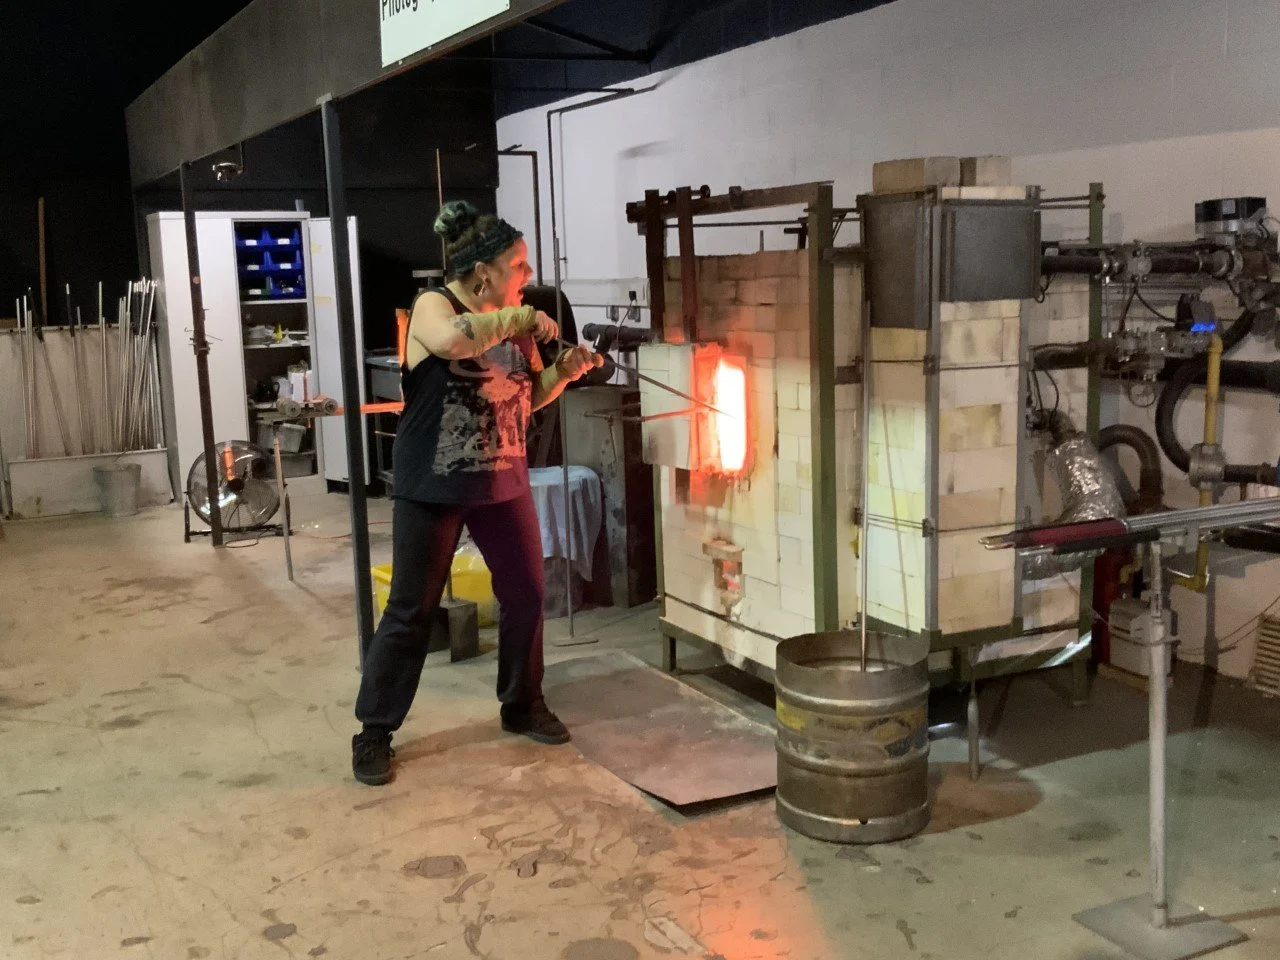
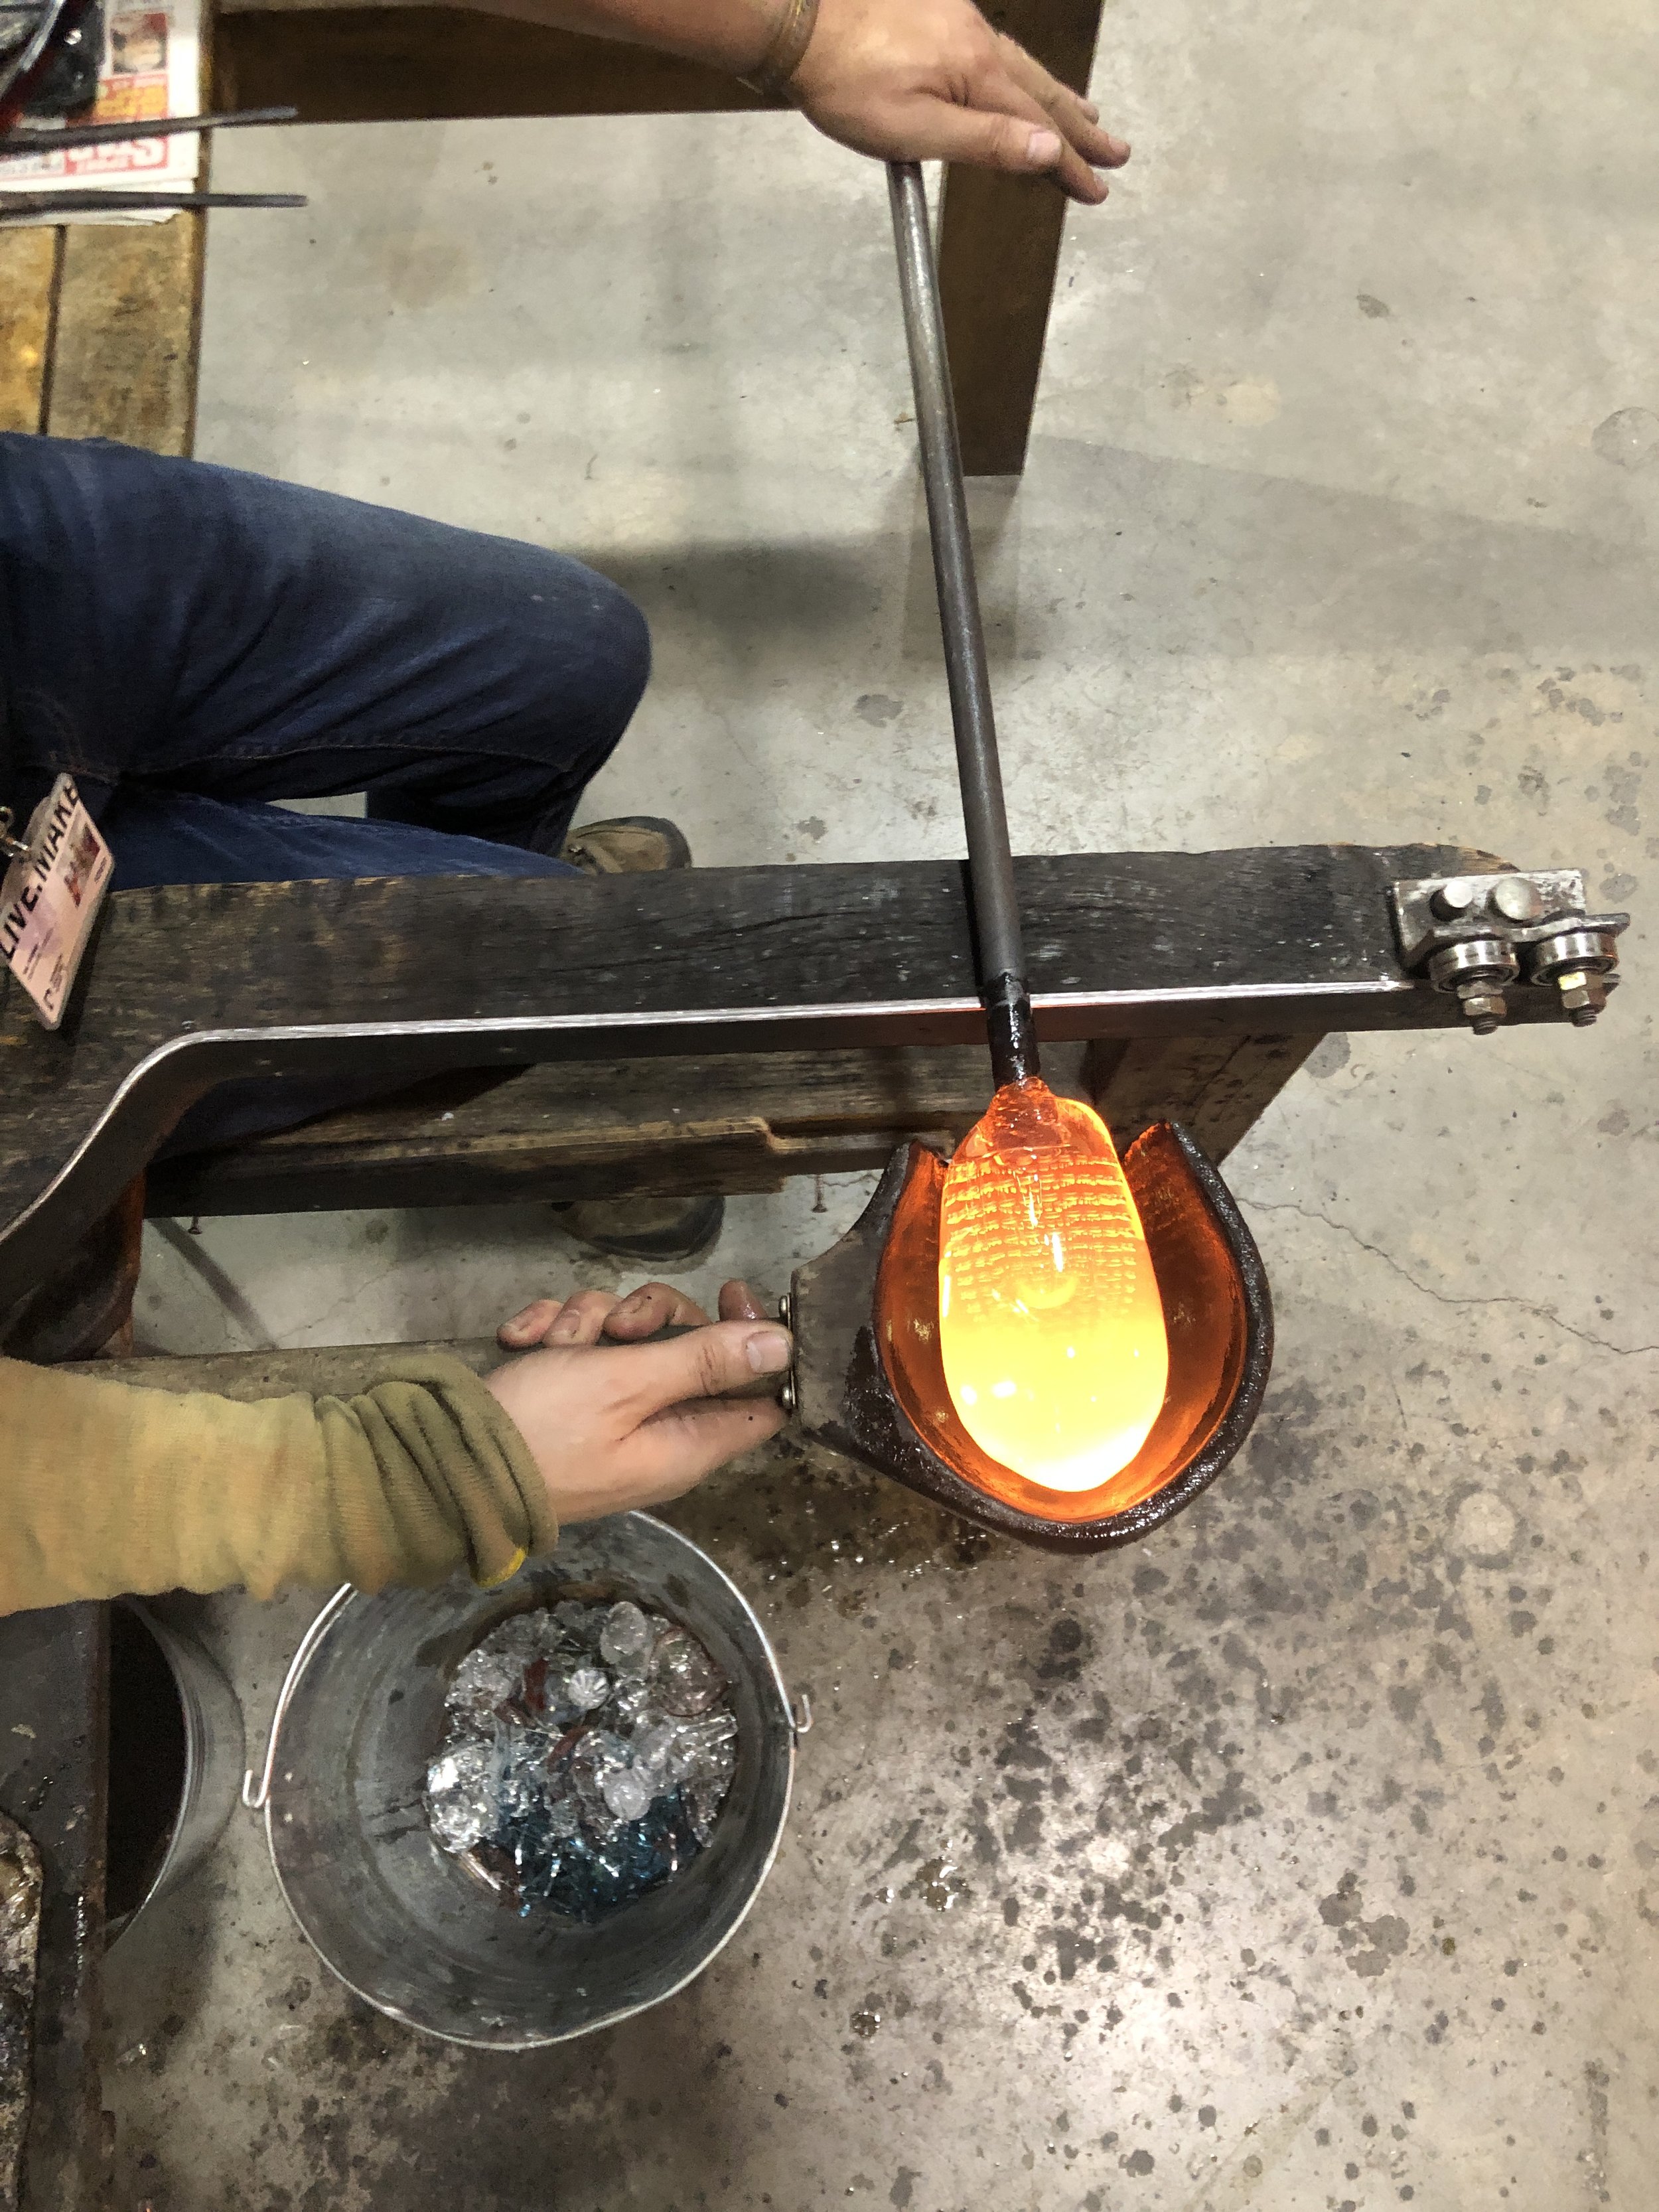
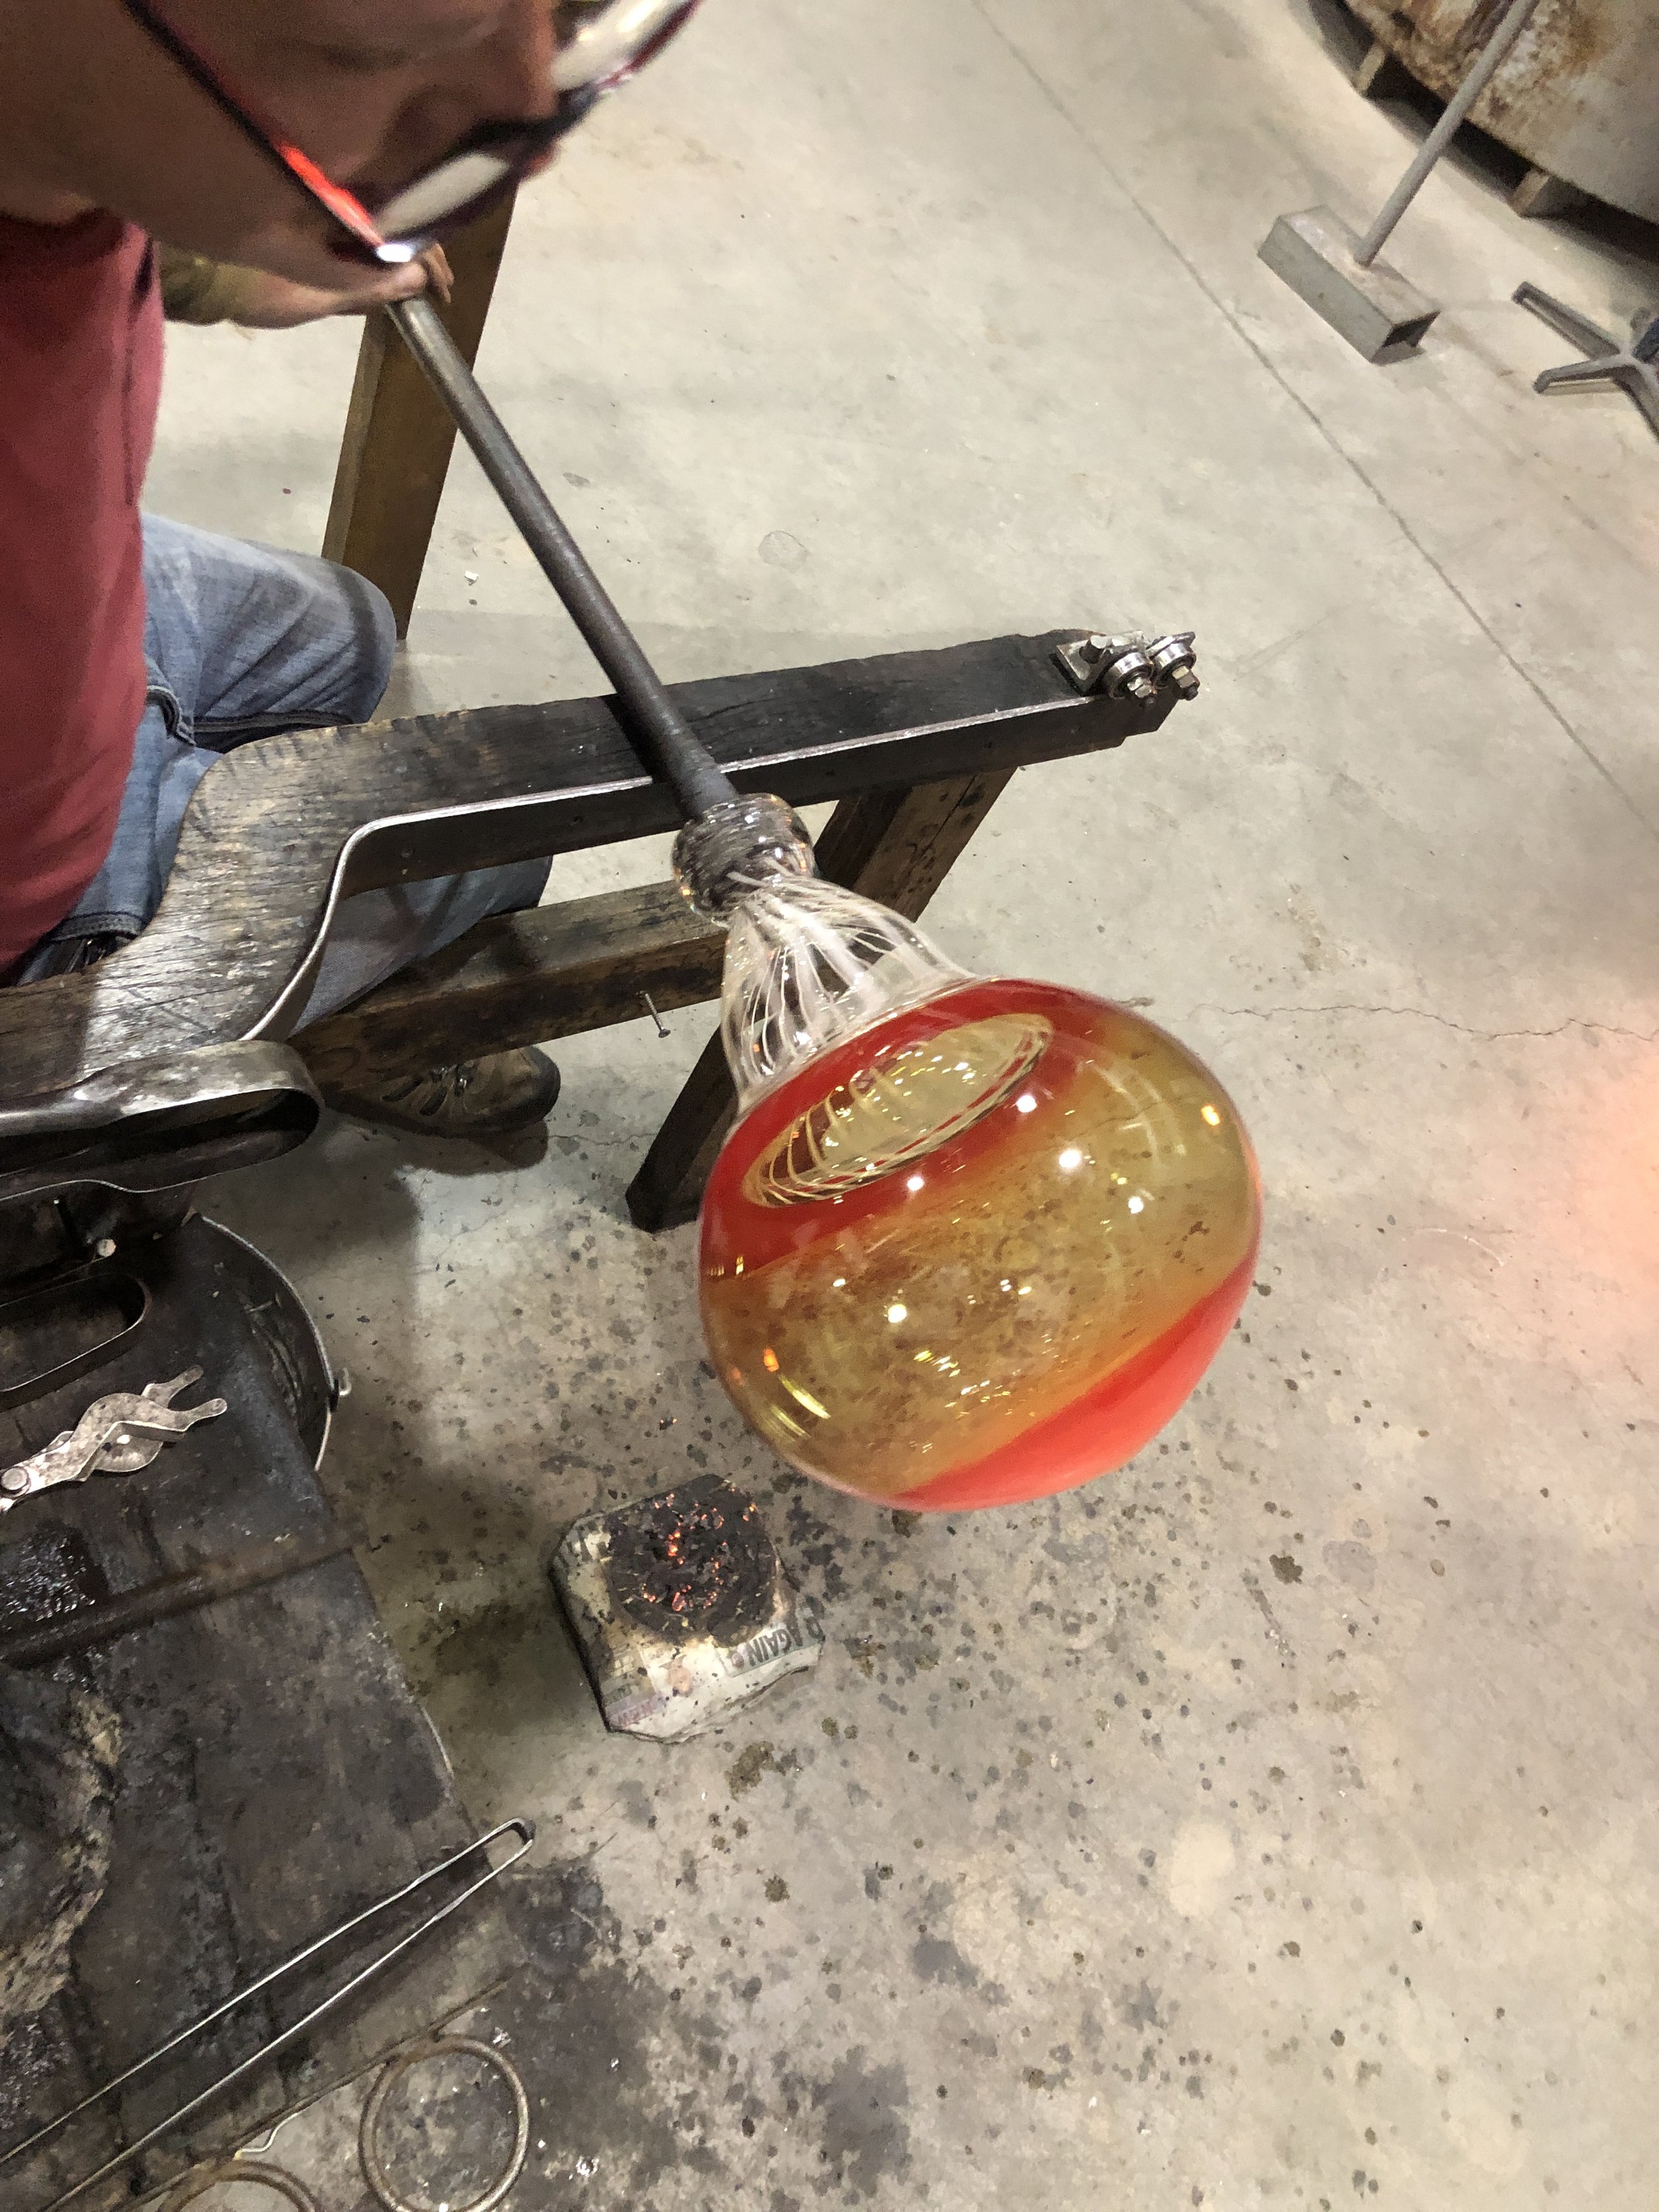
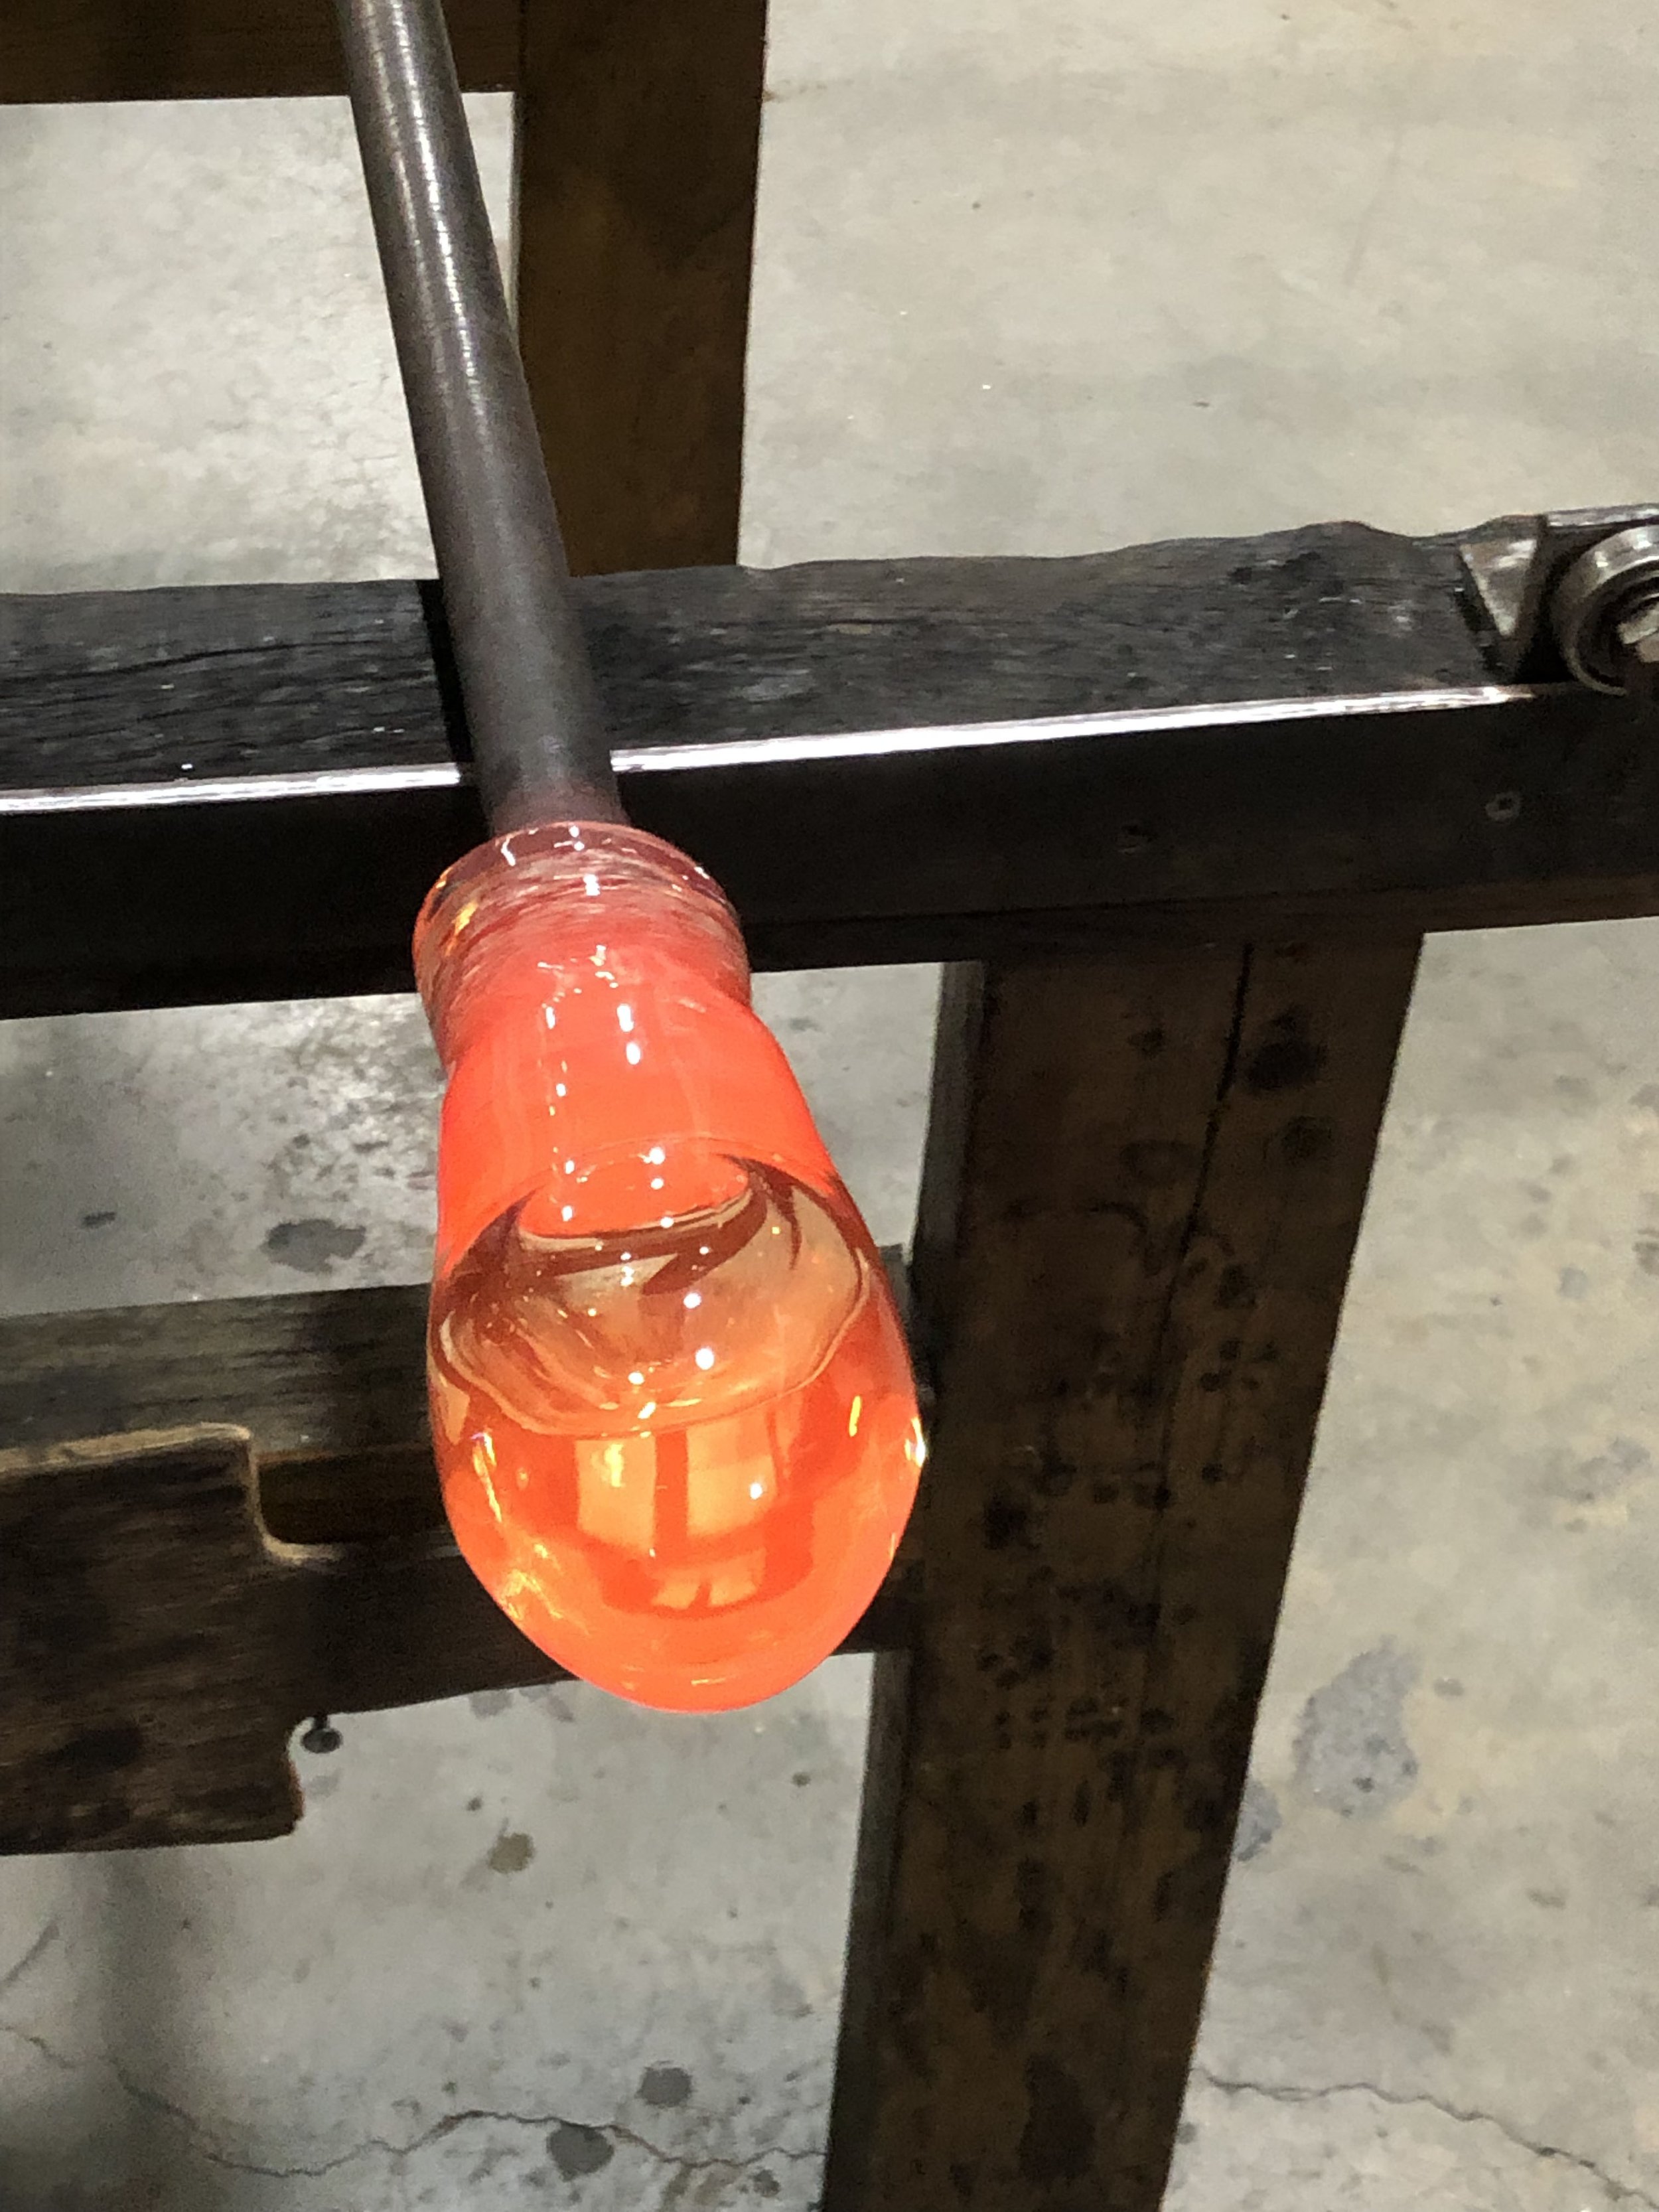
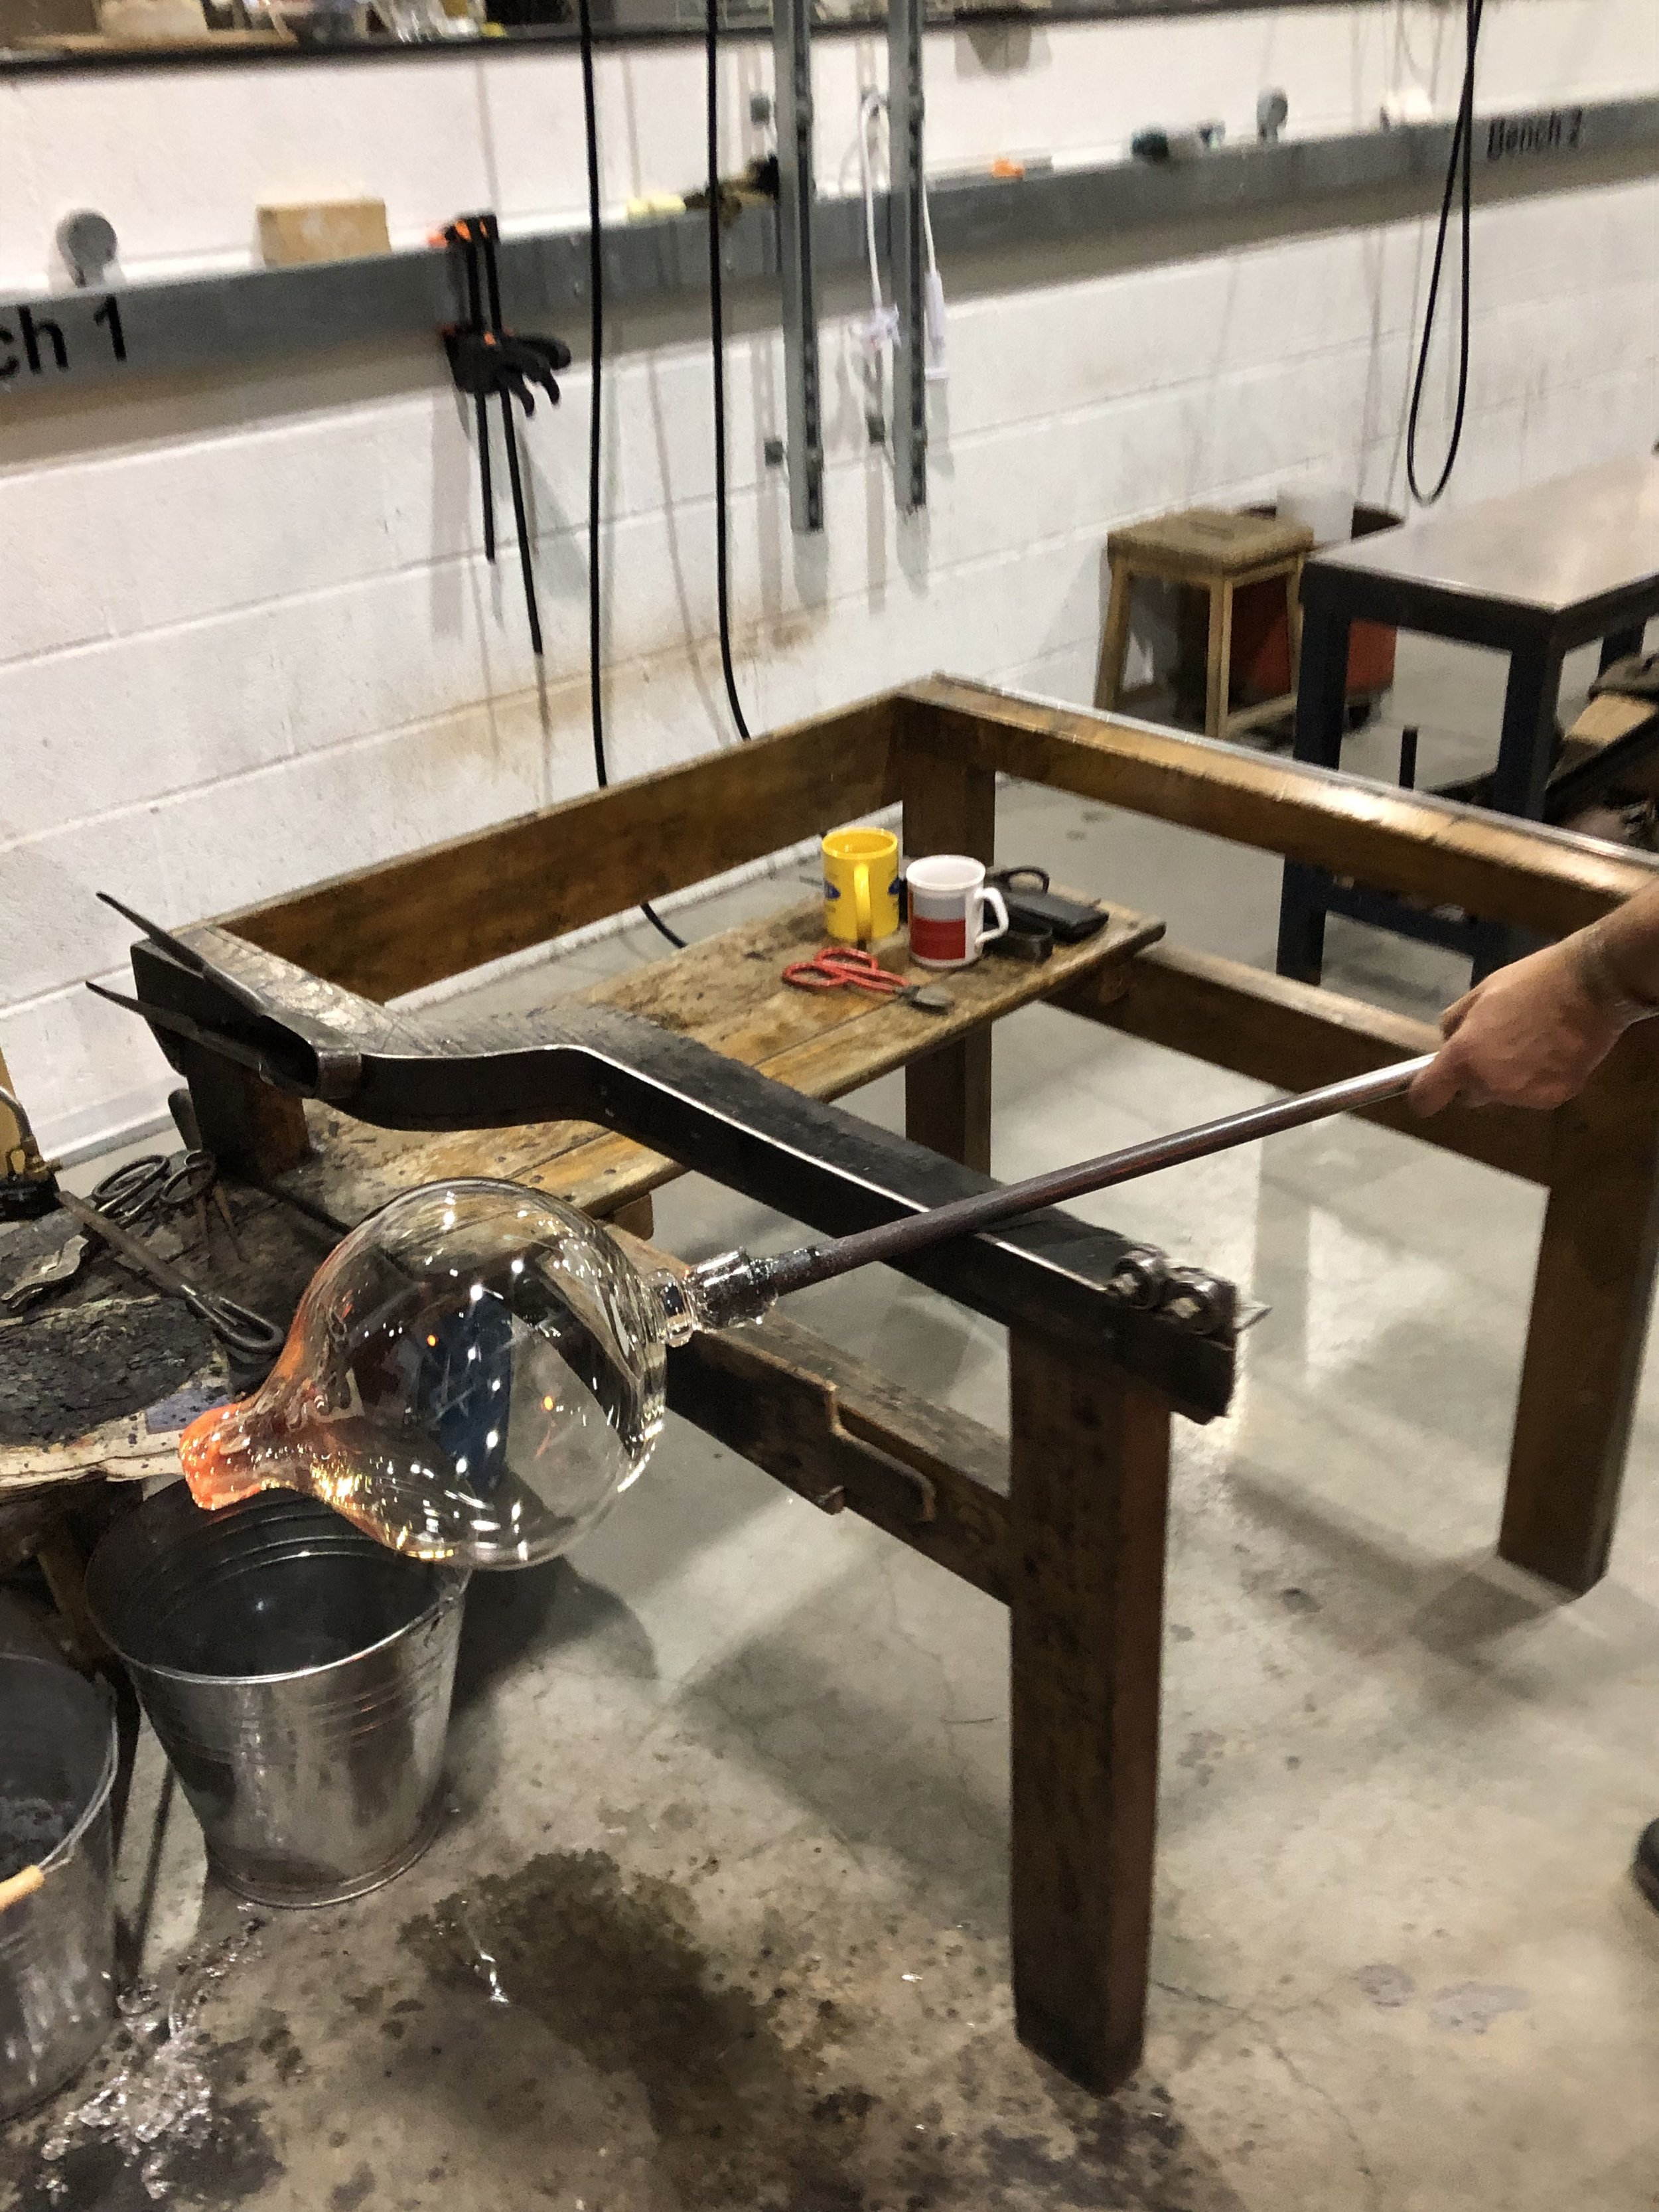
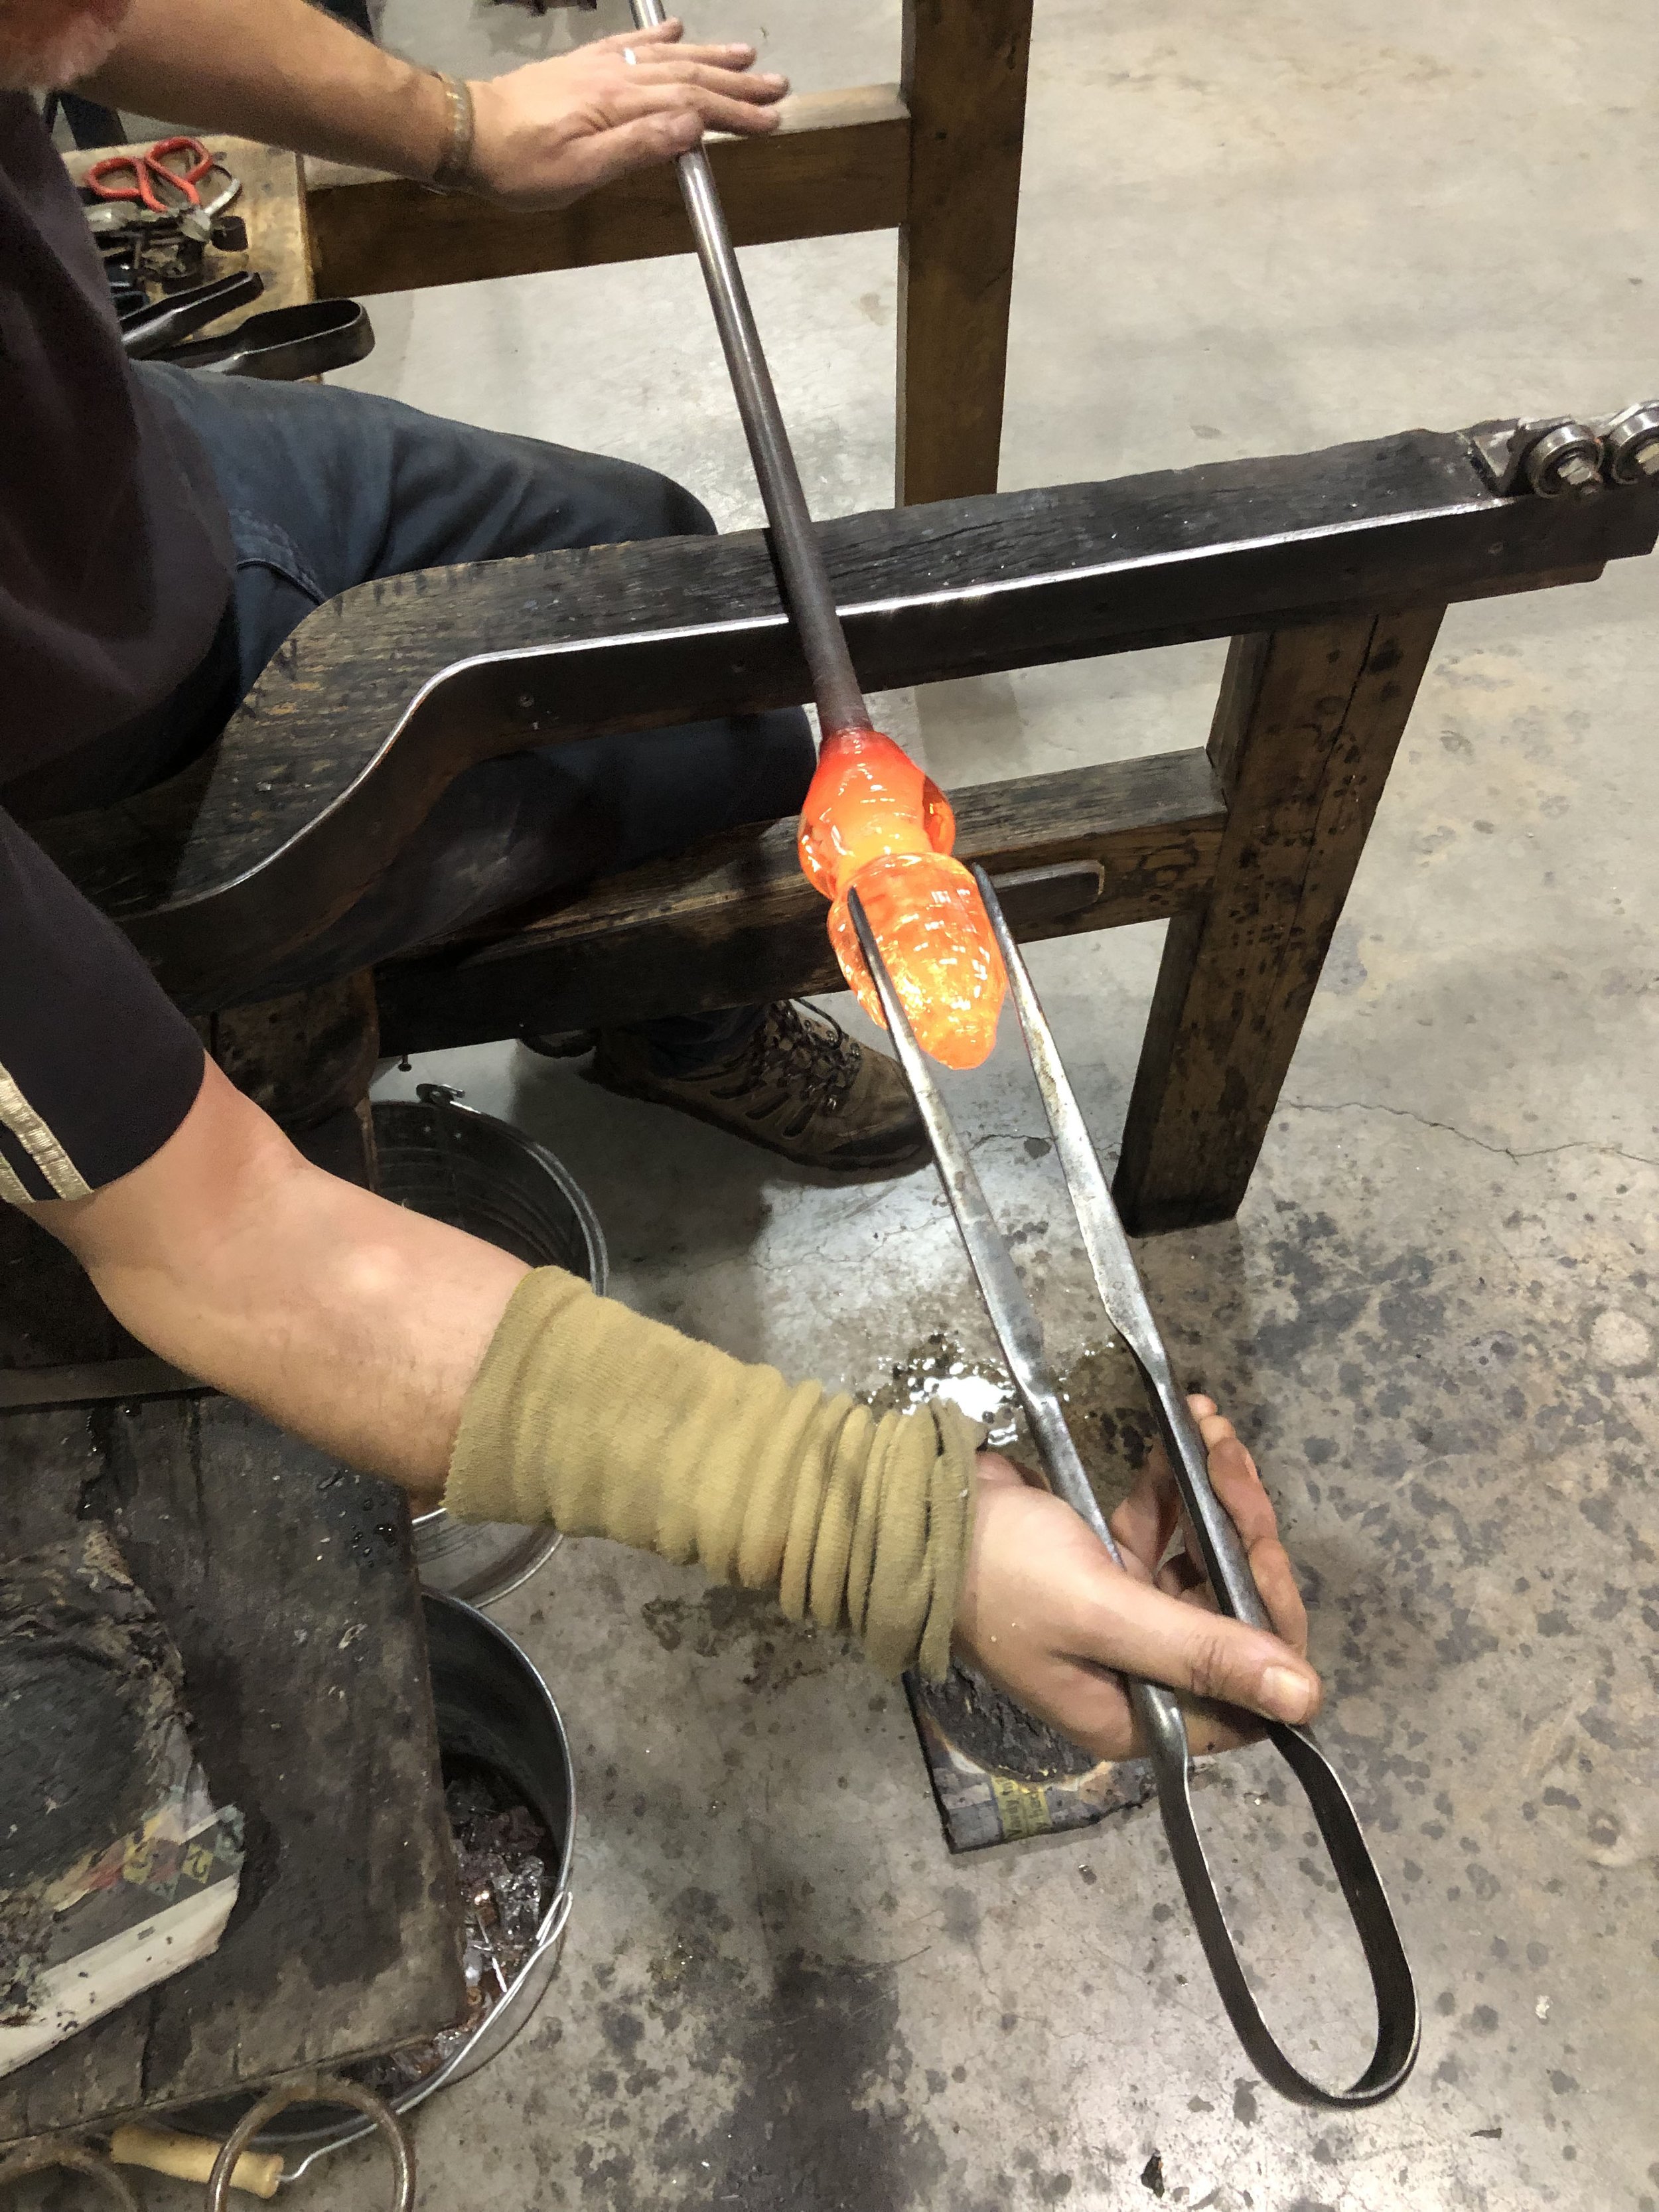
The piece begins: Niki Steele reaches inside the furnace (1095 degrees) and into the crucible that is filled with clear, melted glass and gathers a layer of molten glass on the end of a steel blow pipe.

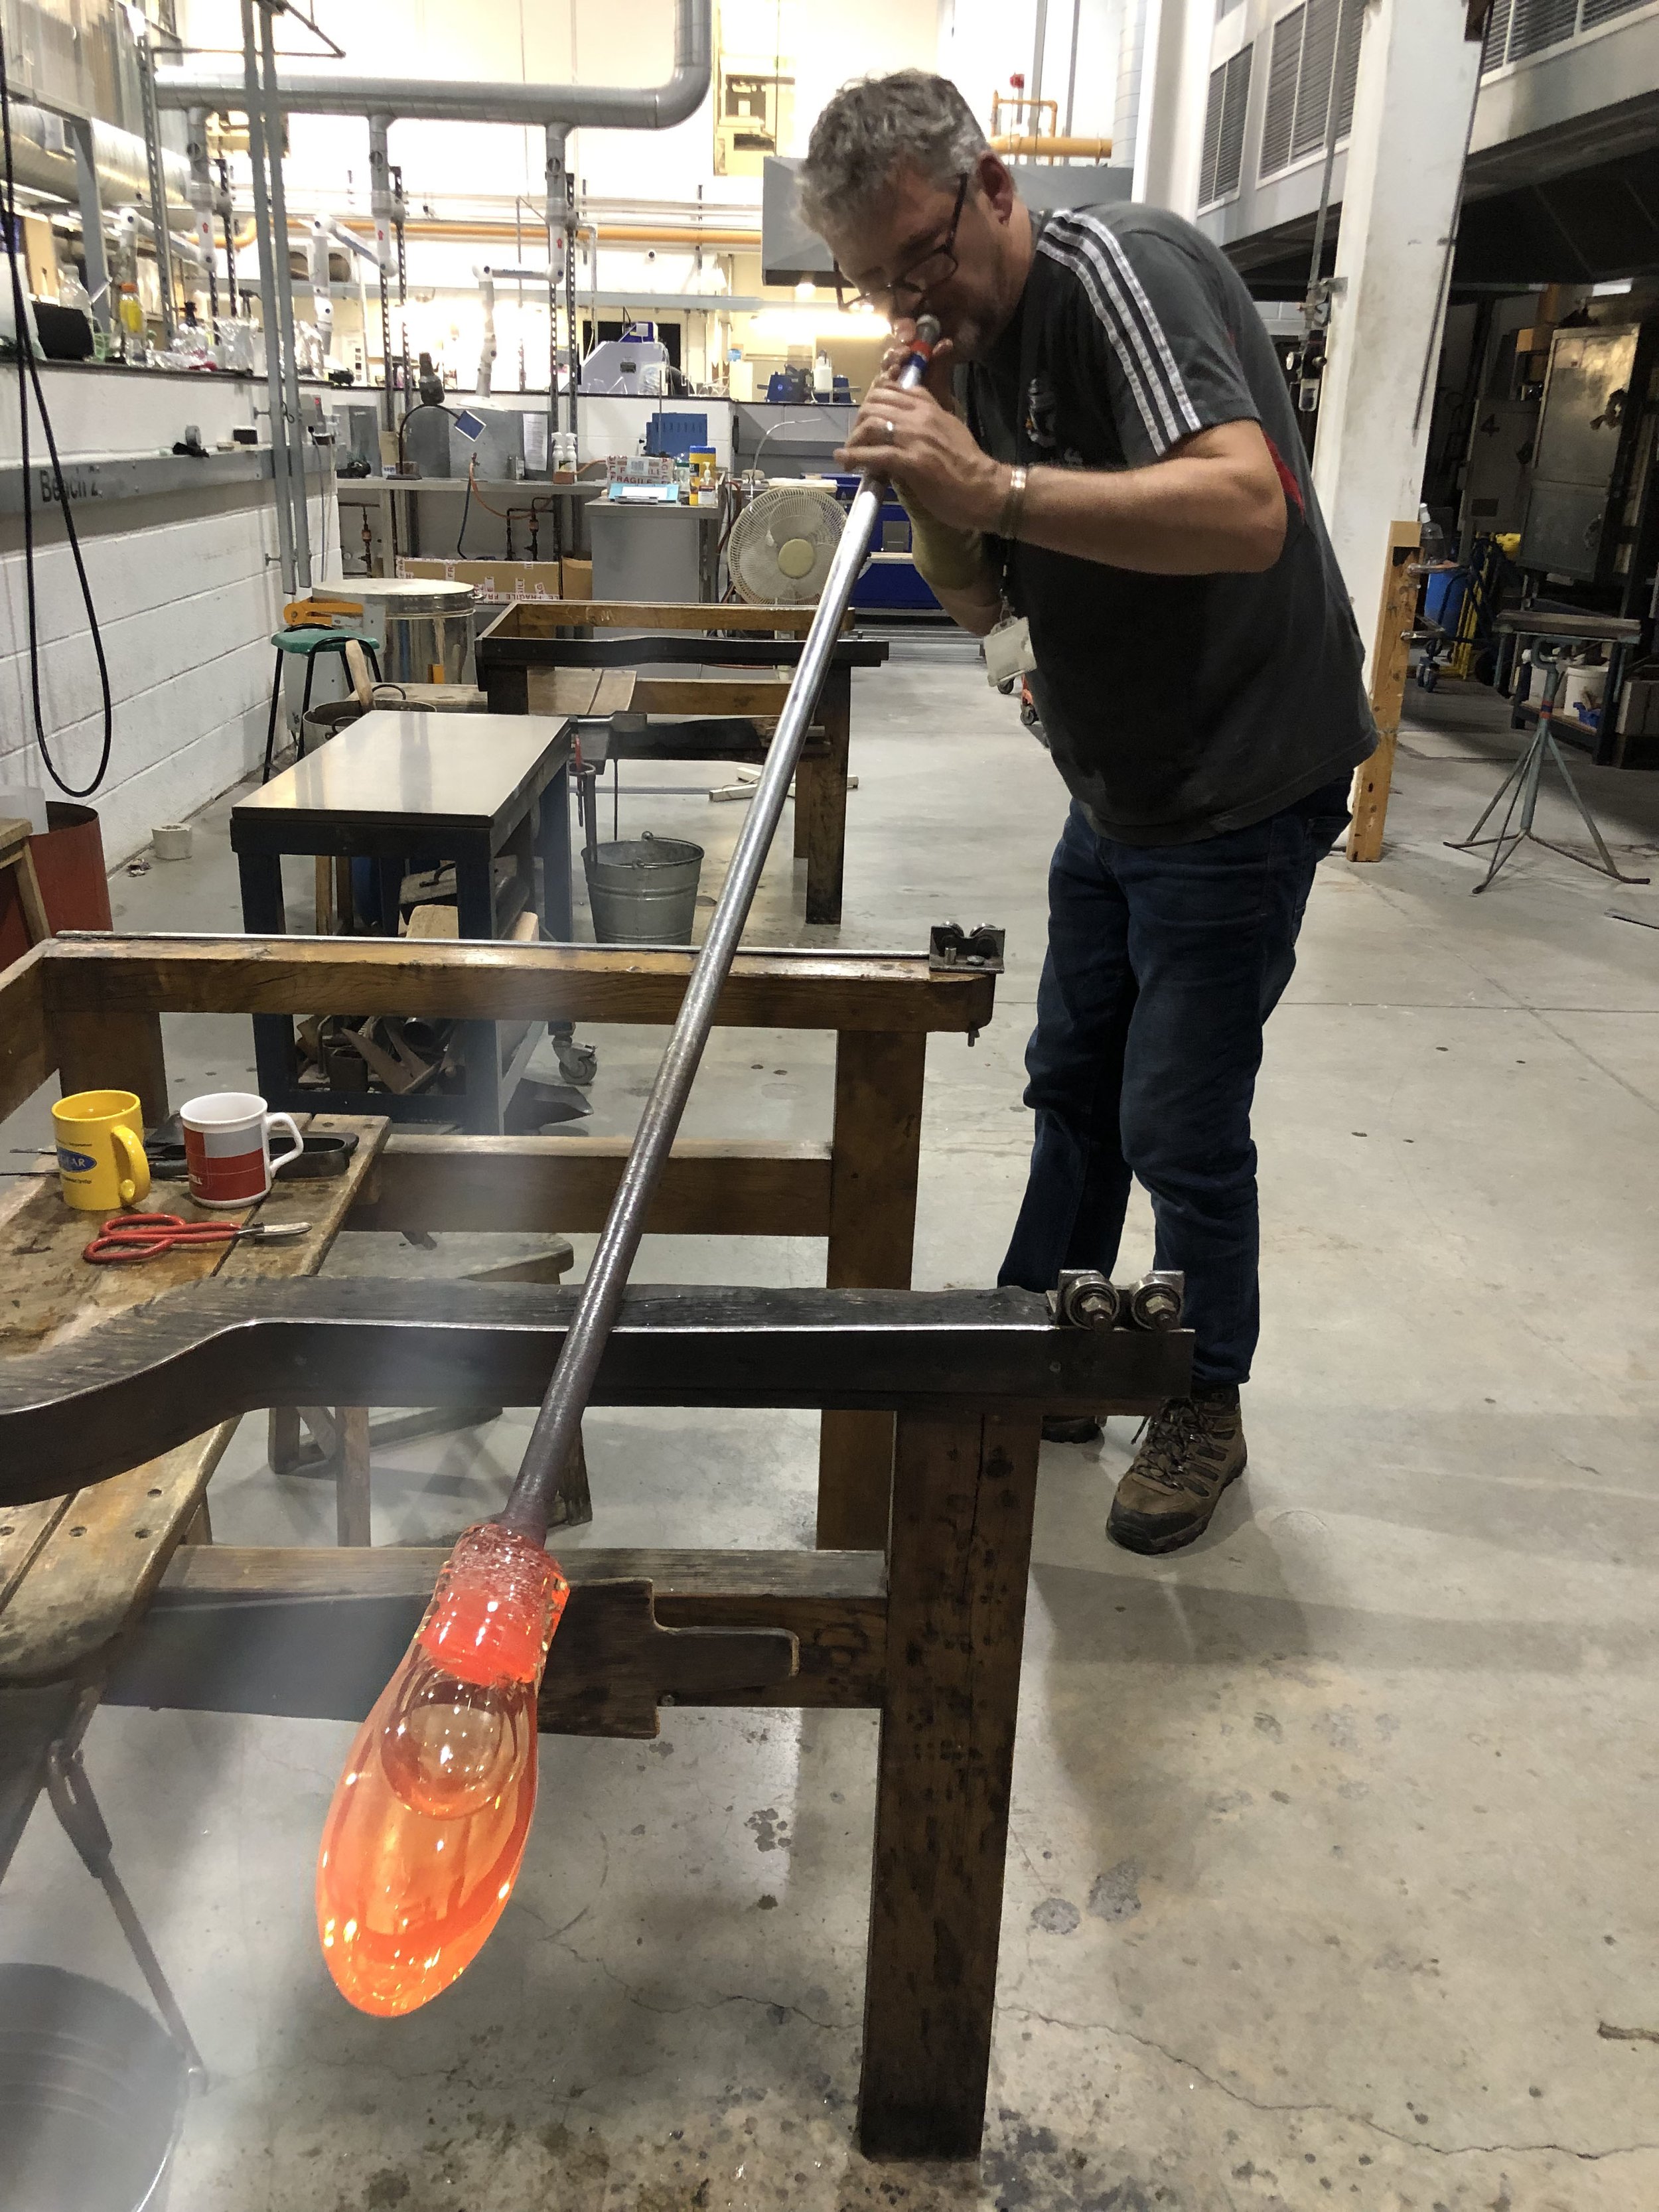
Resting the pipe on the steel arms of the bench, turning it with one hand. With the other hand the artist uses tools such as cherry wood blocks, wet newspaper, wooden paddles and tools made of stainless steel. This process requires perfect coordination between right and left hands and constant motion.

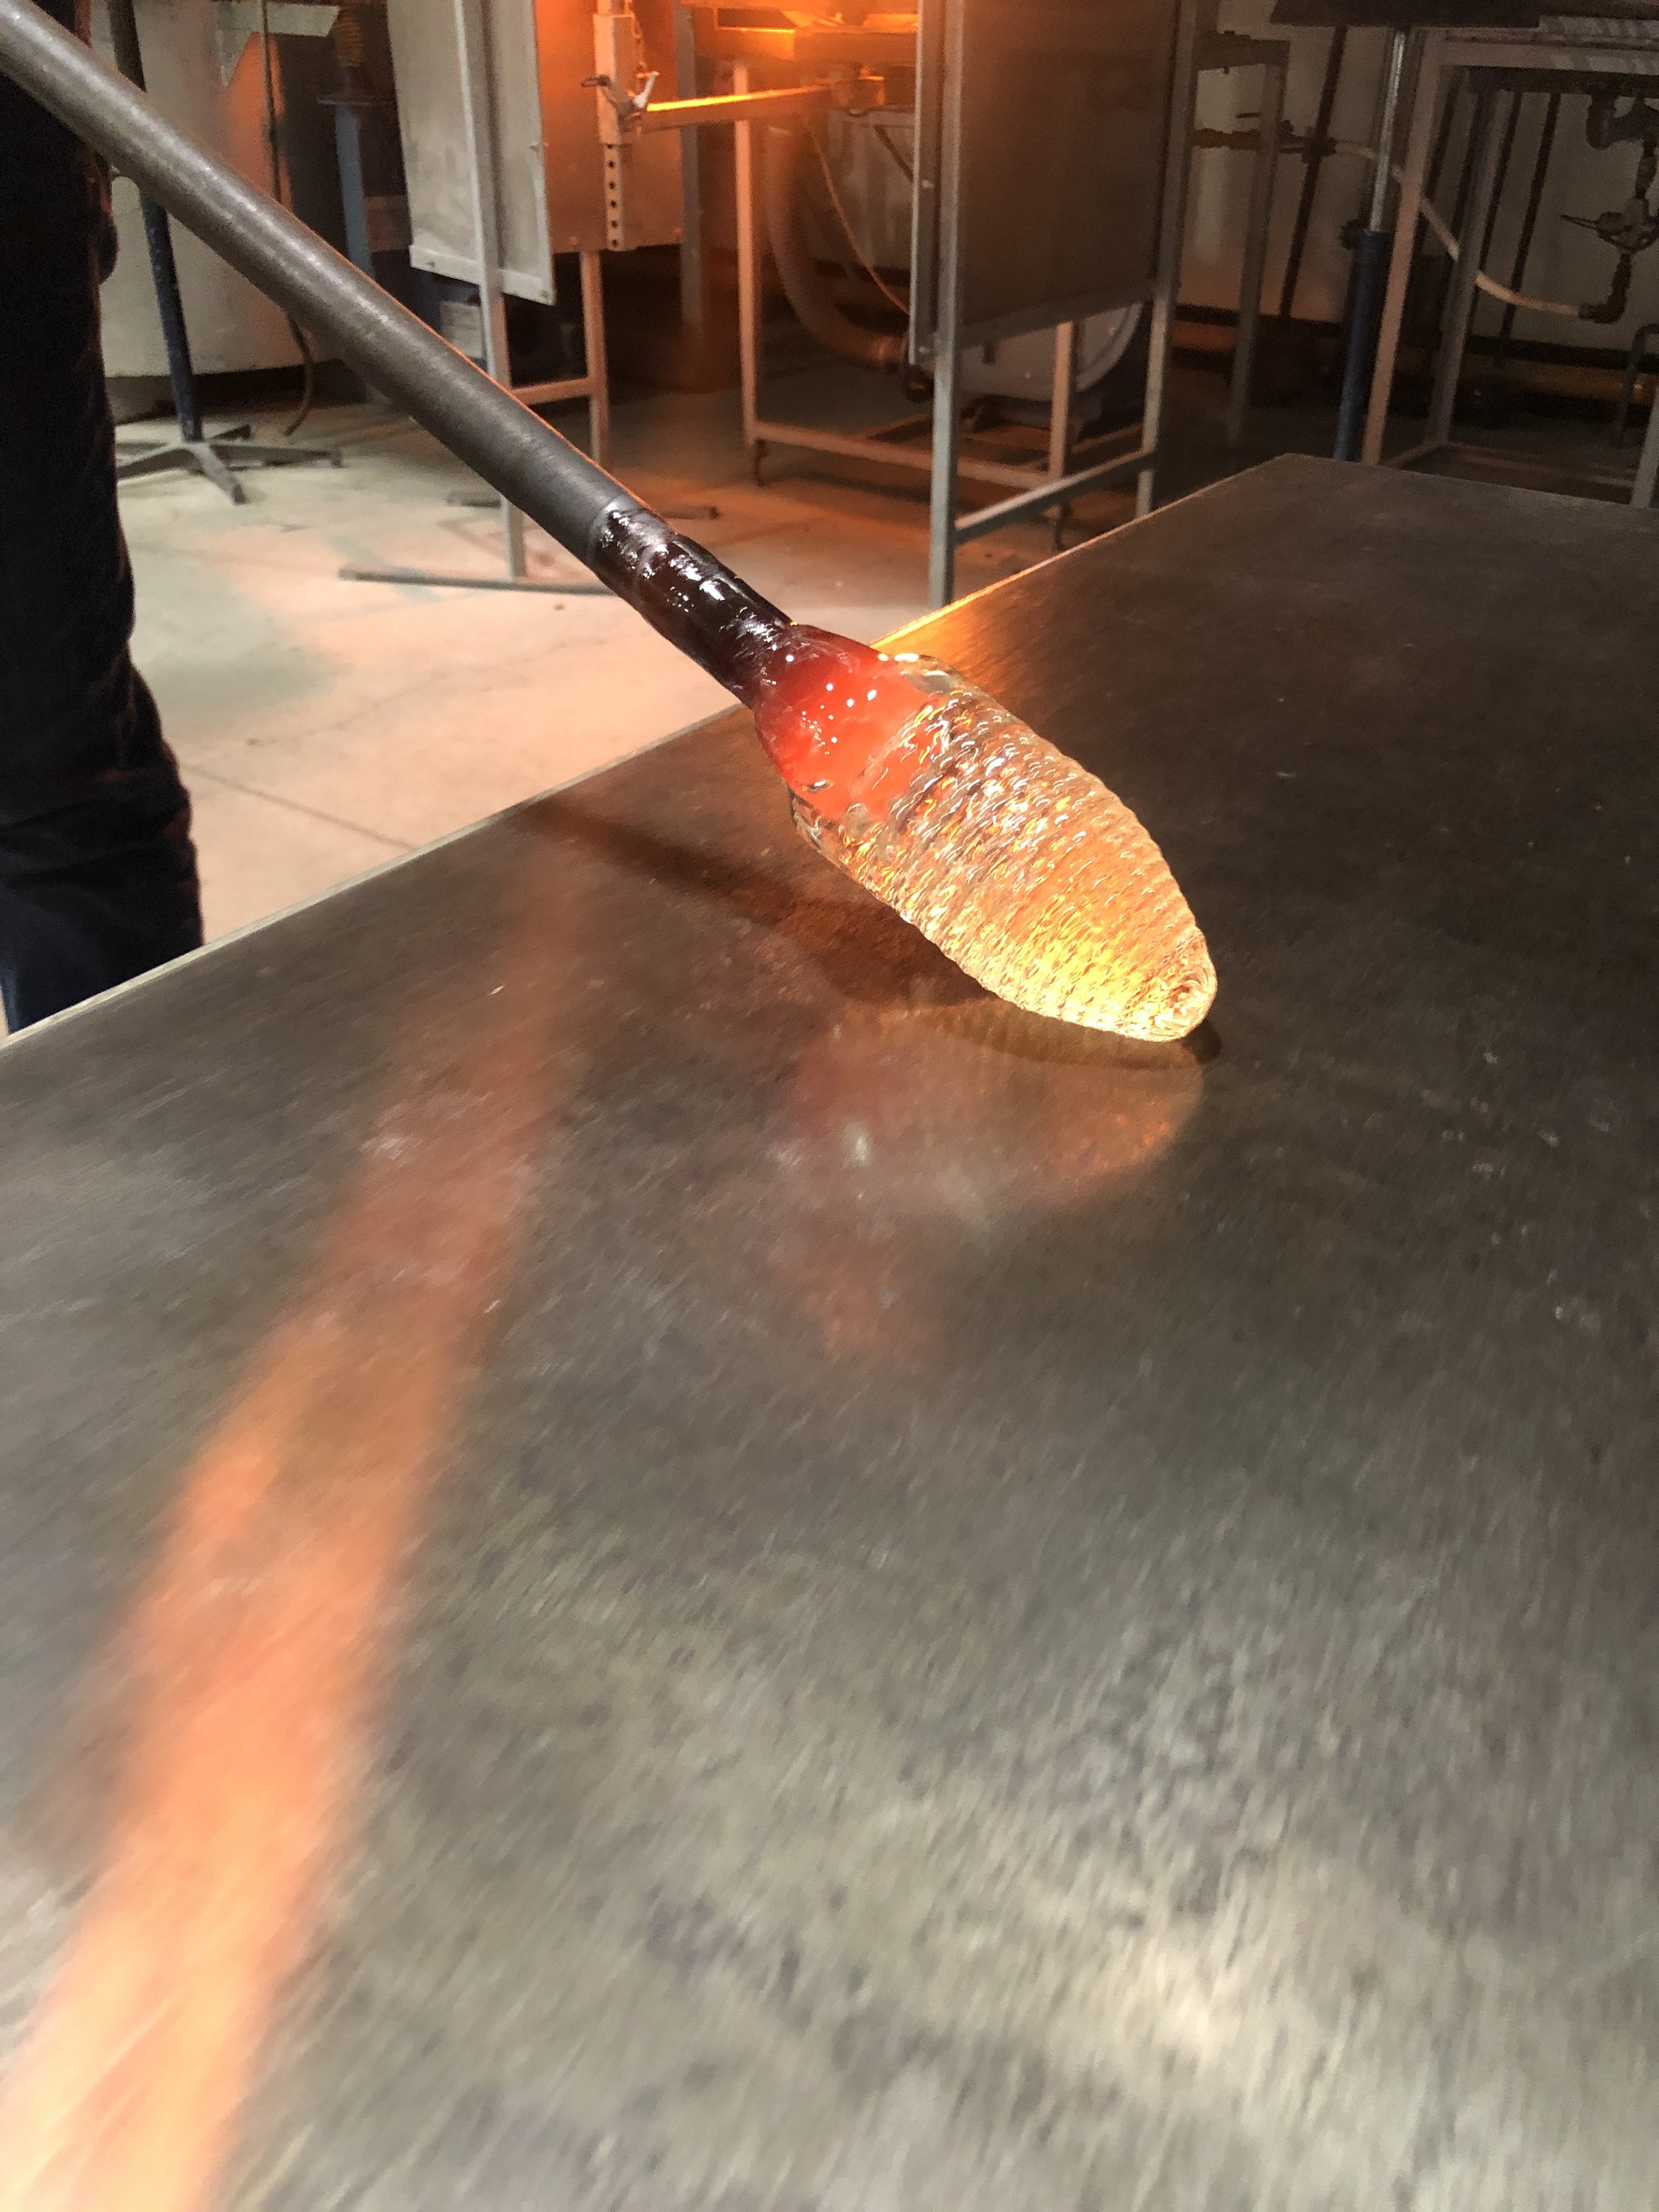
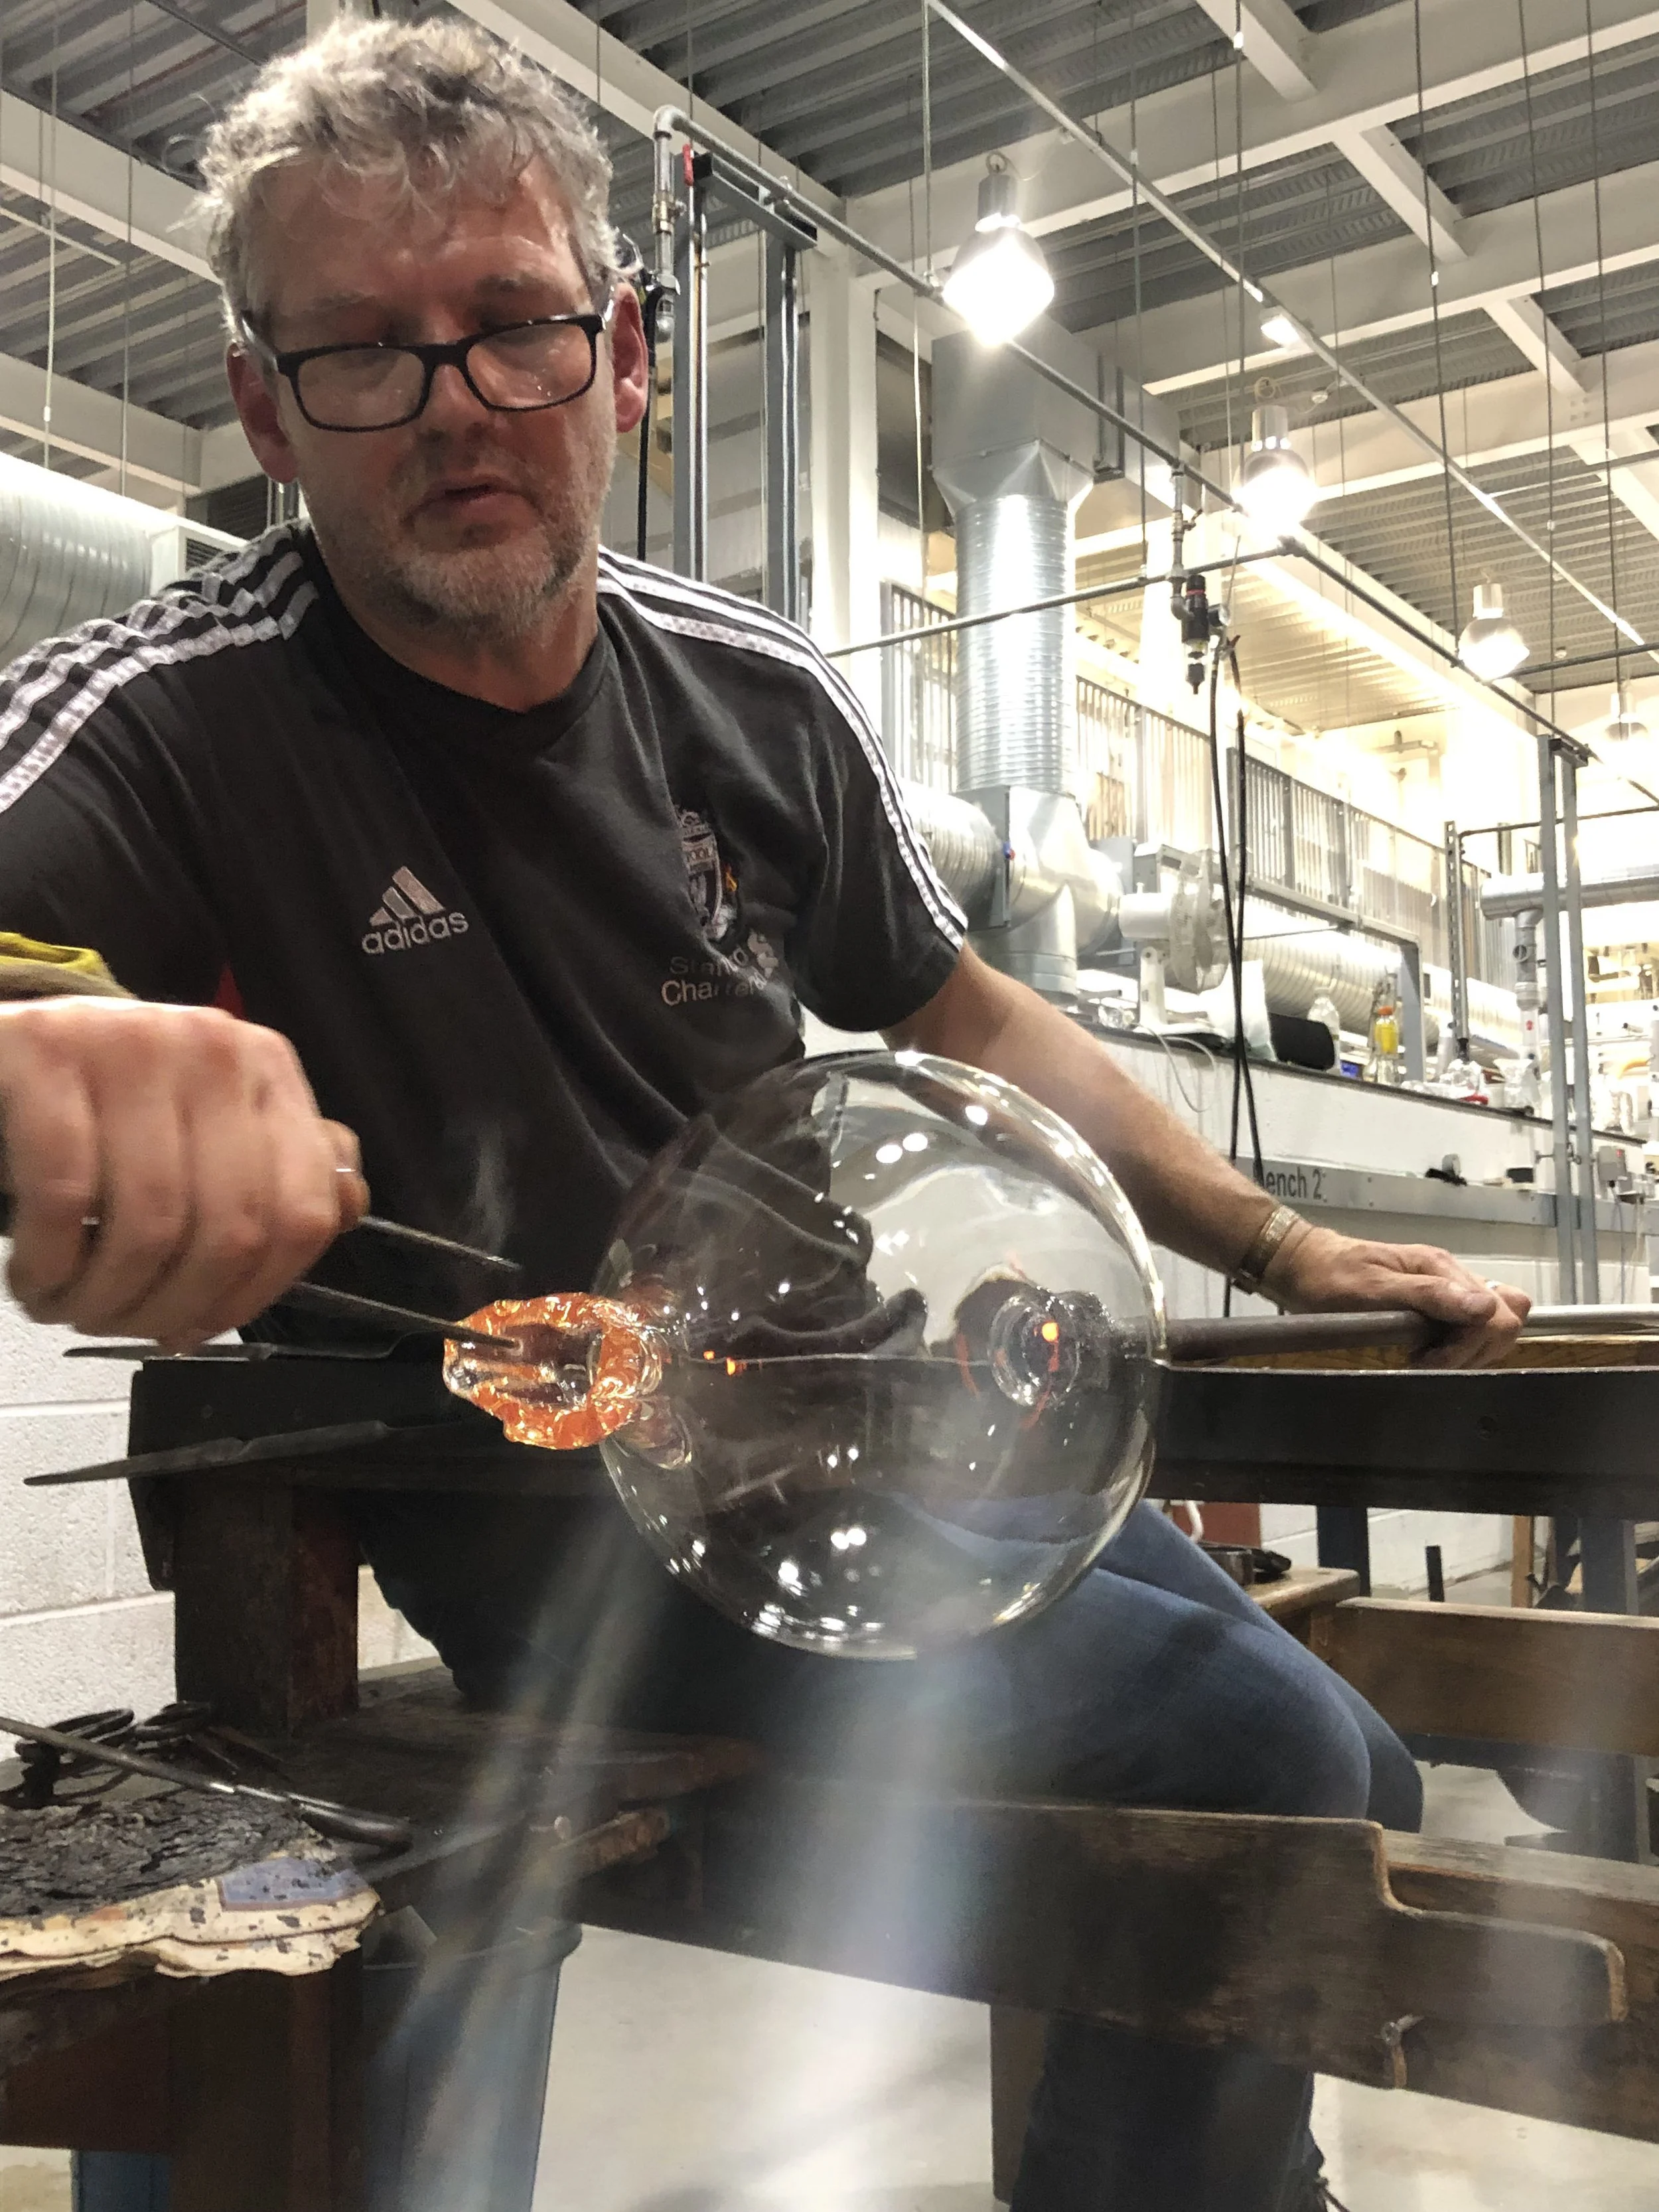
Taking the heated glass on the blow pipe and rolling it over the coloured powder and frits, picking up pieces with each roll.

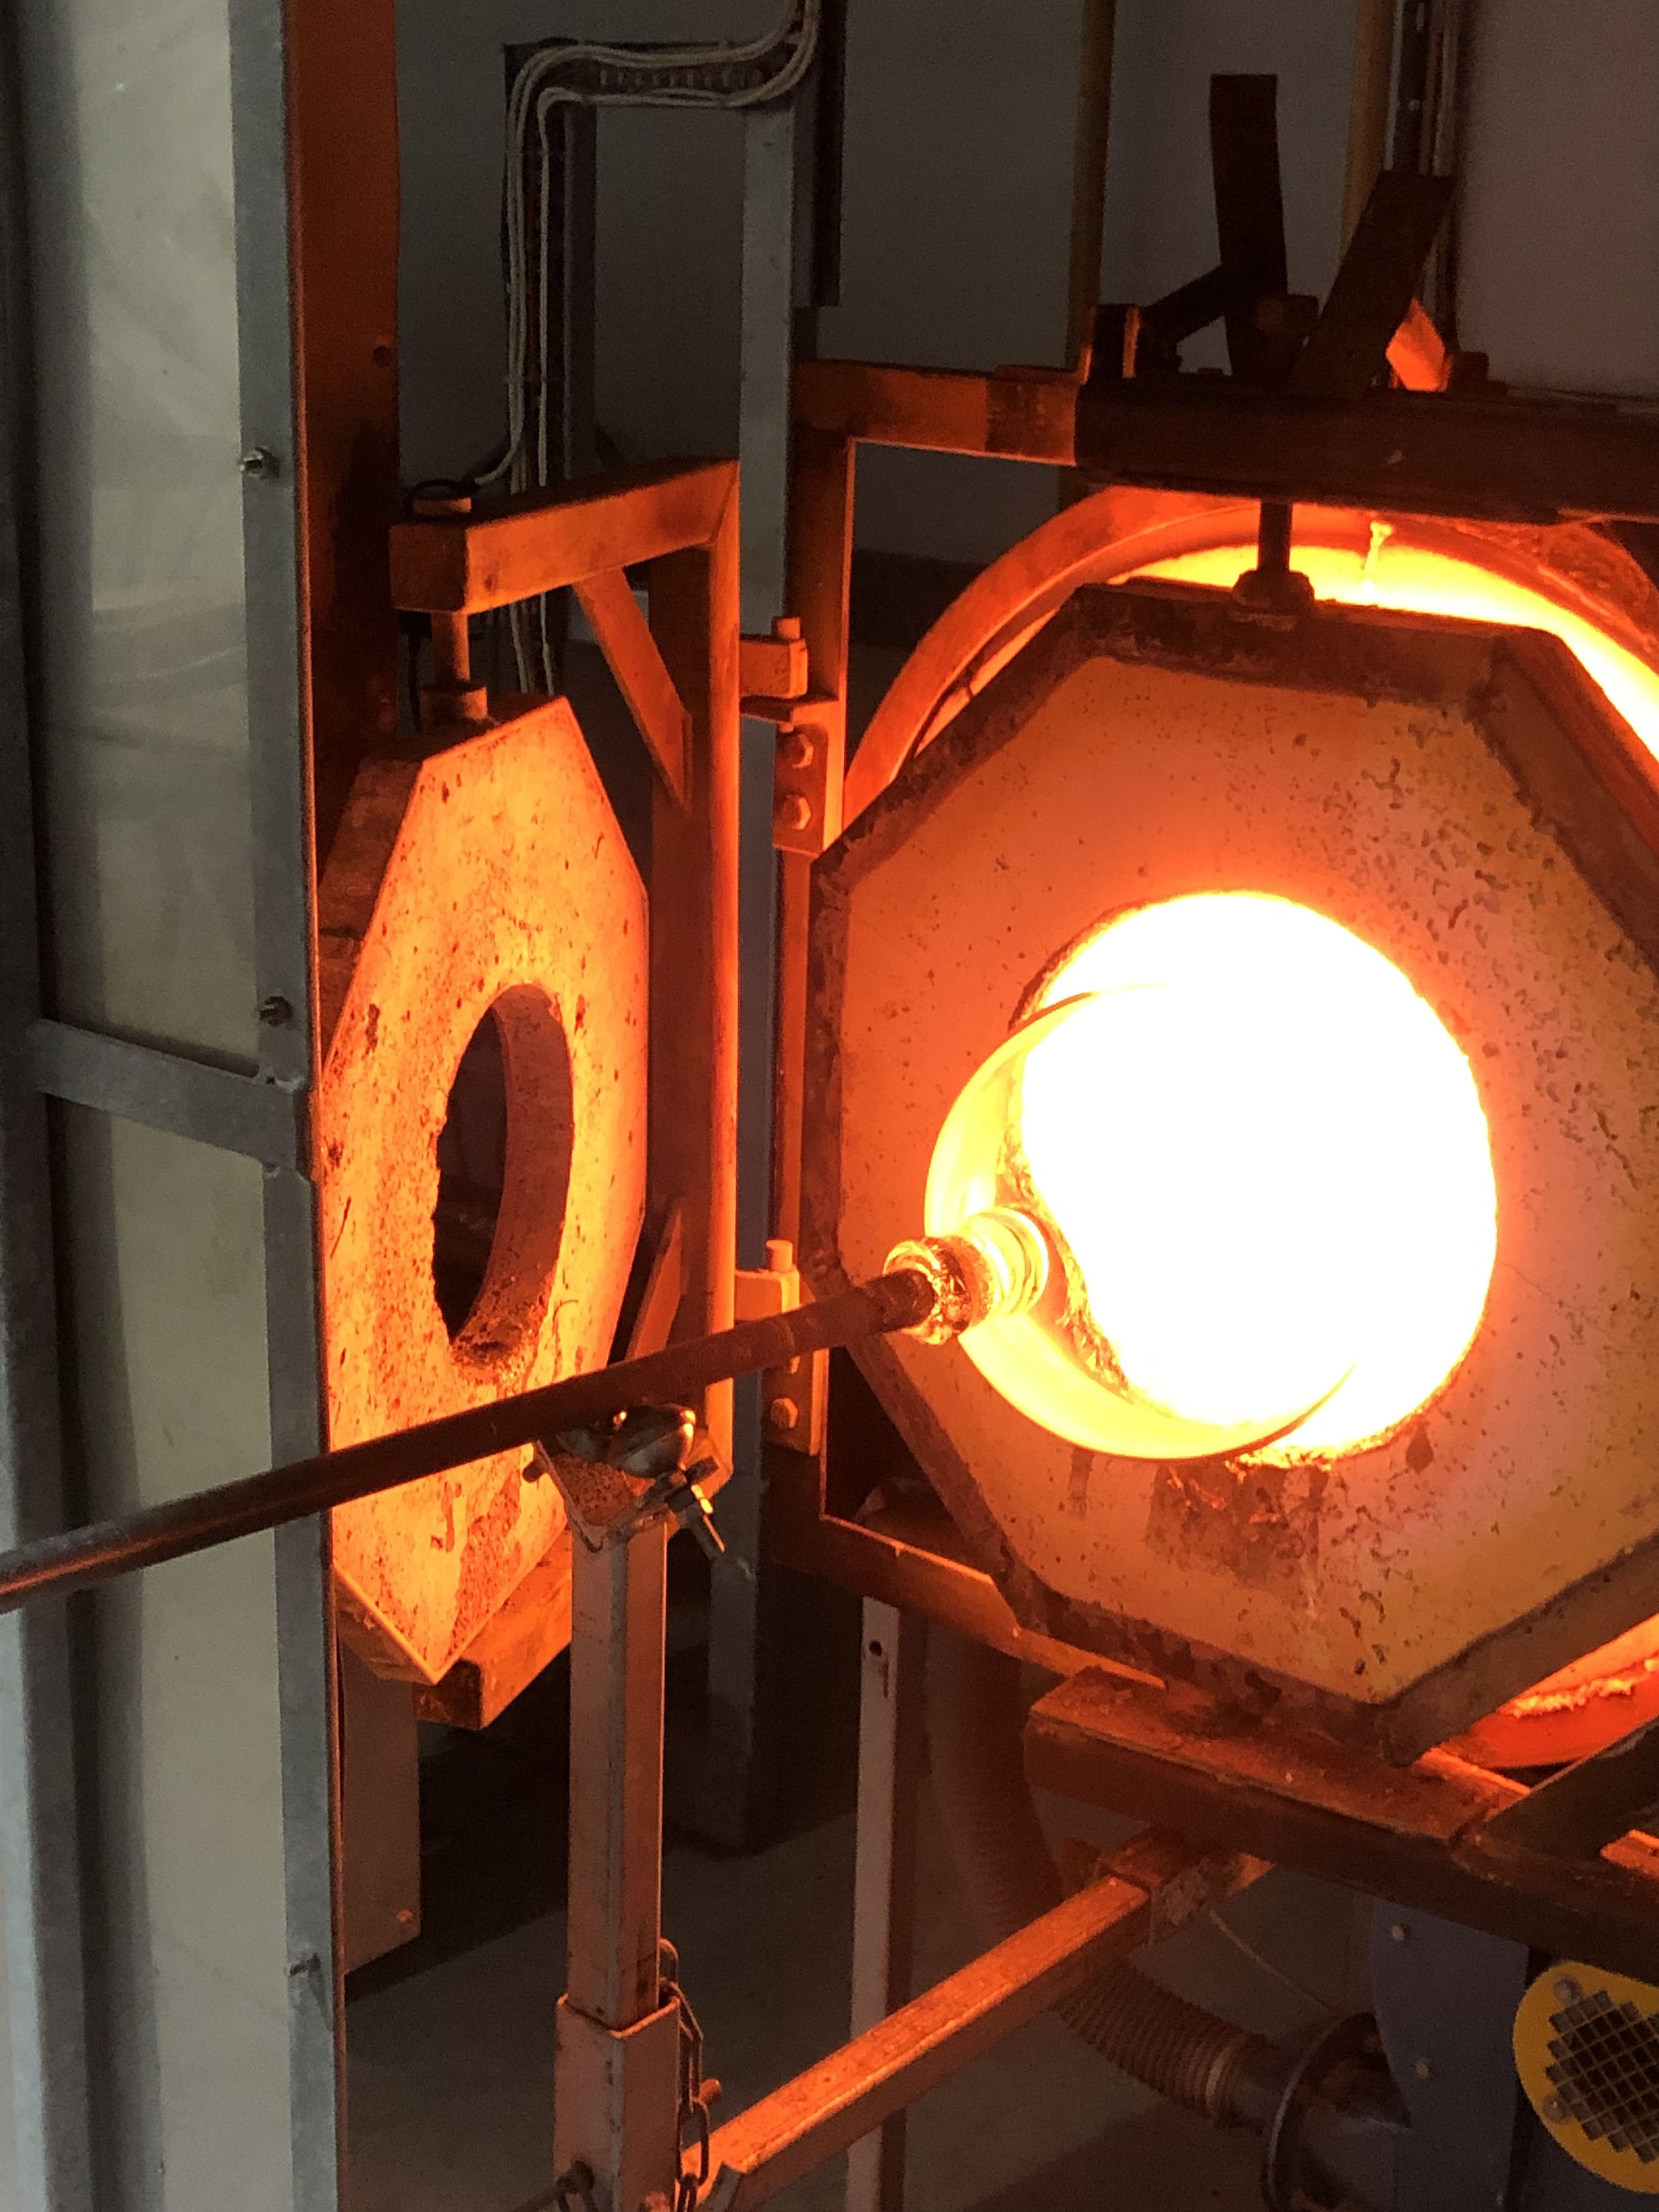
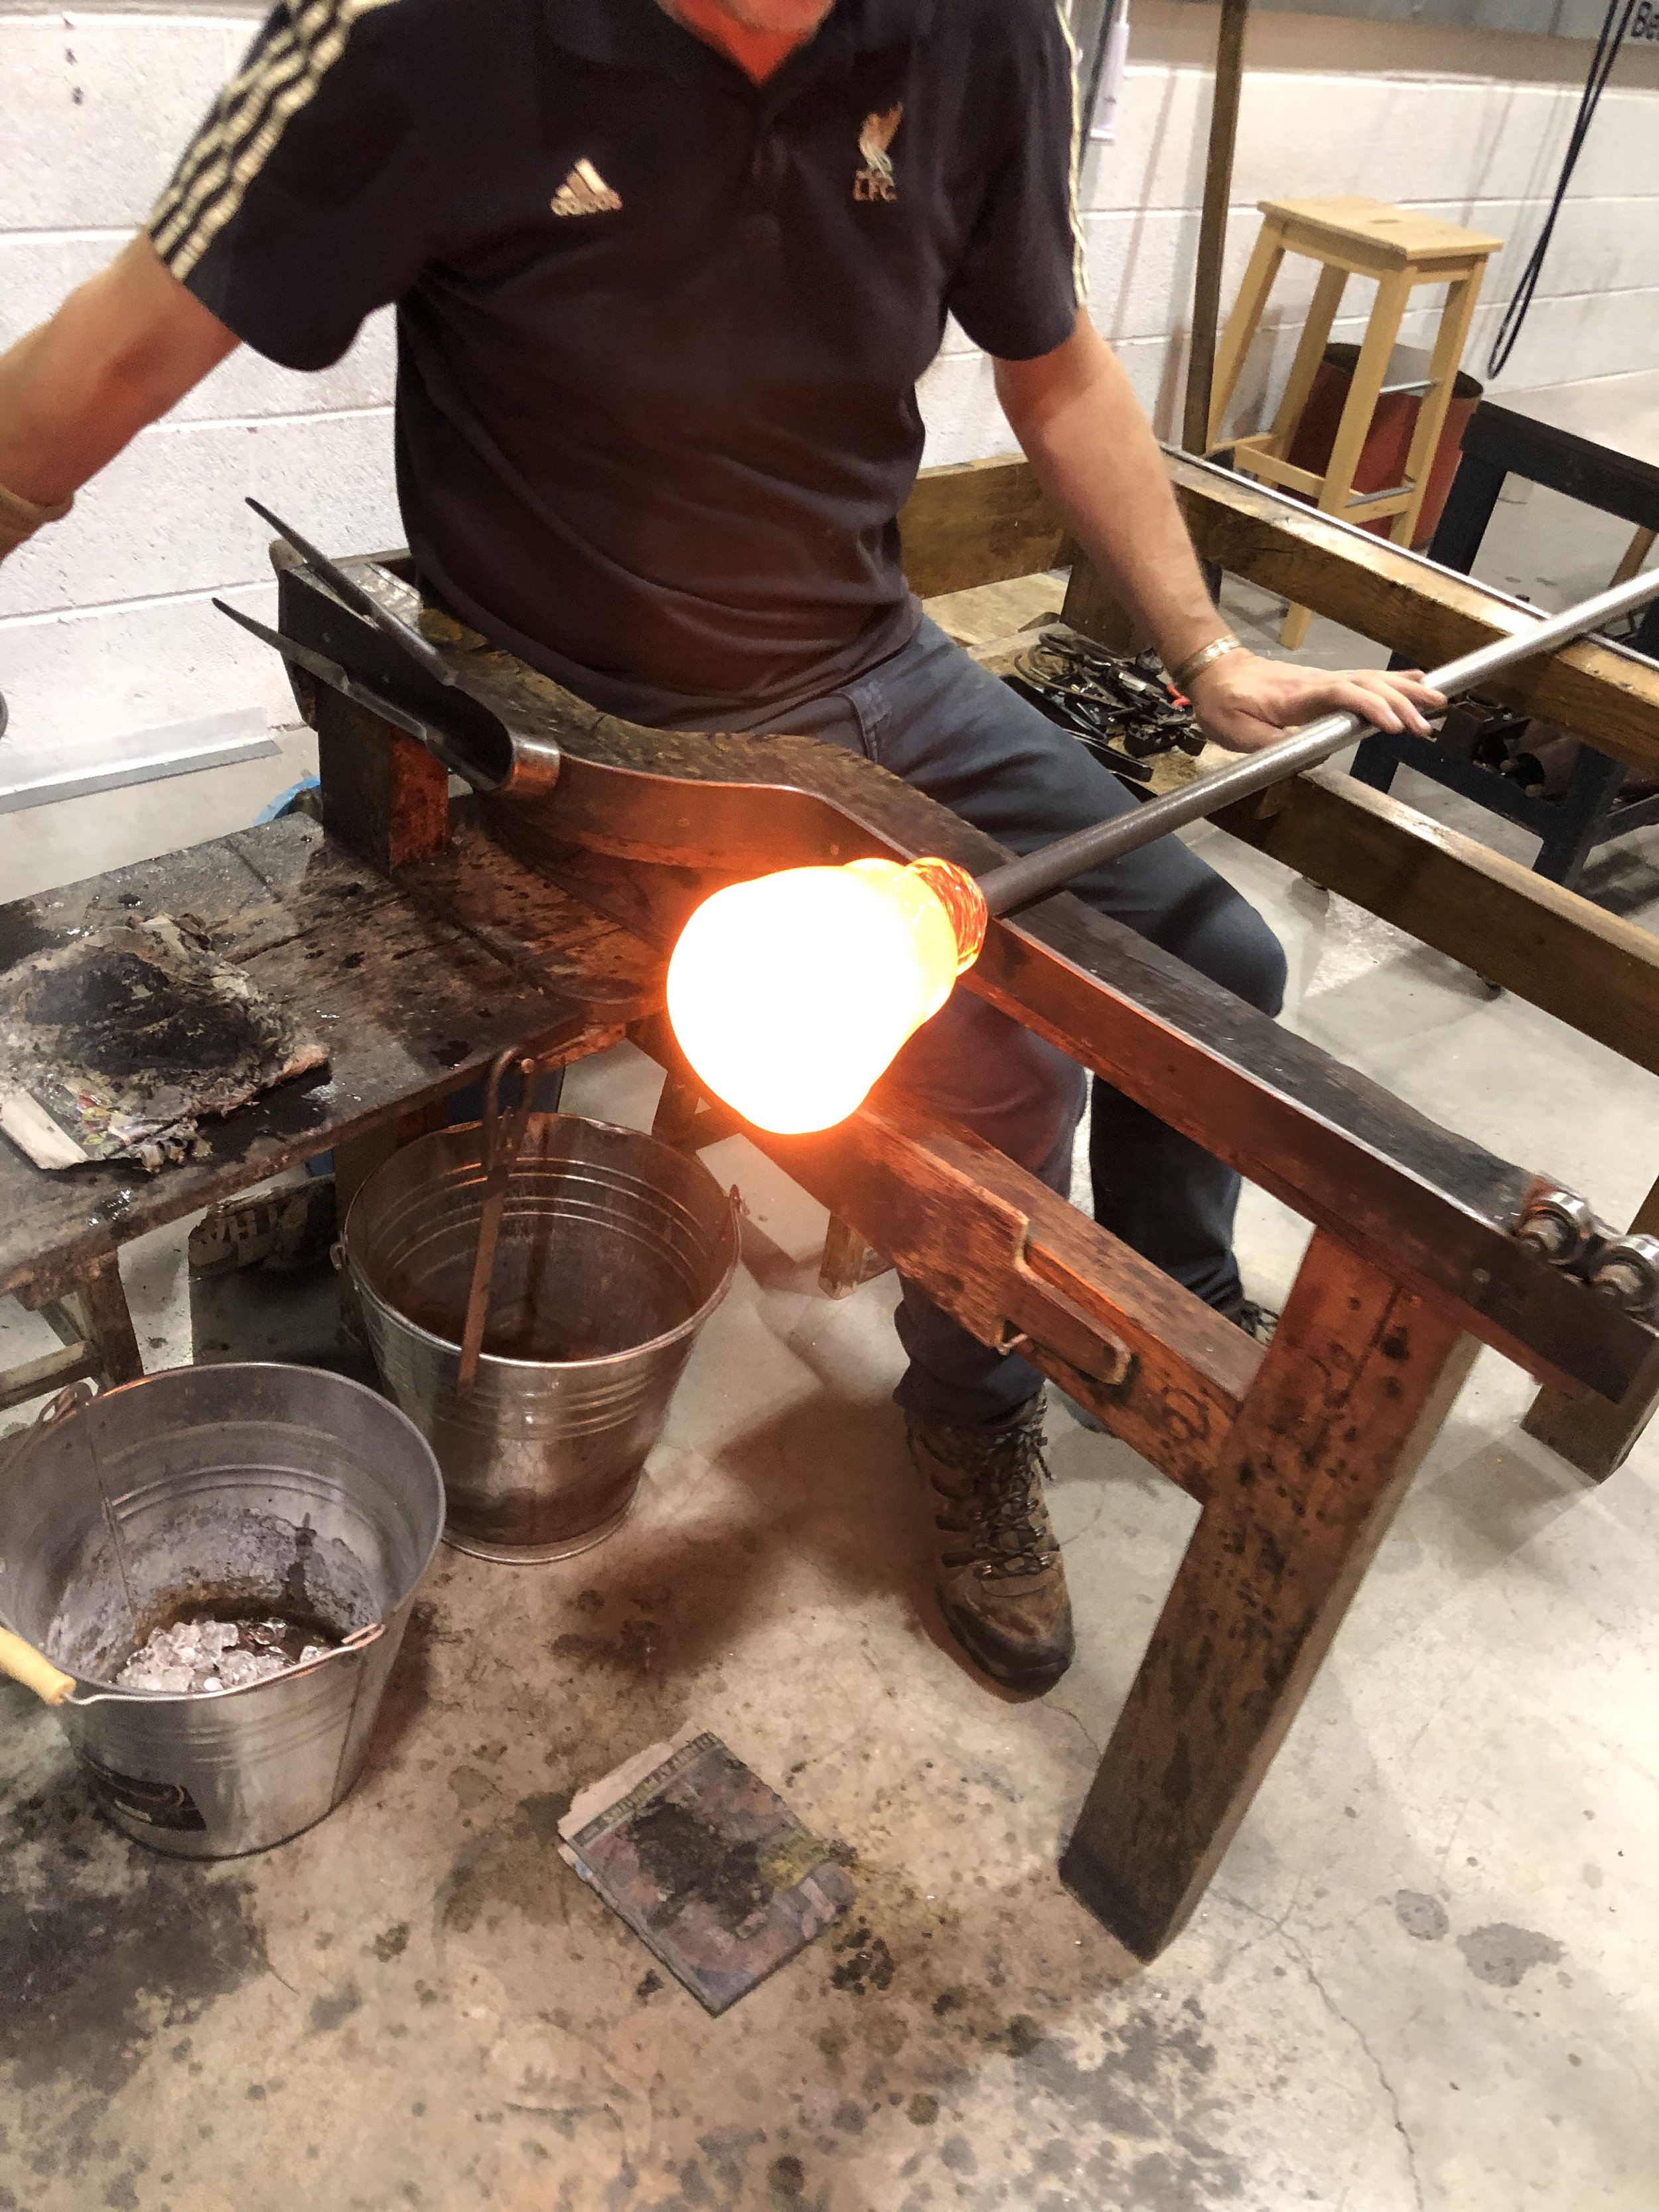
Back to the Glory Hole (1200 degrees) where the coloured glass is heated to melt into the clear. Again, the glass blower keeps turning the pipe to keep the shape at the end of the pole.
The process of heating and turning in the Glory Hole and shaping at the bench will be repeated many times.

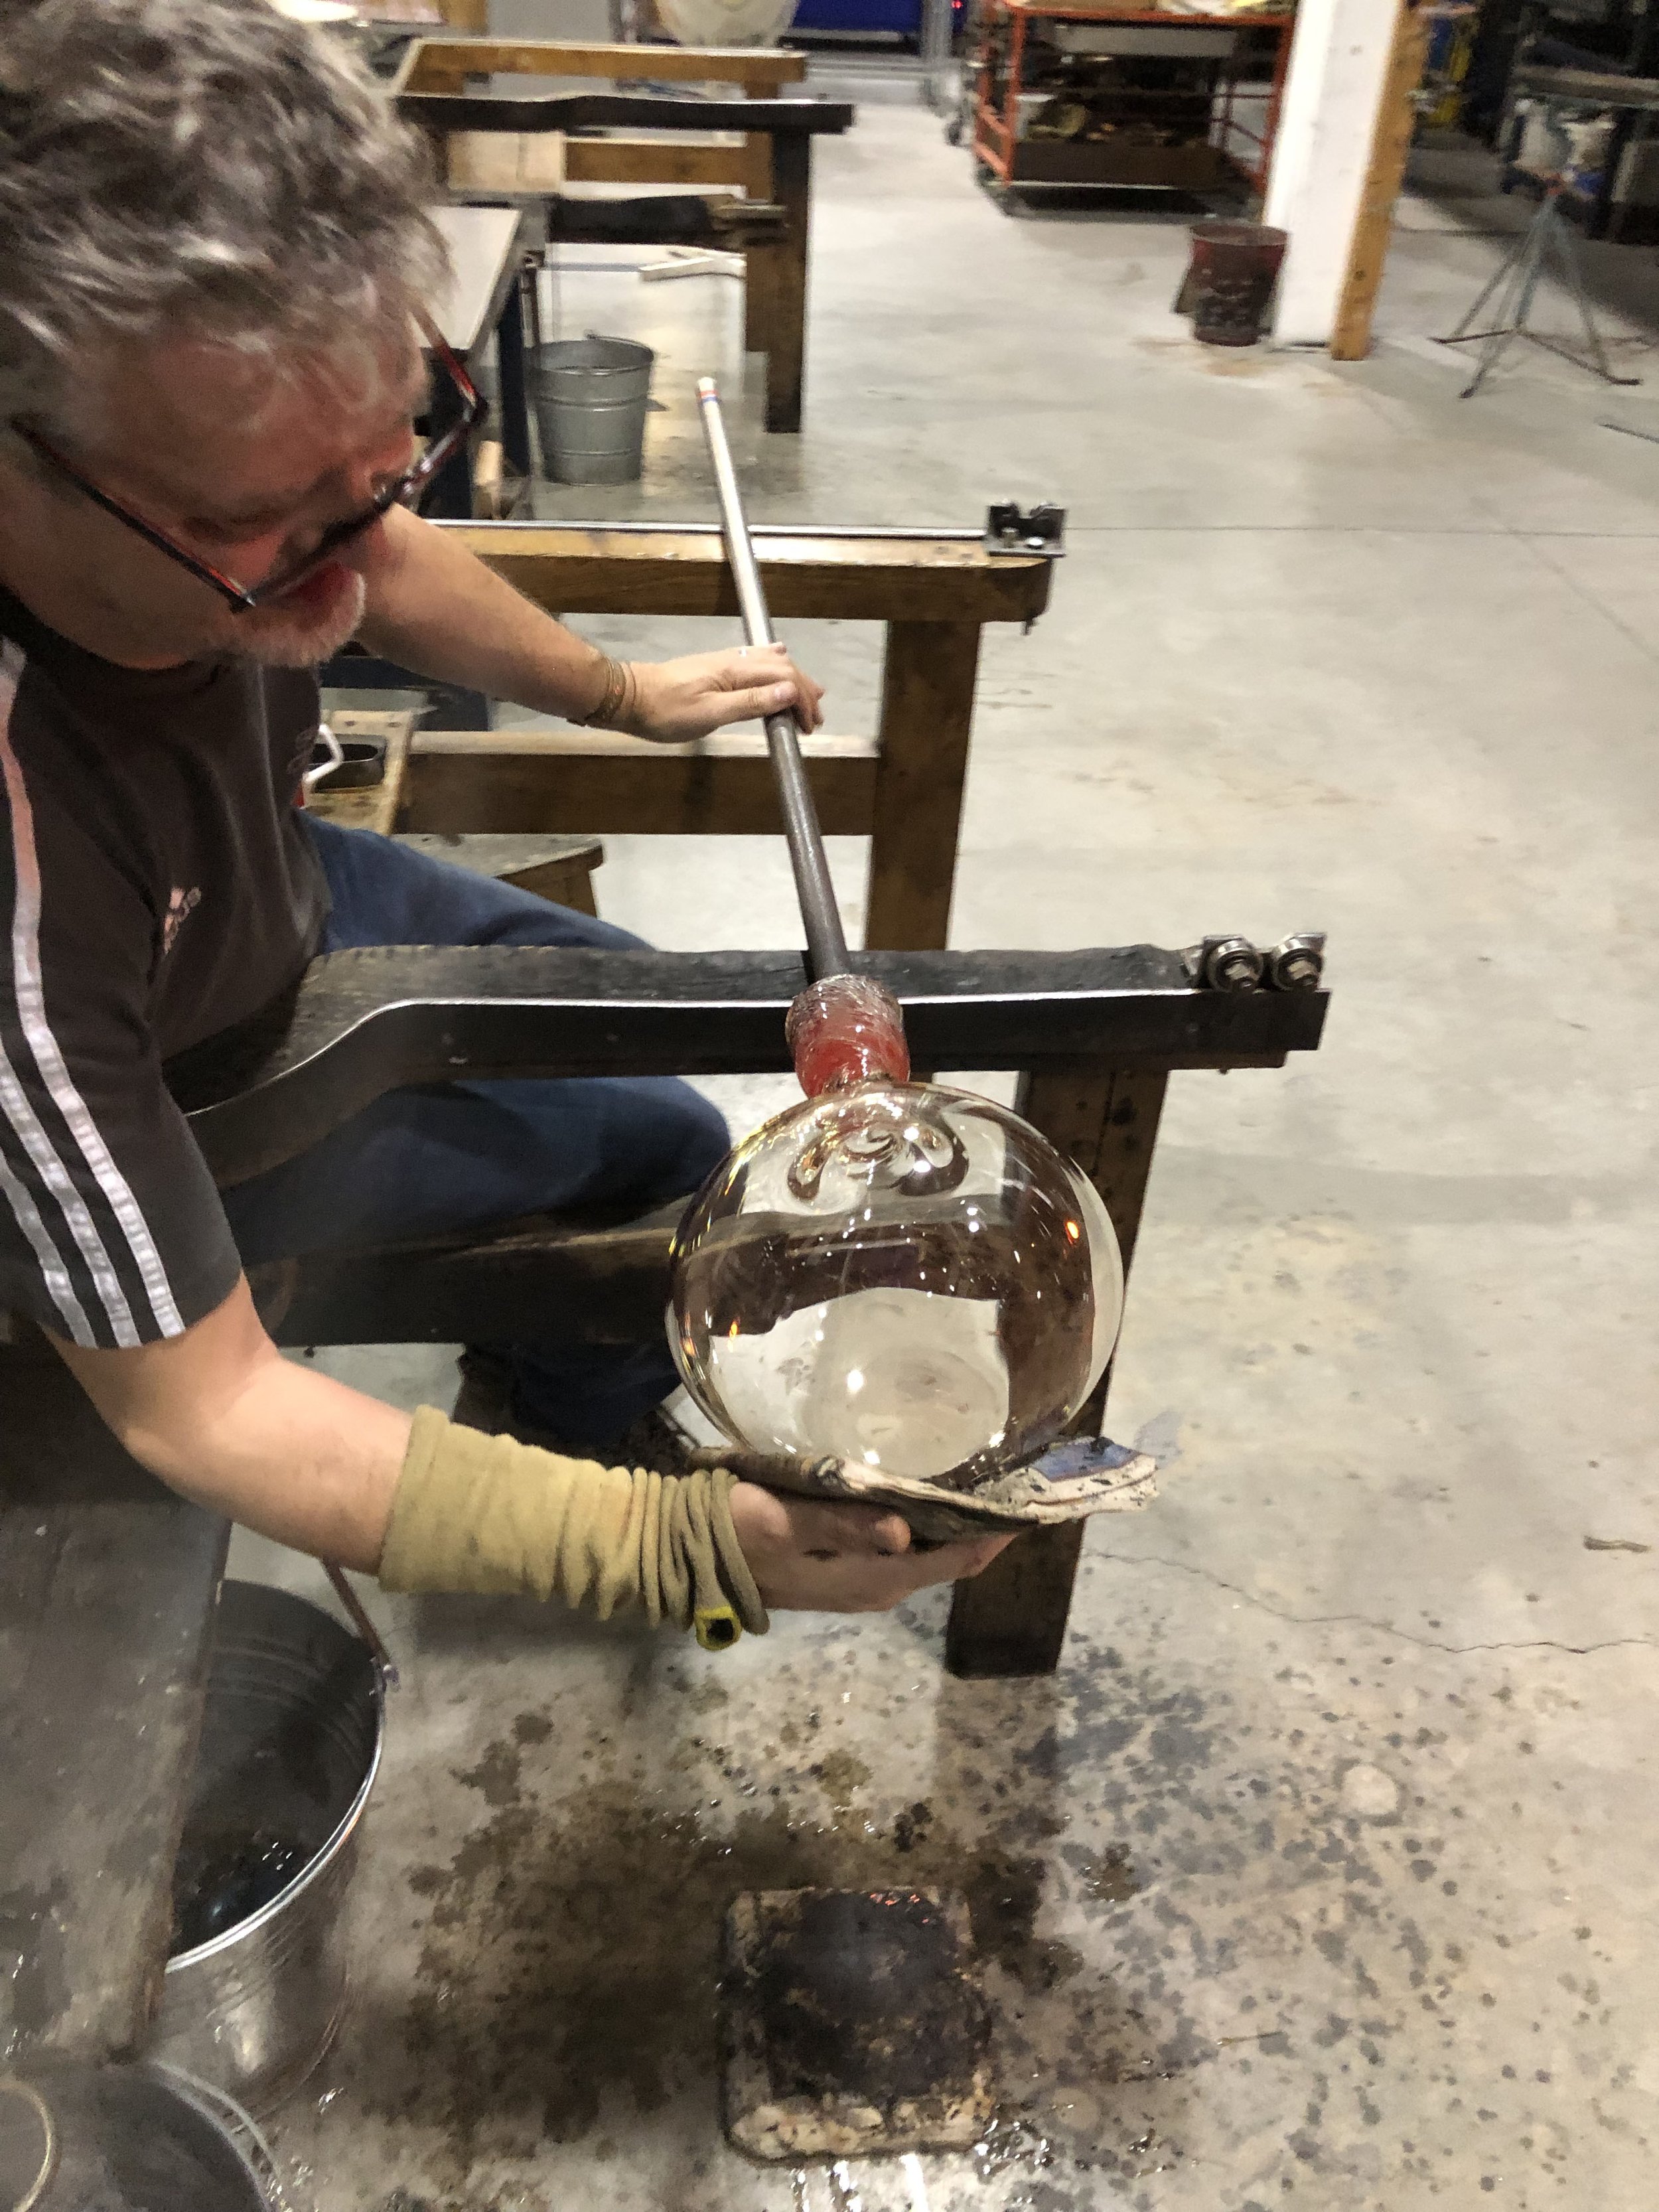
Shaping the glass with jacks as it is rotated at the workbench

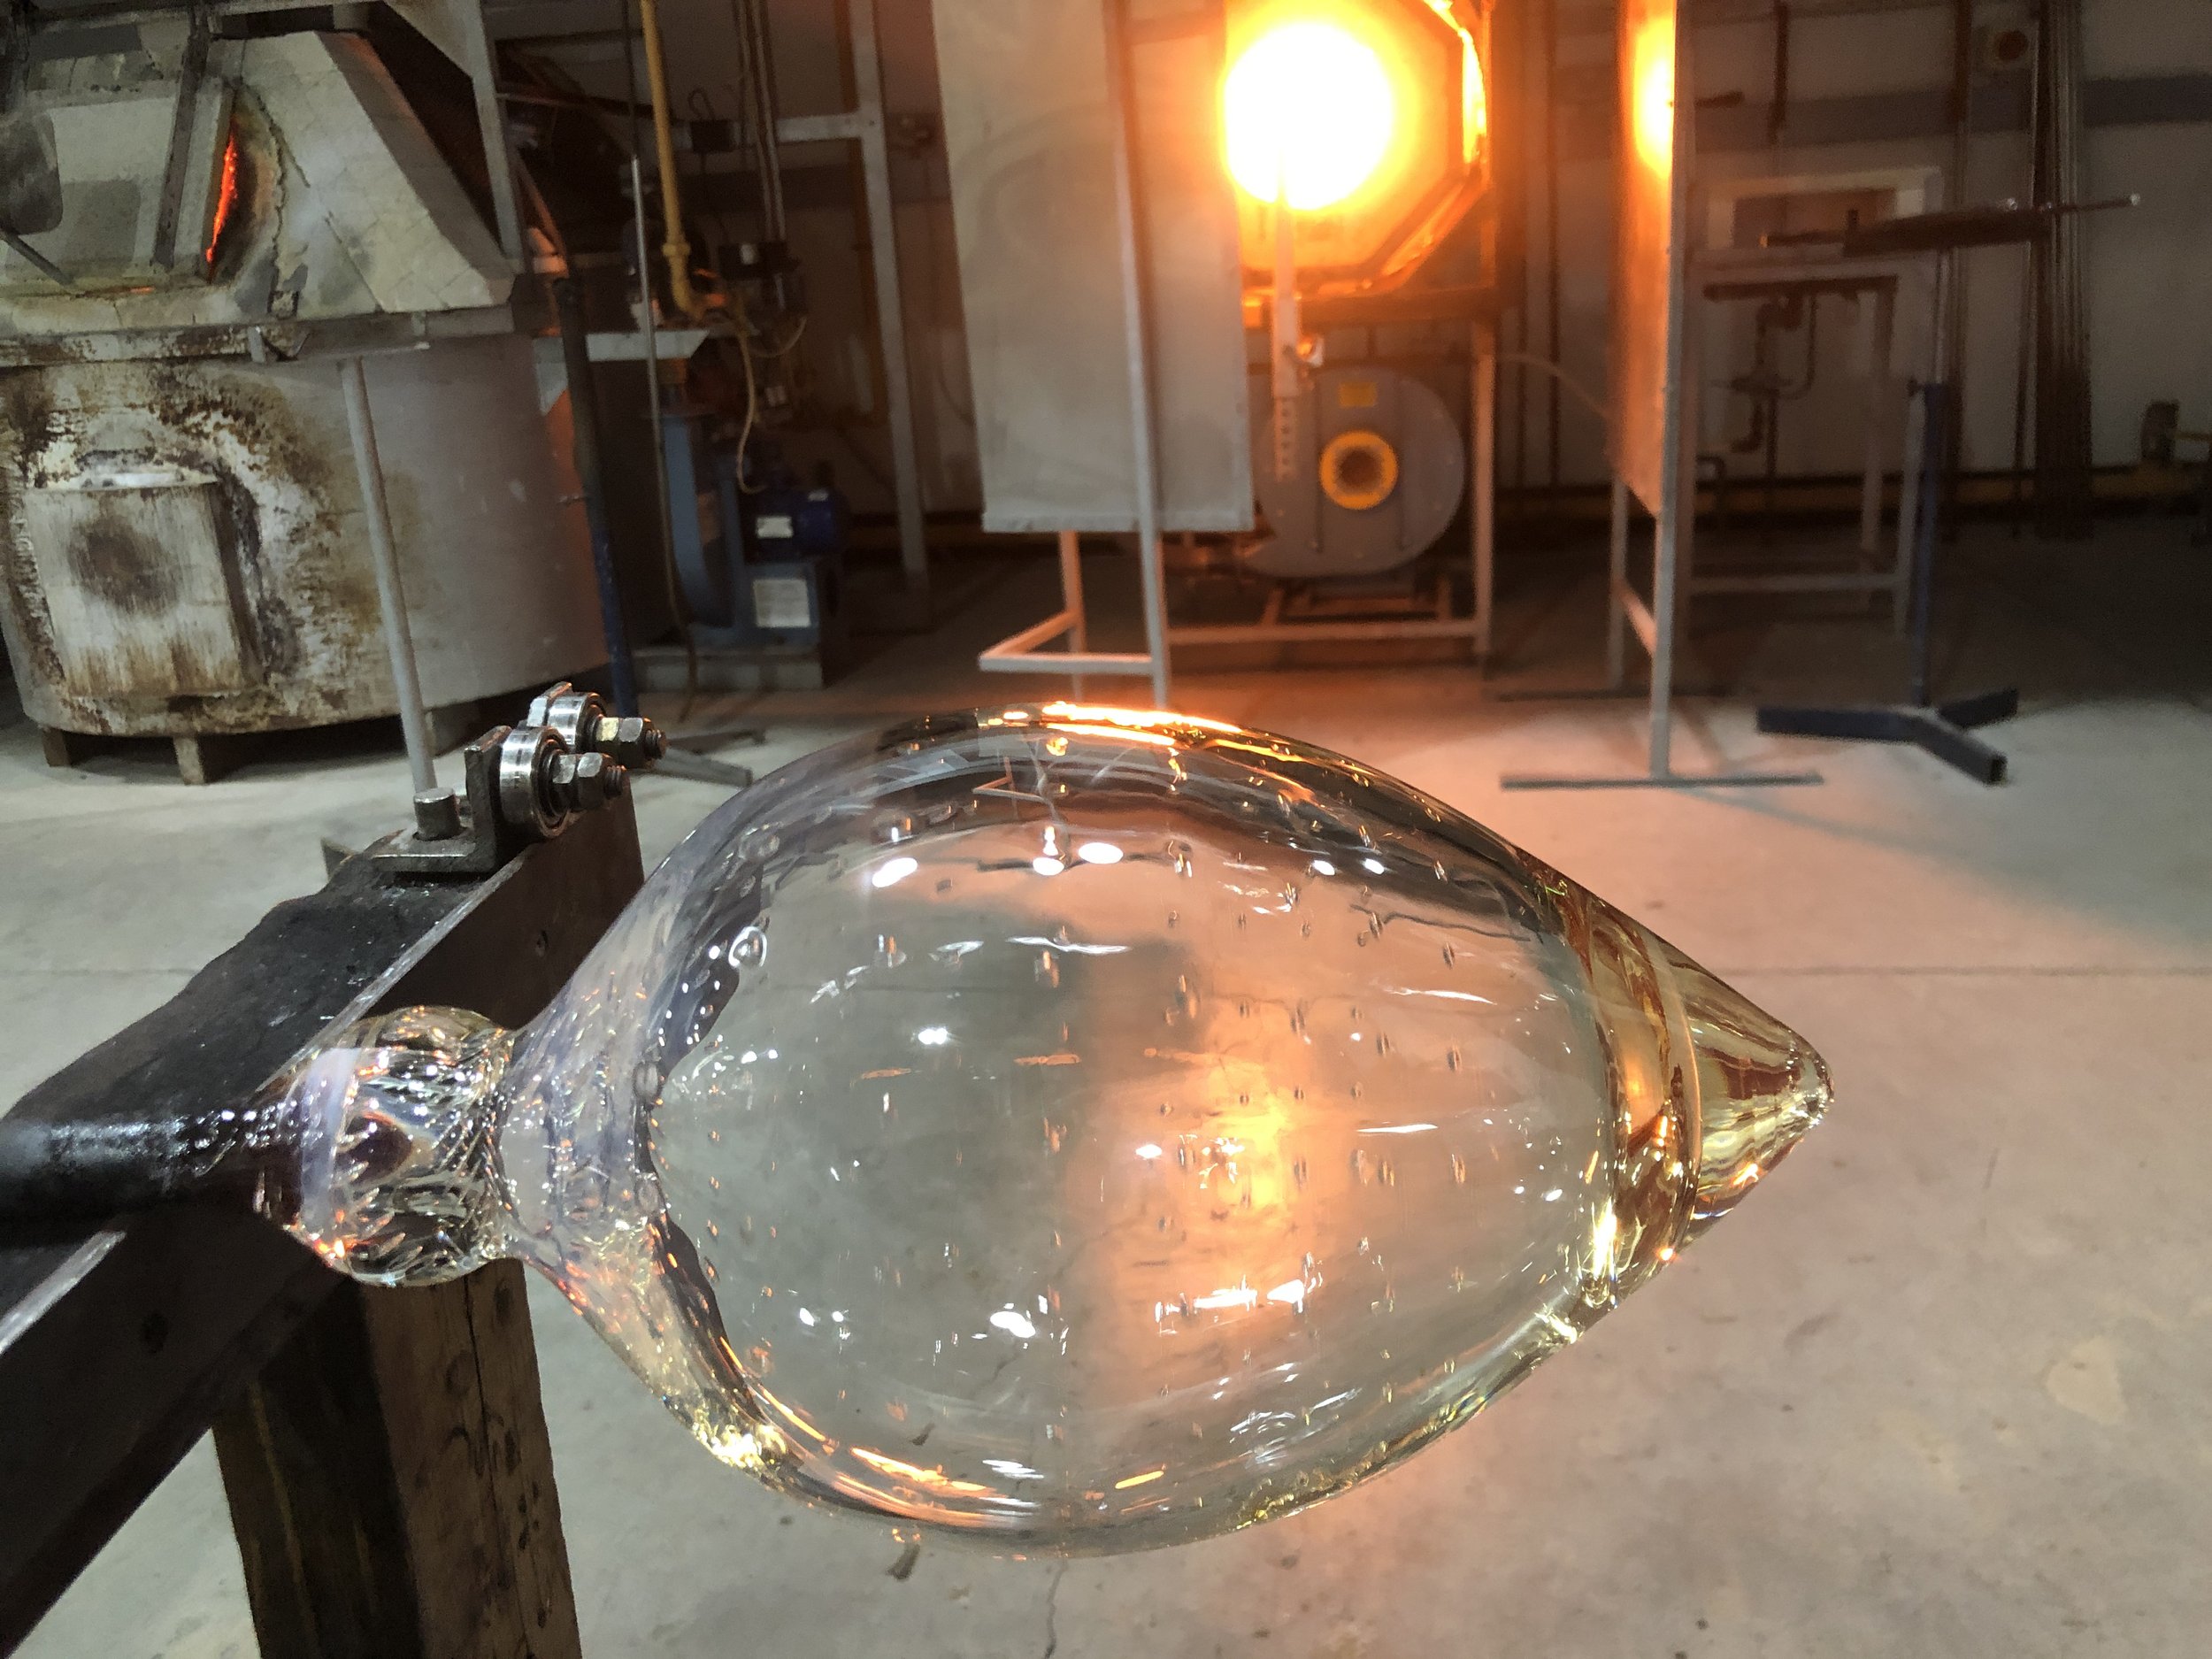
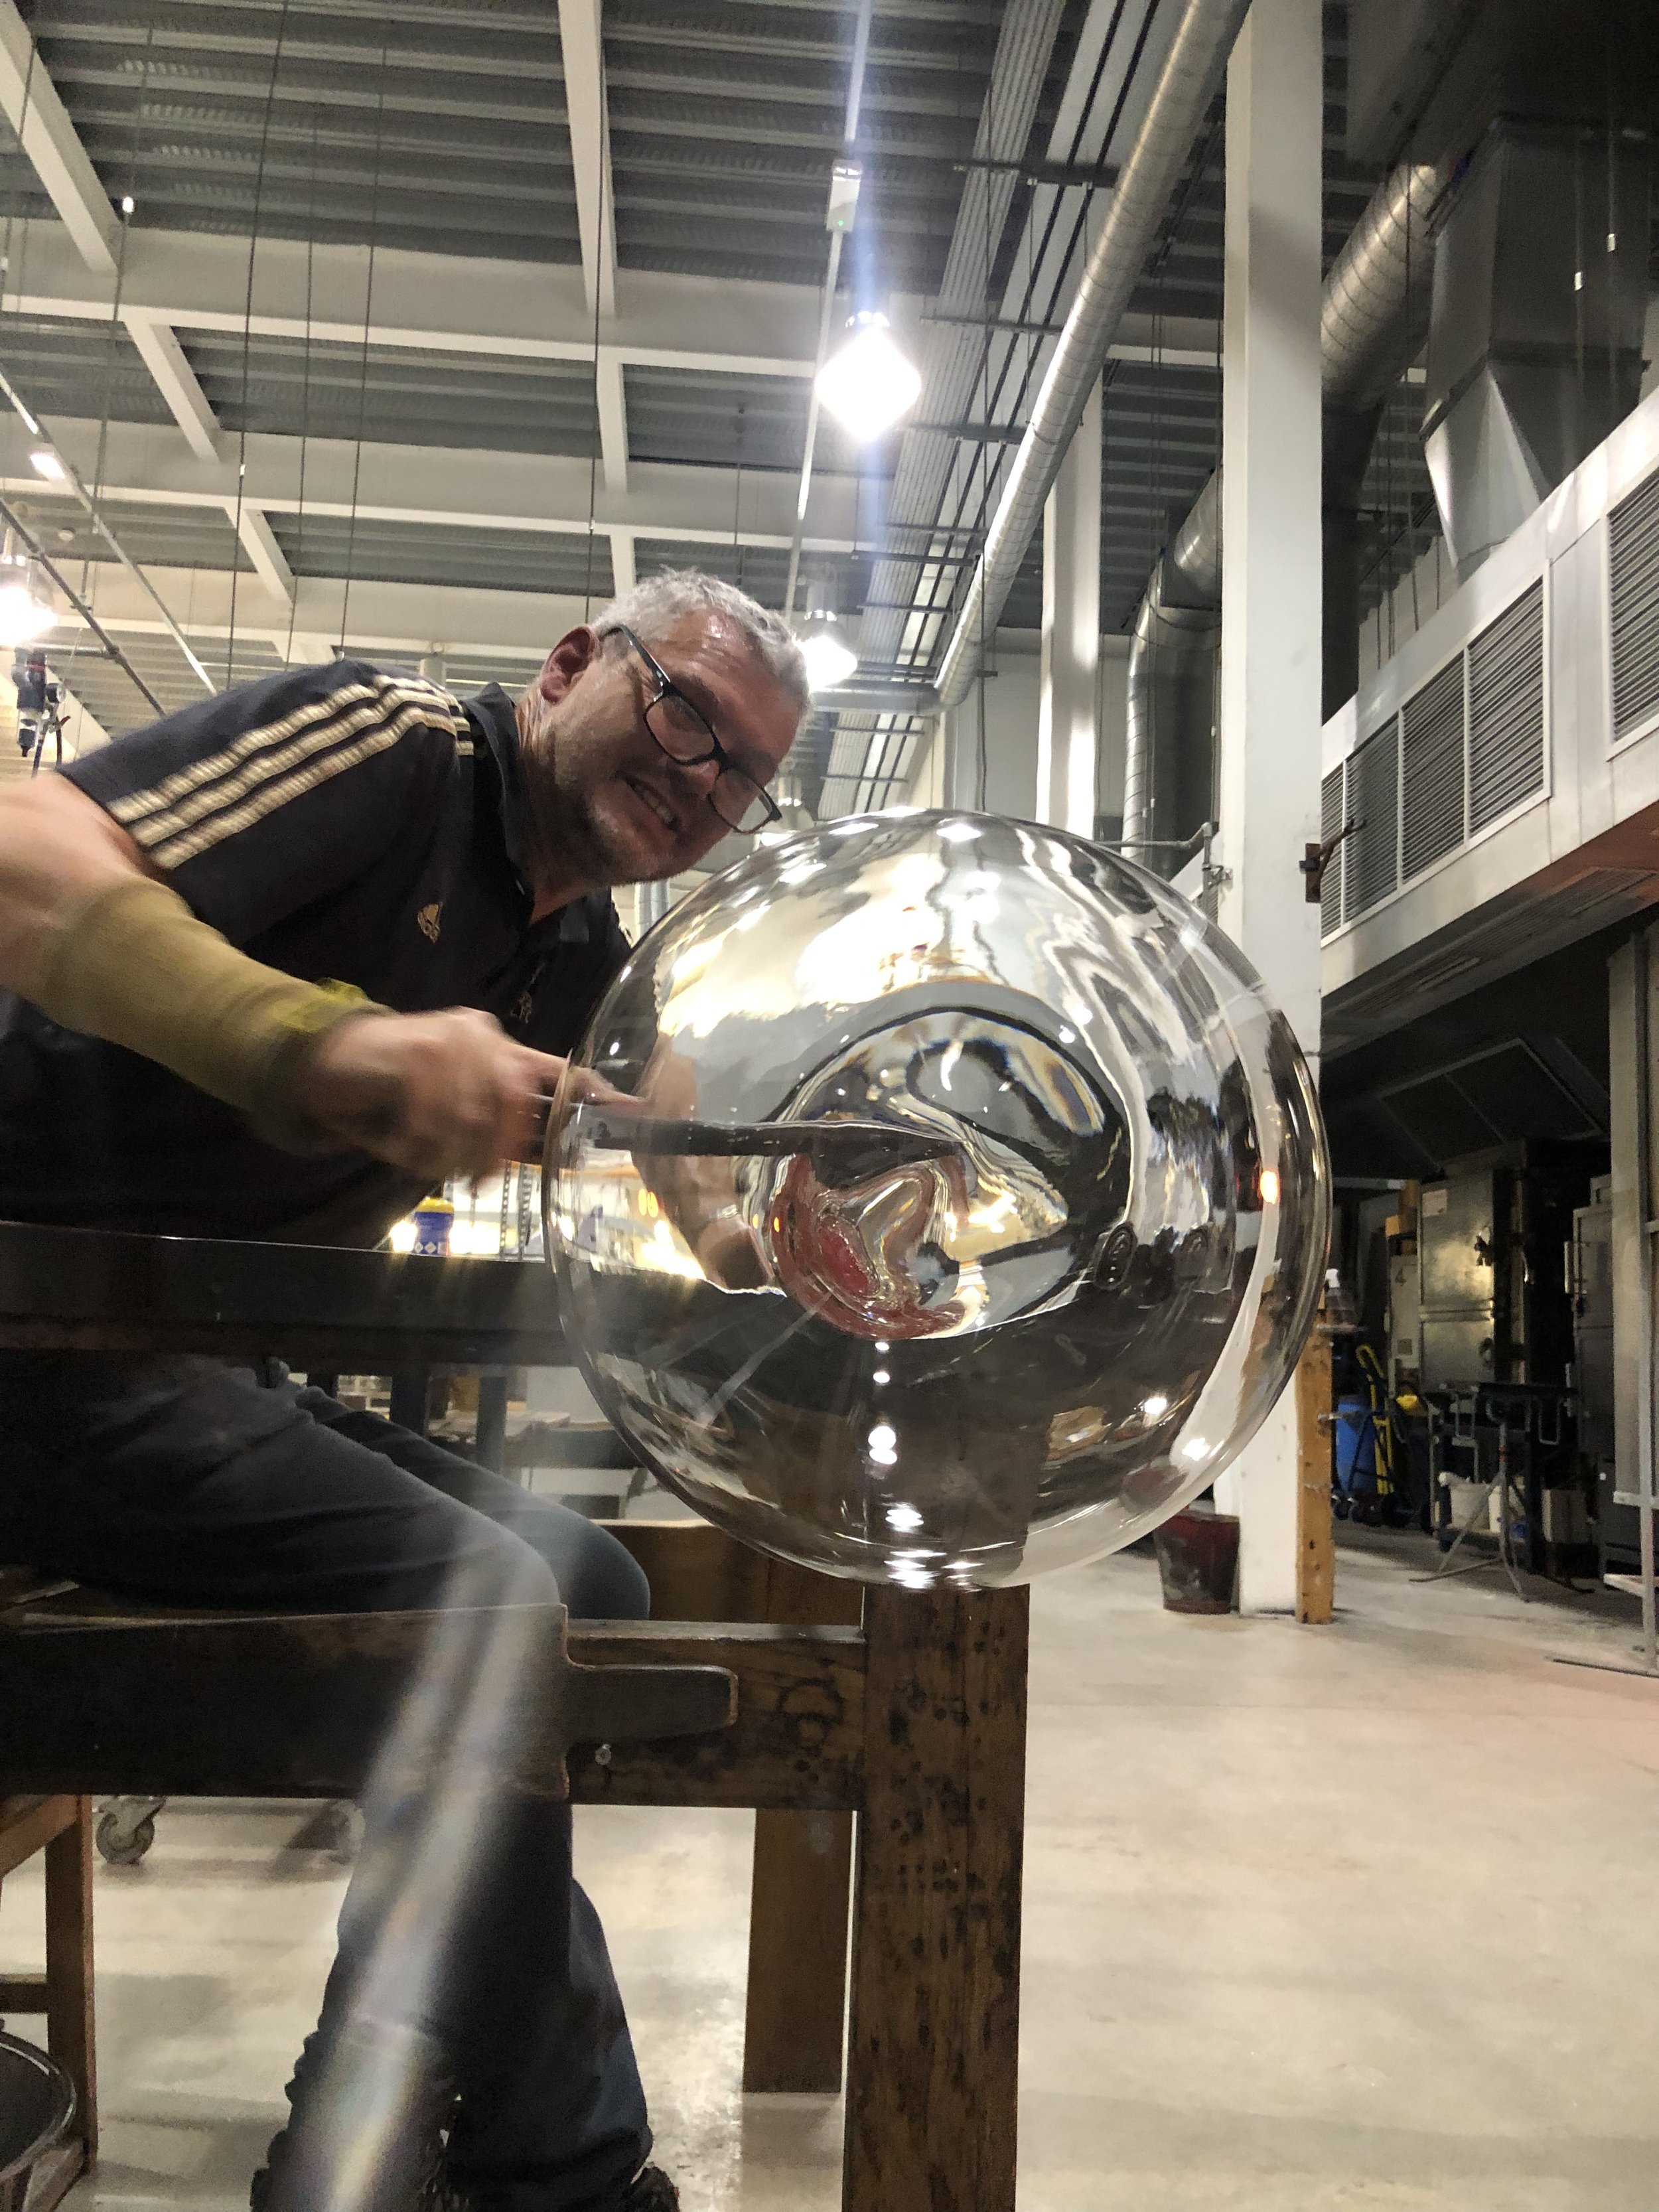
The actual blowing begins. It starts with a puff on the end of the blow pipe to create a bubble. Then it’s back to the Glory Hole for more heating and turning., then back to the bench for more shaping. This cycle gets repeated many times, depending on the size and shape desired.

Removing the piece from the punty. The blower takes the punty and hits it firmly so that the piece drops off into a box that is filled with thick layers of fire blanket.

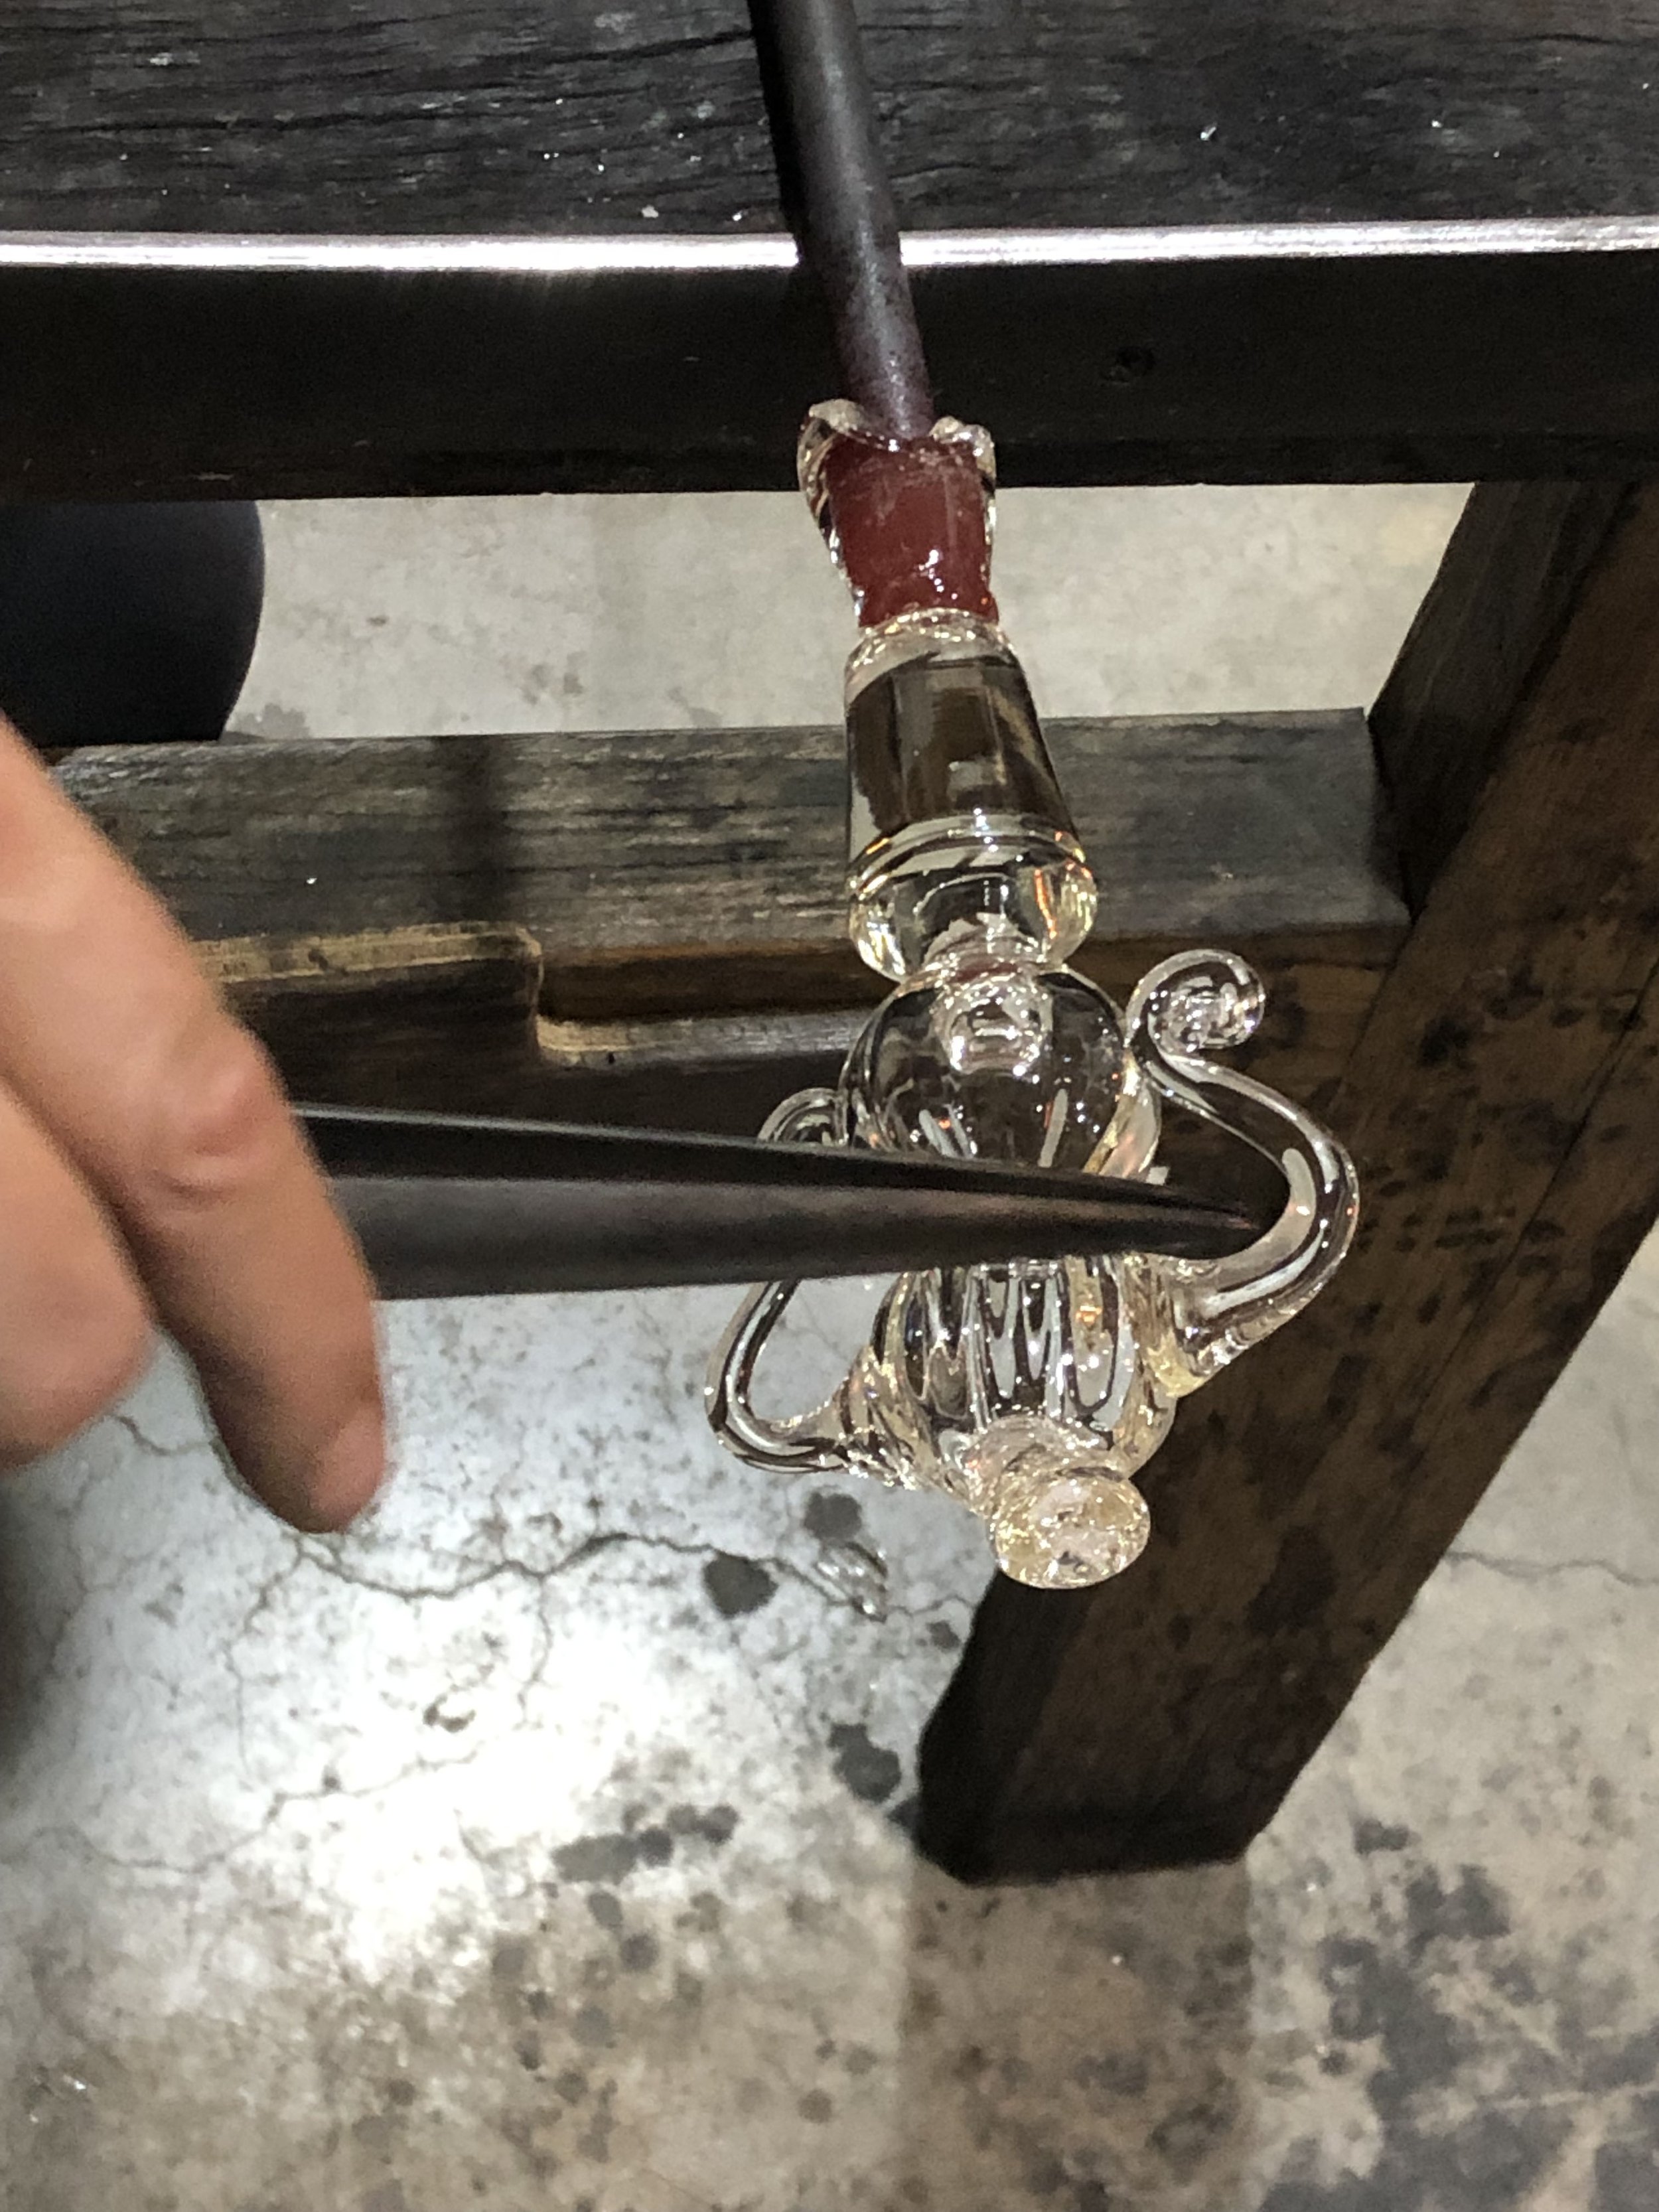
After taking a small gather of clear glass from the furnace, the molten glass is added to the blown piece and then cut and shaped into a hook shape with shears.

The scorching-hot glass is transferred to an annealing oven. This oven is kept at 500 degrees and then cooled down over a period of 14 hours to room temperature. This slow cooling down is to prevent the piece from cracking or breaking. Any sharp edges can be ground down when the glass is completely cool.

Finished coloured paperweight

Coloured blown glass bauble
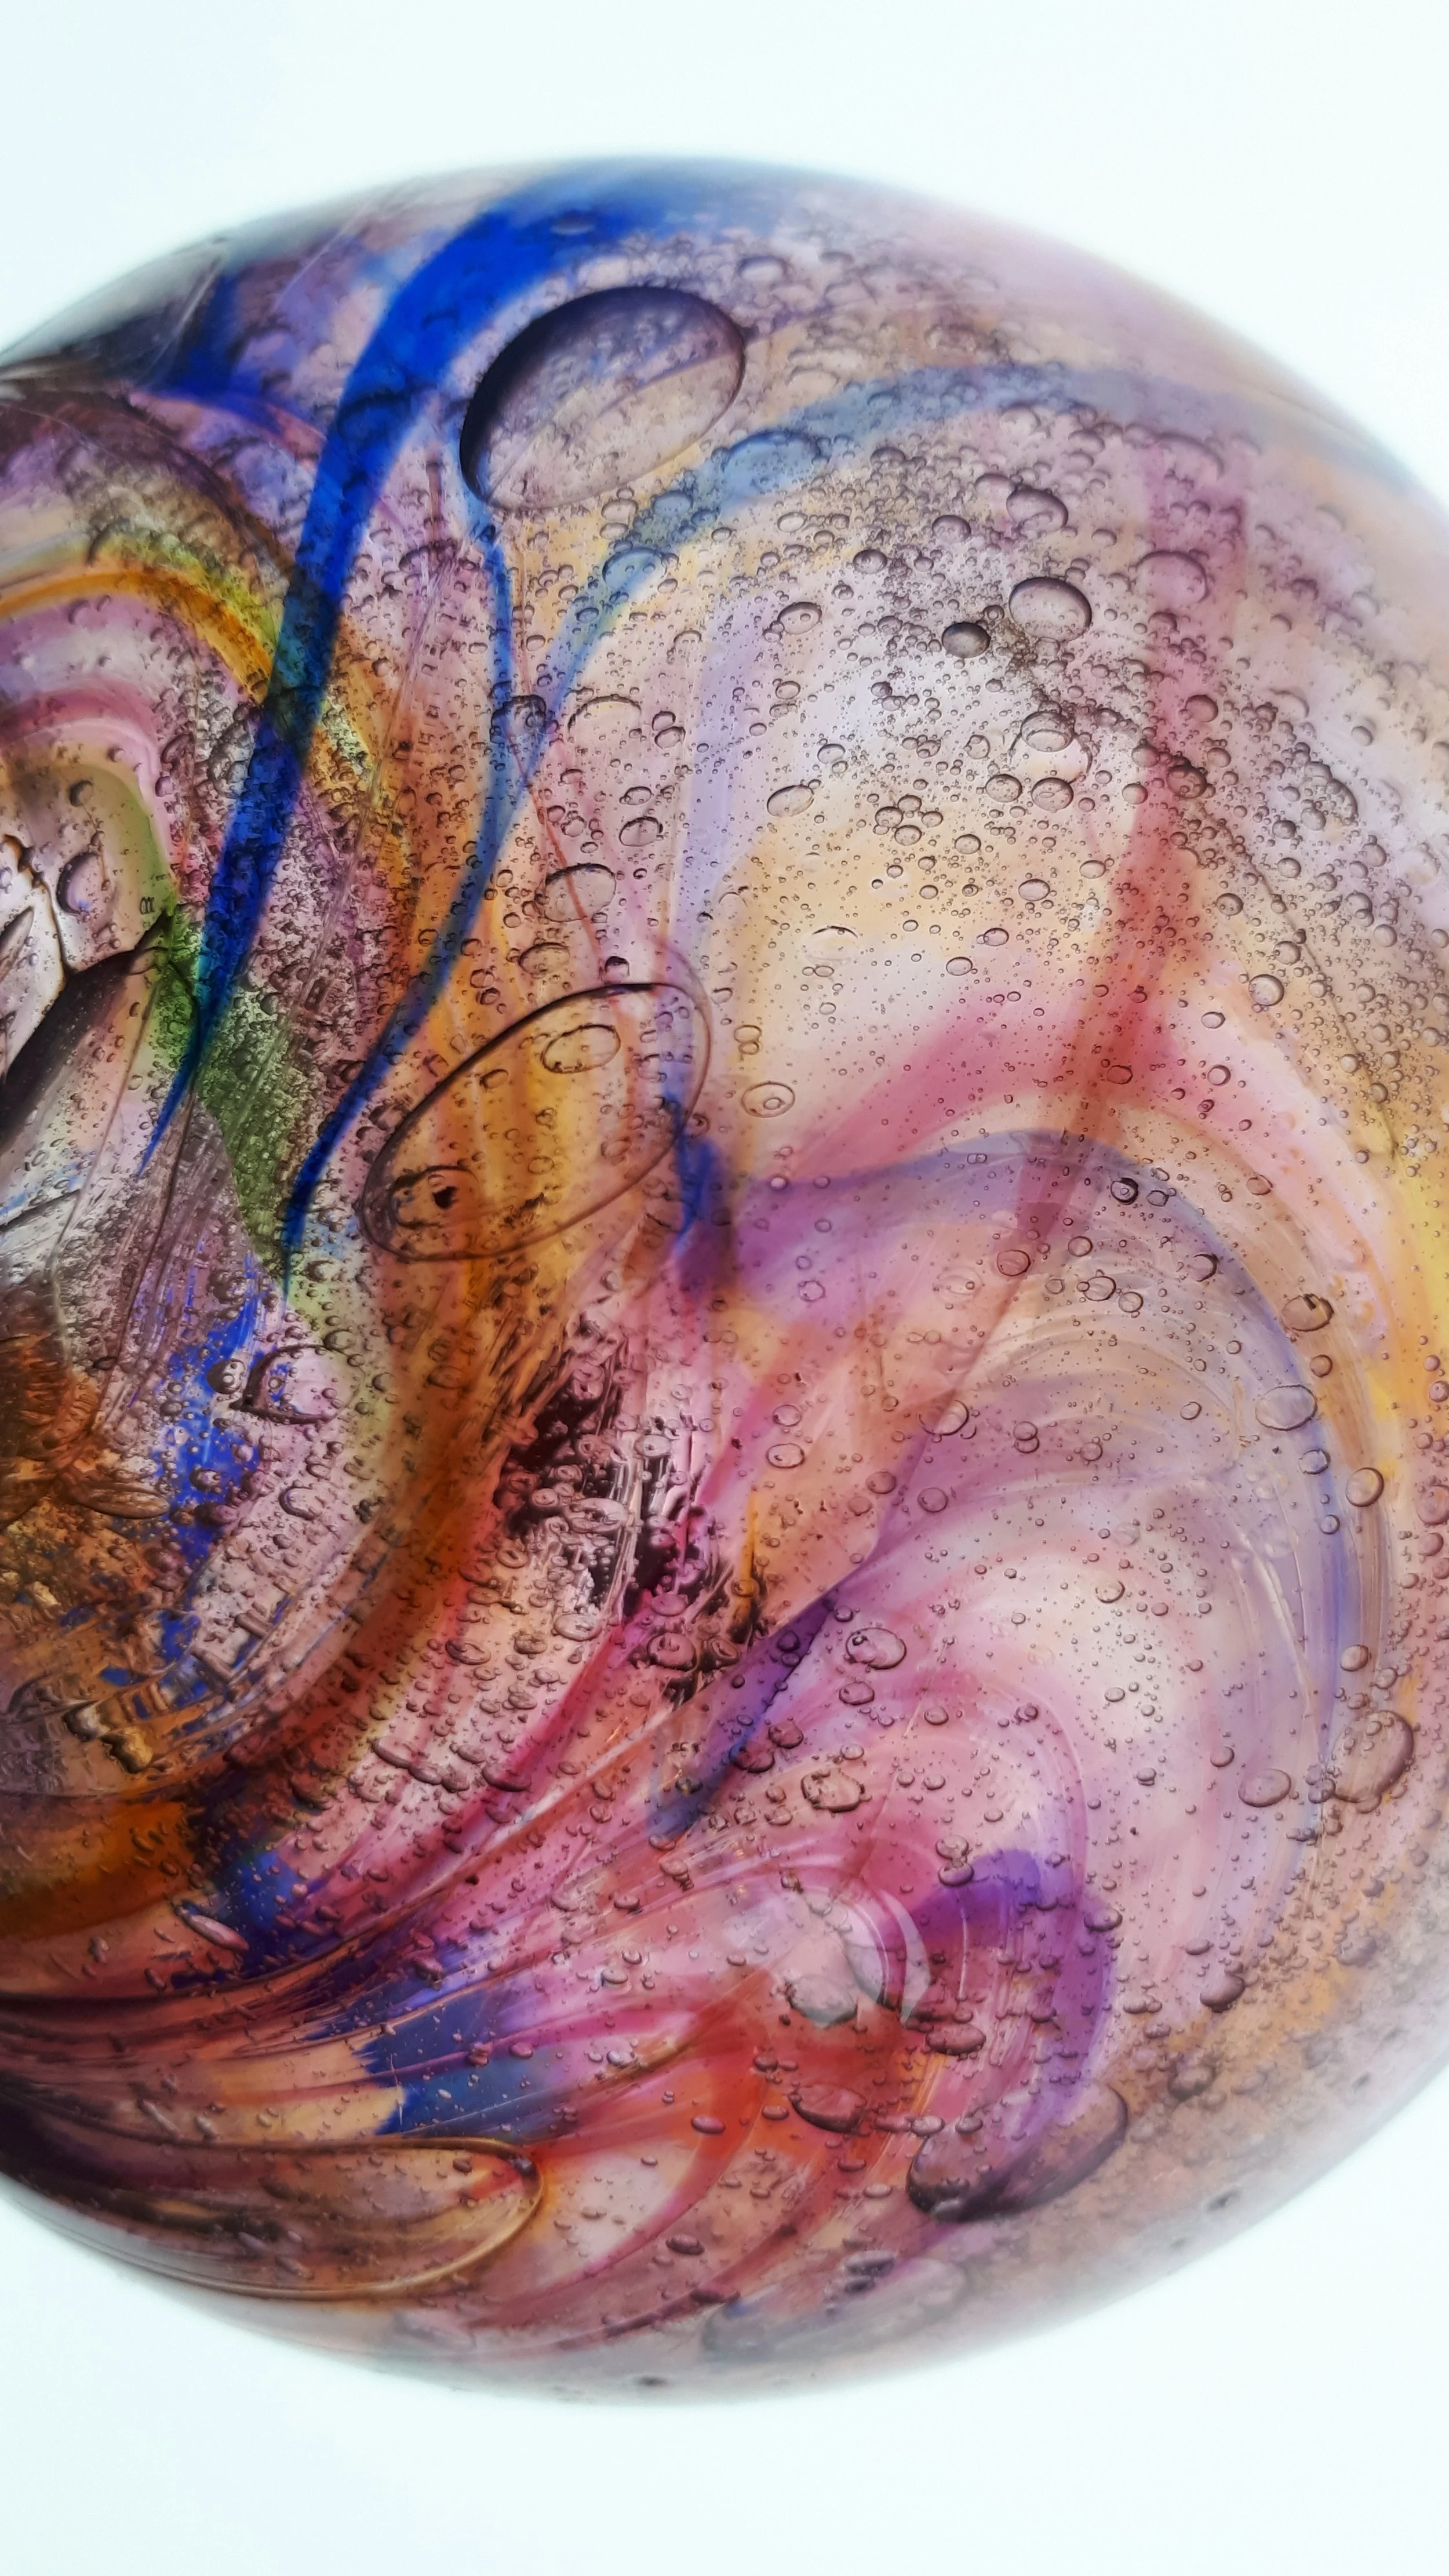
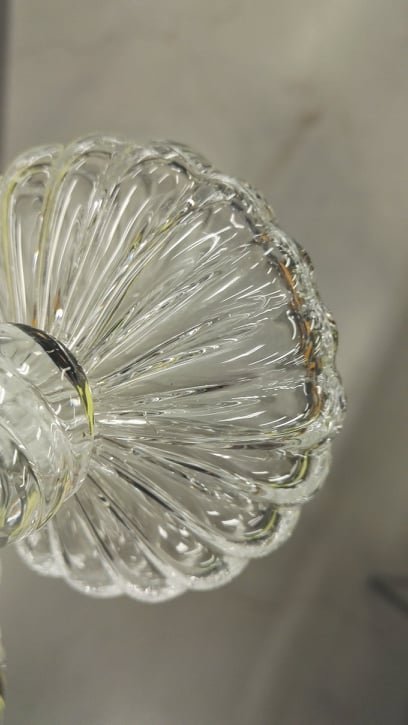
Detail of bauble

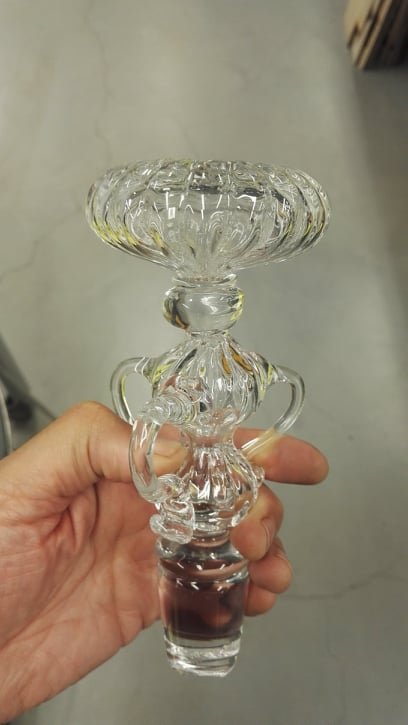
Blown glass bauble

Detail showing smokey colours and lines
Sketchbook Development
I’ve been continuing with my concept designs and sketchbook development at the same time that Ian has been experimenting with the blown glass forms. I’m really enjoying the forward and backwards collaboration which is occurring as the development time progresses. Even though this is a long-distance collaboration (me being in Derbyshire and Ian in Plymouth), it is working well through regular Zoom meeting, and the sharing of images and documentation of the glass process.
I wanted to go back to observing the diatom forms, but with the thought of how they will be explored in glass at the same time. With more knowledge of the different glass techniques, I am now able to visualise how each ‘experiment’ or test piece will be put together.

Sketchbook detail
In the above image I am playing around with some ideas which Ian has already made and starting to think about how these objects will float. I think instead of sitting working out the maths for this, it is better to experiment and test the pieces as they are made. We both like the idea of the sculptures floating on water and possibly concealing a hidden decorative element beneath the water surface.

Test piece showing stopper

Completed test piece
Photography by Nathan Soper

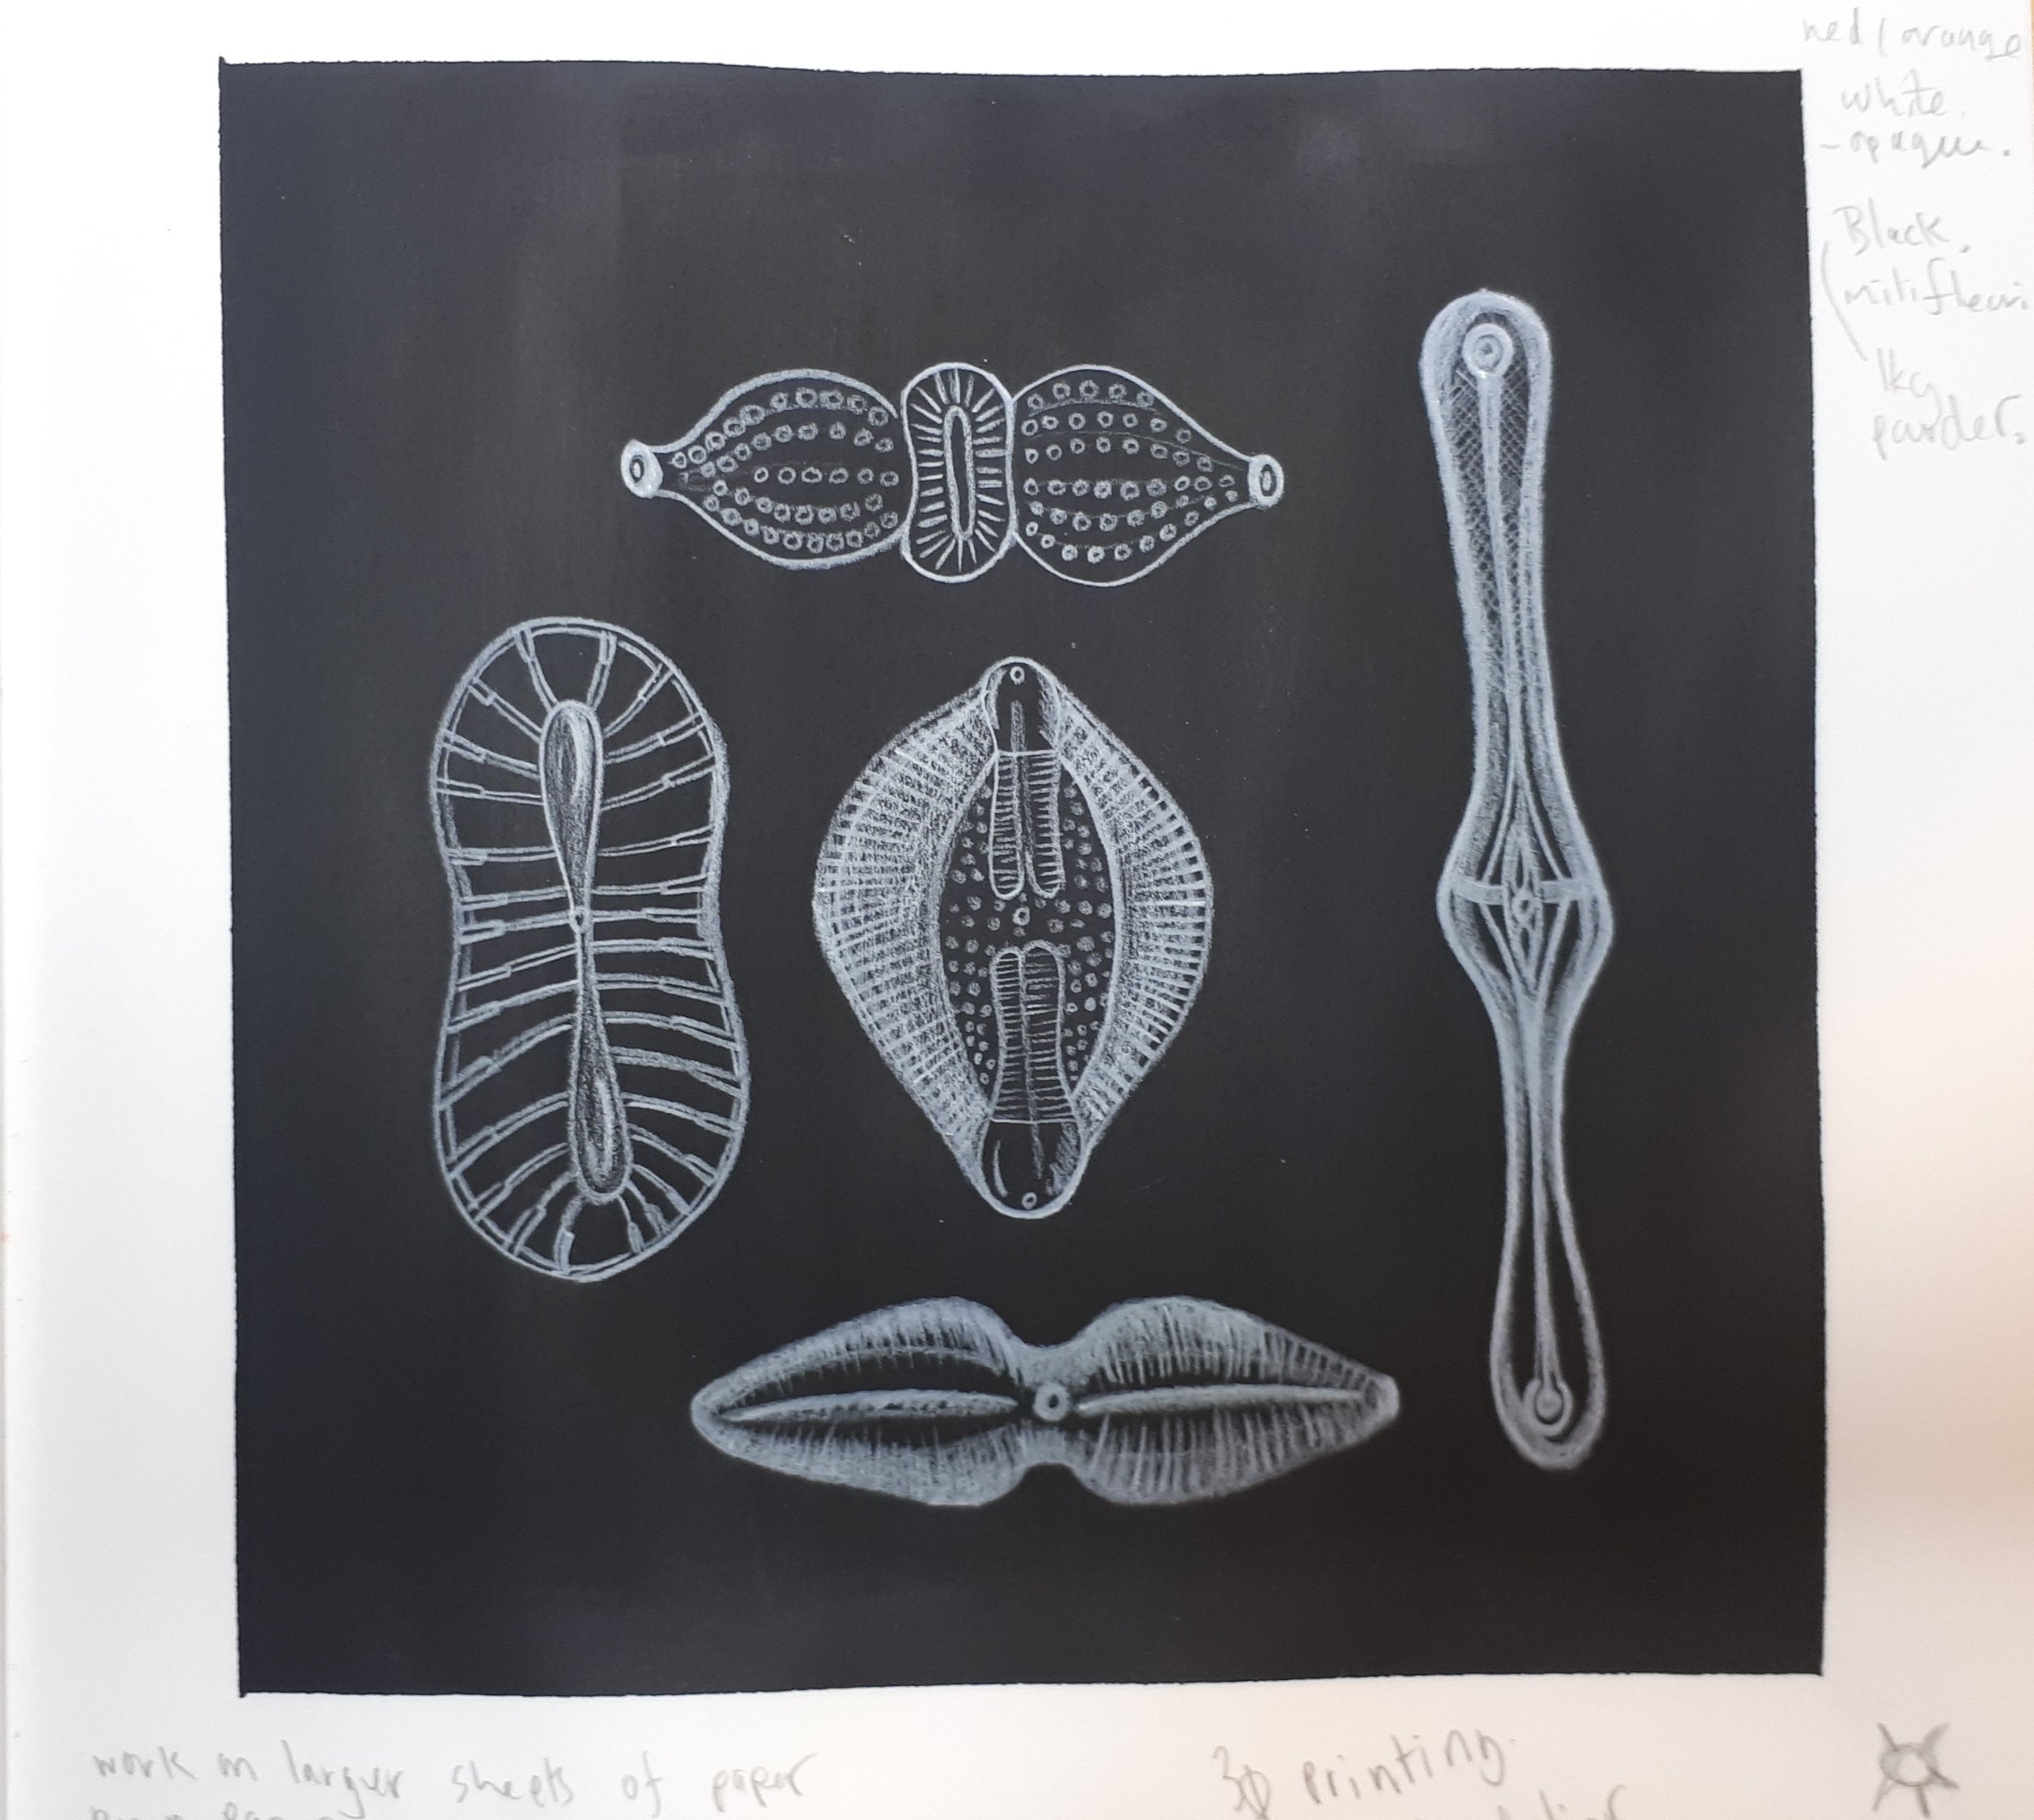
Sketchbook detail
Diatom shapes, textures and forms which could be explored in glass
The above video clip shows an early piece of blown glass made by Ian, he used my diatom drawings as inspiration. I really like the contrast of the translucent aqua blue against the opaque white. This is something we will take forward when considering colour for the next stage.

Sketchbook detail
Thinking about the technical side of how the glass pieces will float.
Sketchbook detail
Focusing on form and texture details of diatoms. Could these more details elements be 3D printed?
When working in my sketchbook, it is interesting to see how my ideas flow. This often changes from observation drawing; looking at form, pattern and texture to more imaginative concept design and technical problem solving. I was really enjoying observing the fine details of the patterns in the diatoms and got carried away thinking how we could represent this in the glass with bubbles.

Ian made some intricate ‘stopper’ pieces which fit perfectly into the larger more bulbous vessel. Would it be possible to contain something within this space? Could it create its own eco-system, or could be introduce another material with the glass?
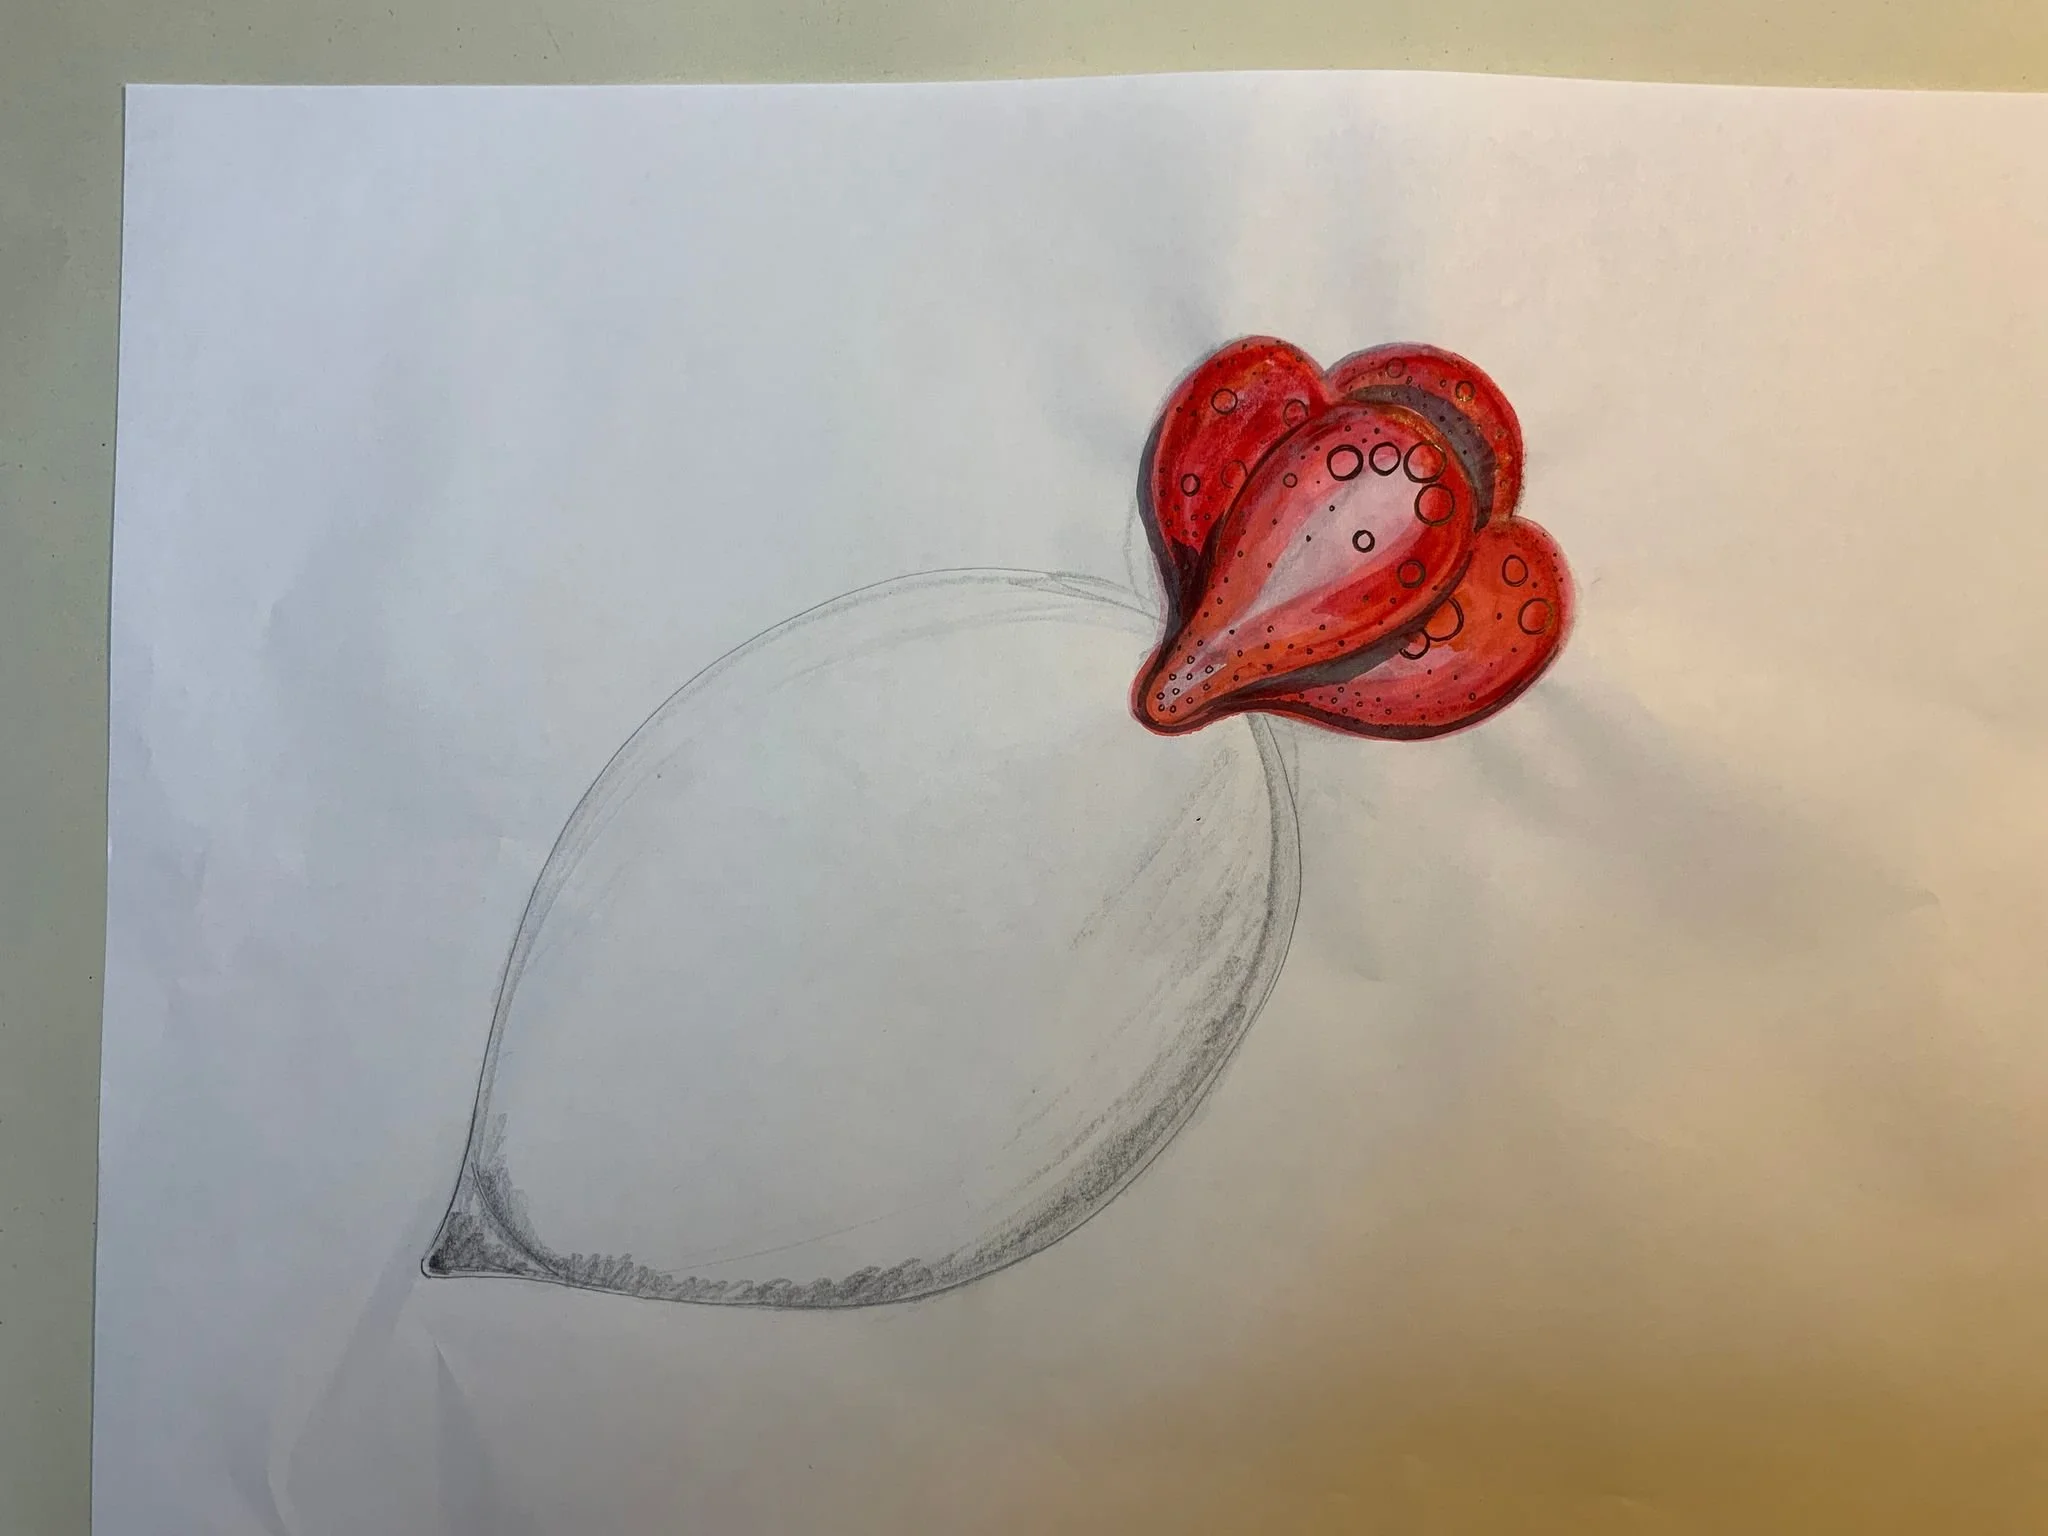
I then started looking at Sea creatures, particularly jellyfish, and was intrigued by the often brightly-coloured insides which were visible through the translucent layers. I thought this would be an interesting concept to play with using translucent and opaque colours of glass.

Sketchbook detail

Sketchbook detail

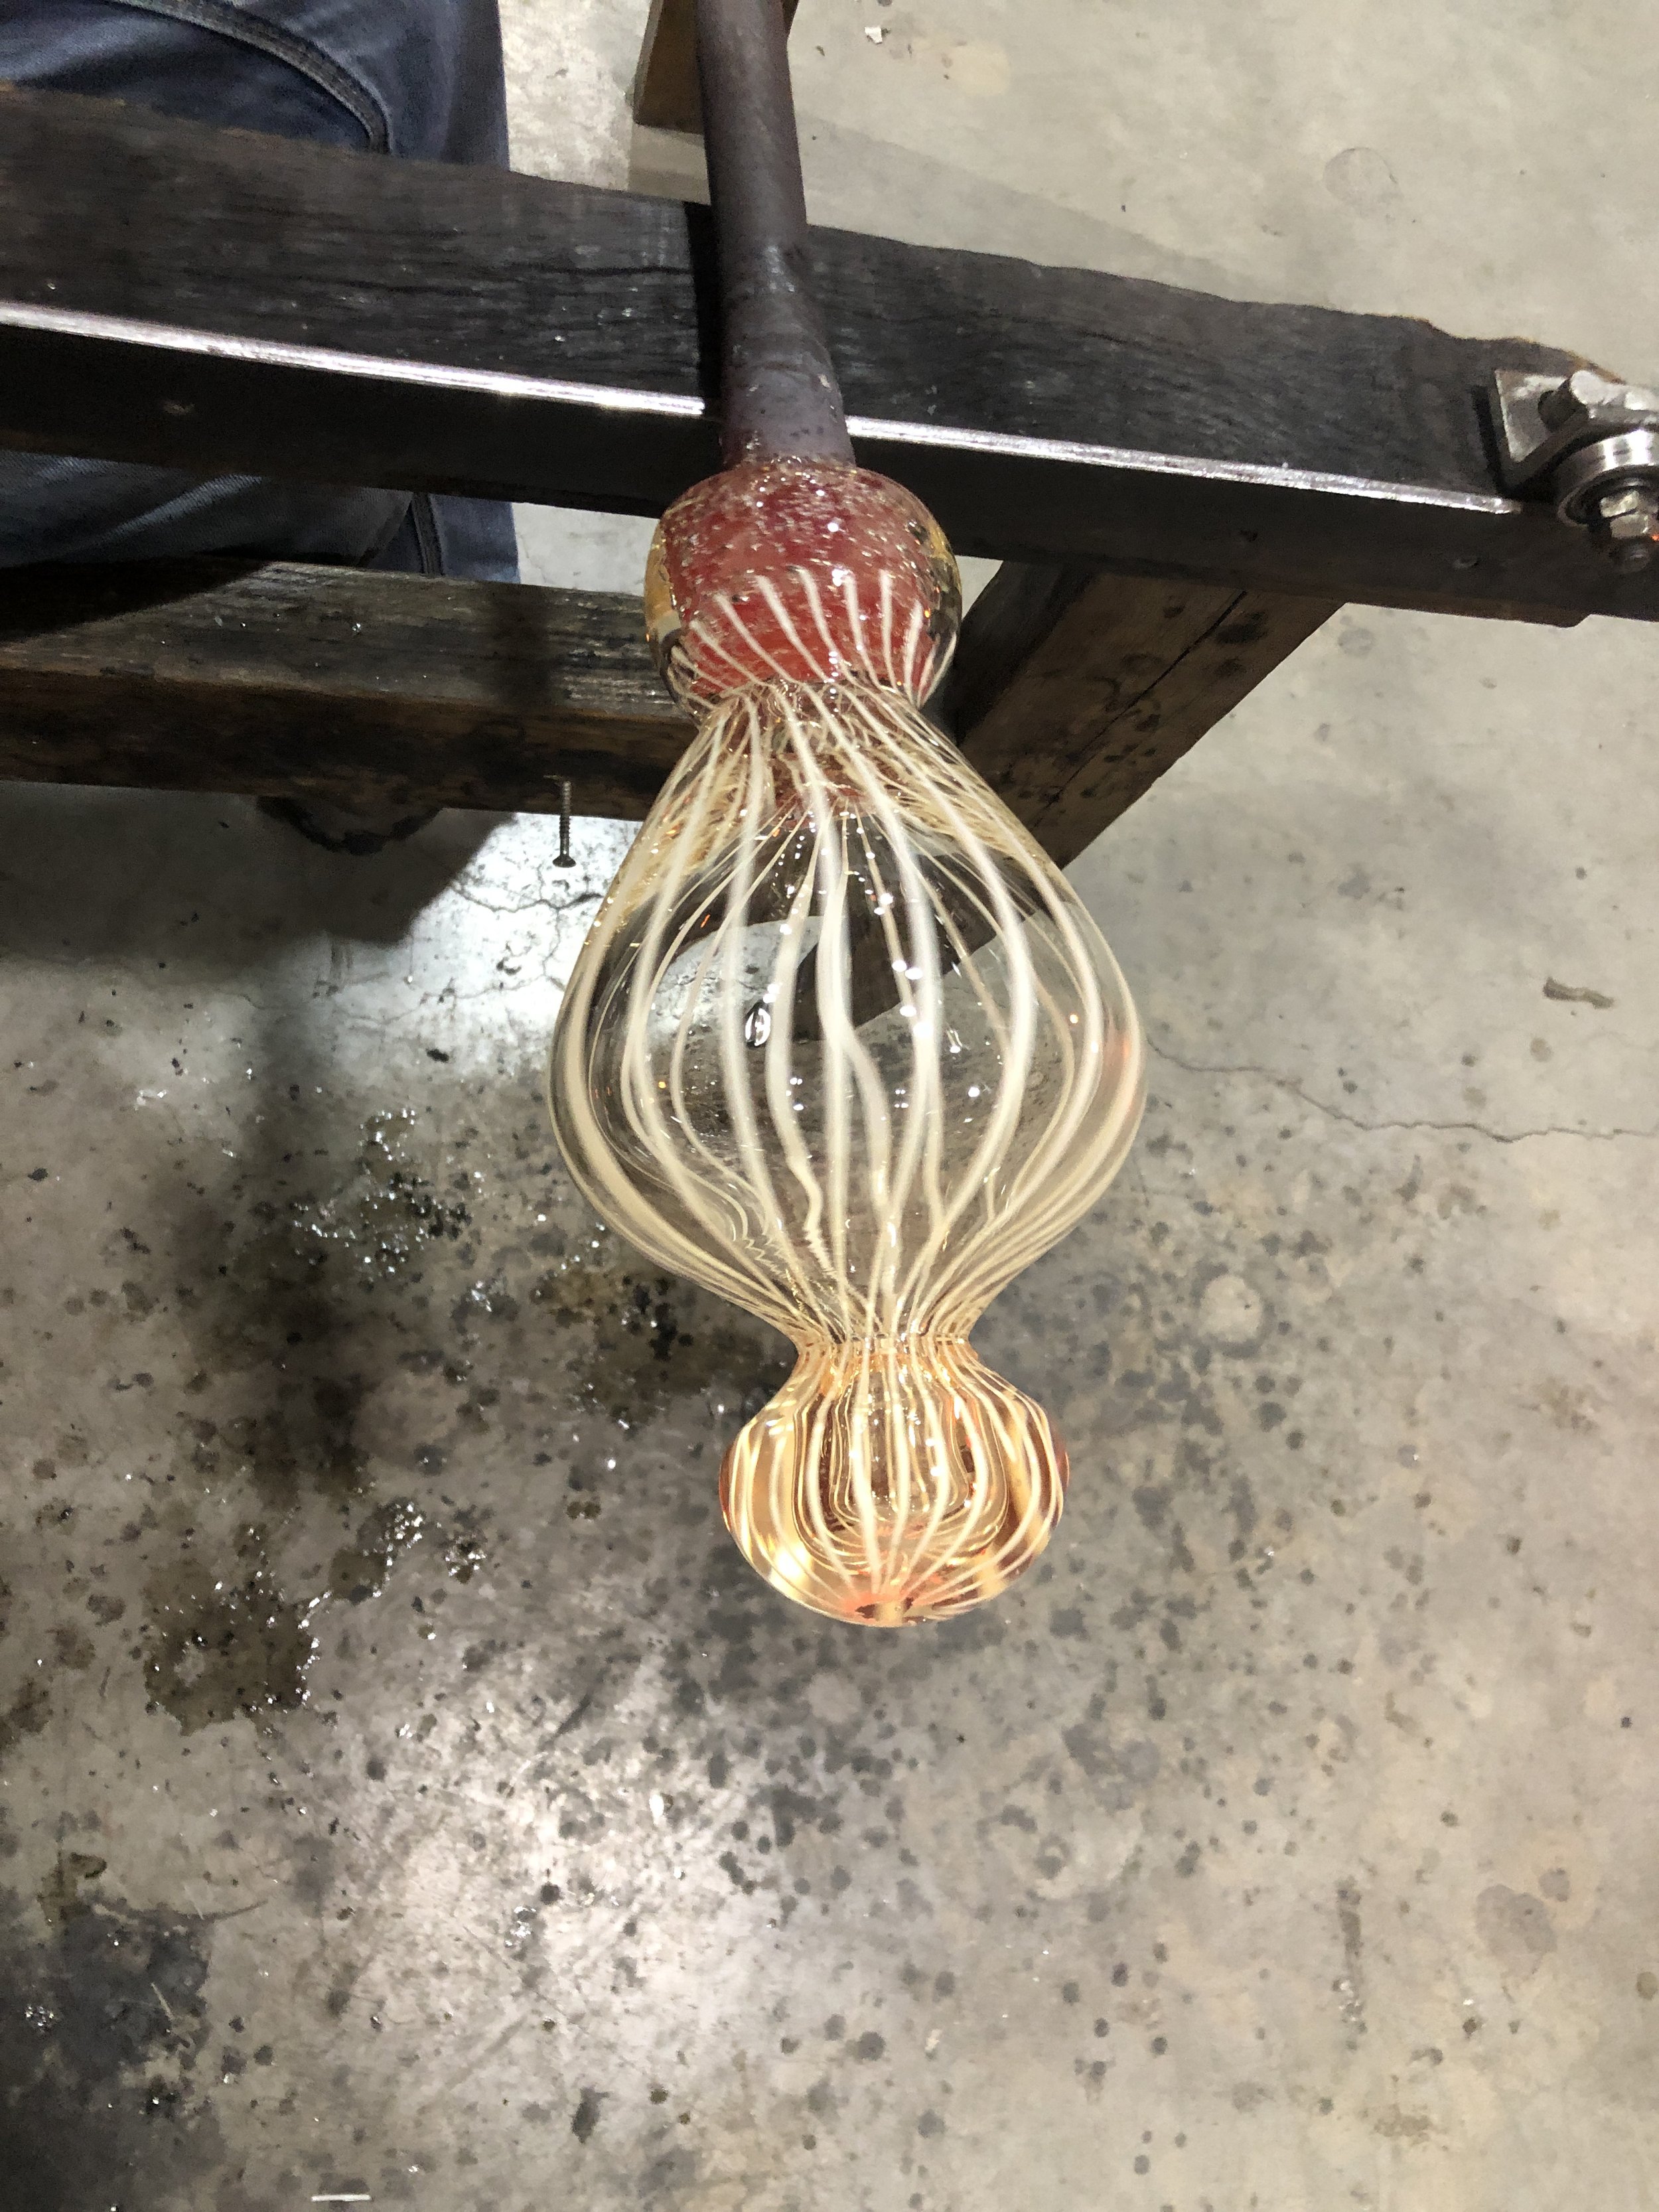
Ian manipulating the glass stopper
Photography by Nathan Soper

Sketchbook detail
Diatom arrangement
Ian pointed out that these Victorian style diatom arrangements reminded him of Millefiori Murano Glass (a thousand flowers). We thought that this technique could be explored for the more decorative areas. I really like the dark backgrounds which make the brightly coloured glass pop.

Antique microscope slide of diatoms arranged in highly complex patterns

2.5 inch Perthshire paperweight with about 12 radial spokes and a standard 1-1-2-2 pattern of millefiore canes
Hot Shop
Over the last few weeks, Ian has been experimenting with clear glass test pieces in the hot shop. He has been assisted by 1st year student Nathan Soper from Plymouth Collage of Art to help with the documentation and heavy lifting of the molten glass. This is a great opportunity for Nathan to experience an Arts Council funded artist collaboration and develop his professional practice experience.
Ian has been taking inspiration from my observational and concept drawings and using his technical skills of working with glass to create large, blown glass forms.
It’s been a long time since I attempted to make large mouth blown glass pieces, but I find myself inspired to make this body of work as large and as uncompromisingly ambitious as possible. I can imagine the results of our collaboration floating in water – perhaps at the old head office lake of Pilkington Glass in St Helens, where I started my career 40 years ago as an engineering craft apprentice.
At my age I will need help to carry the weight of the hot molten glass I need, so I have enlisted the help of one of our 1st year students, Nathan Soper, who has kindly agreed to work with me and also document the hot glass development work I am doing in response to Emma’s drawings.
The wonderful thing about working with Emma, is that the integrity of the concept, is not side-tracked or compromised by the technical skill of the glassmaker. I’ve always felt that in on too many occasions, sculptural work made exclusively by glassblowers tends to be rather inferior in my opinion, stuck in a kind of ‘cultural limbo’ somewhere between Art and Craft, not quite achieving quality as either.
This collaboration with Emma is wonderful because the conceptual thinking and the drawings that she makes are straight from her imagination, with an understanding of glass, but without the many years of training and experience that point a specific way to how things are done. For the first time since I was a student, I have the freedom to imagine making anything, without limits, but this time with over 30 years of tacit skill as a glassmaker at my disposal.
Ian Hankey MA(RCA)

Finished test piece including top stopper


Photography by Nathan Soper 2021

It floats!
Our next stage is to experiment with more forms taken from my drawings and to start to introduce colour. We have decided on a colour palette of aqua blue, translucent red/orange, opaque white and black. We both feel that an intense black base will work well for the Italian millefiori technique which we want to try for the more decorative elements.
We are also curious about the possibility of introducing a 3D printed element to the work. Could this be the nucleus of the piece which holds many glass pieces into place? Similar to the highly intricate arranged diatom slides from the Victorian era. Multiple structures arranged to create one composite piece.
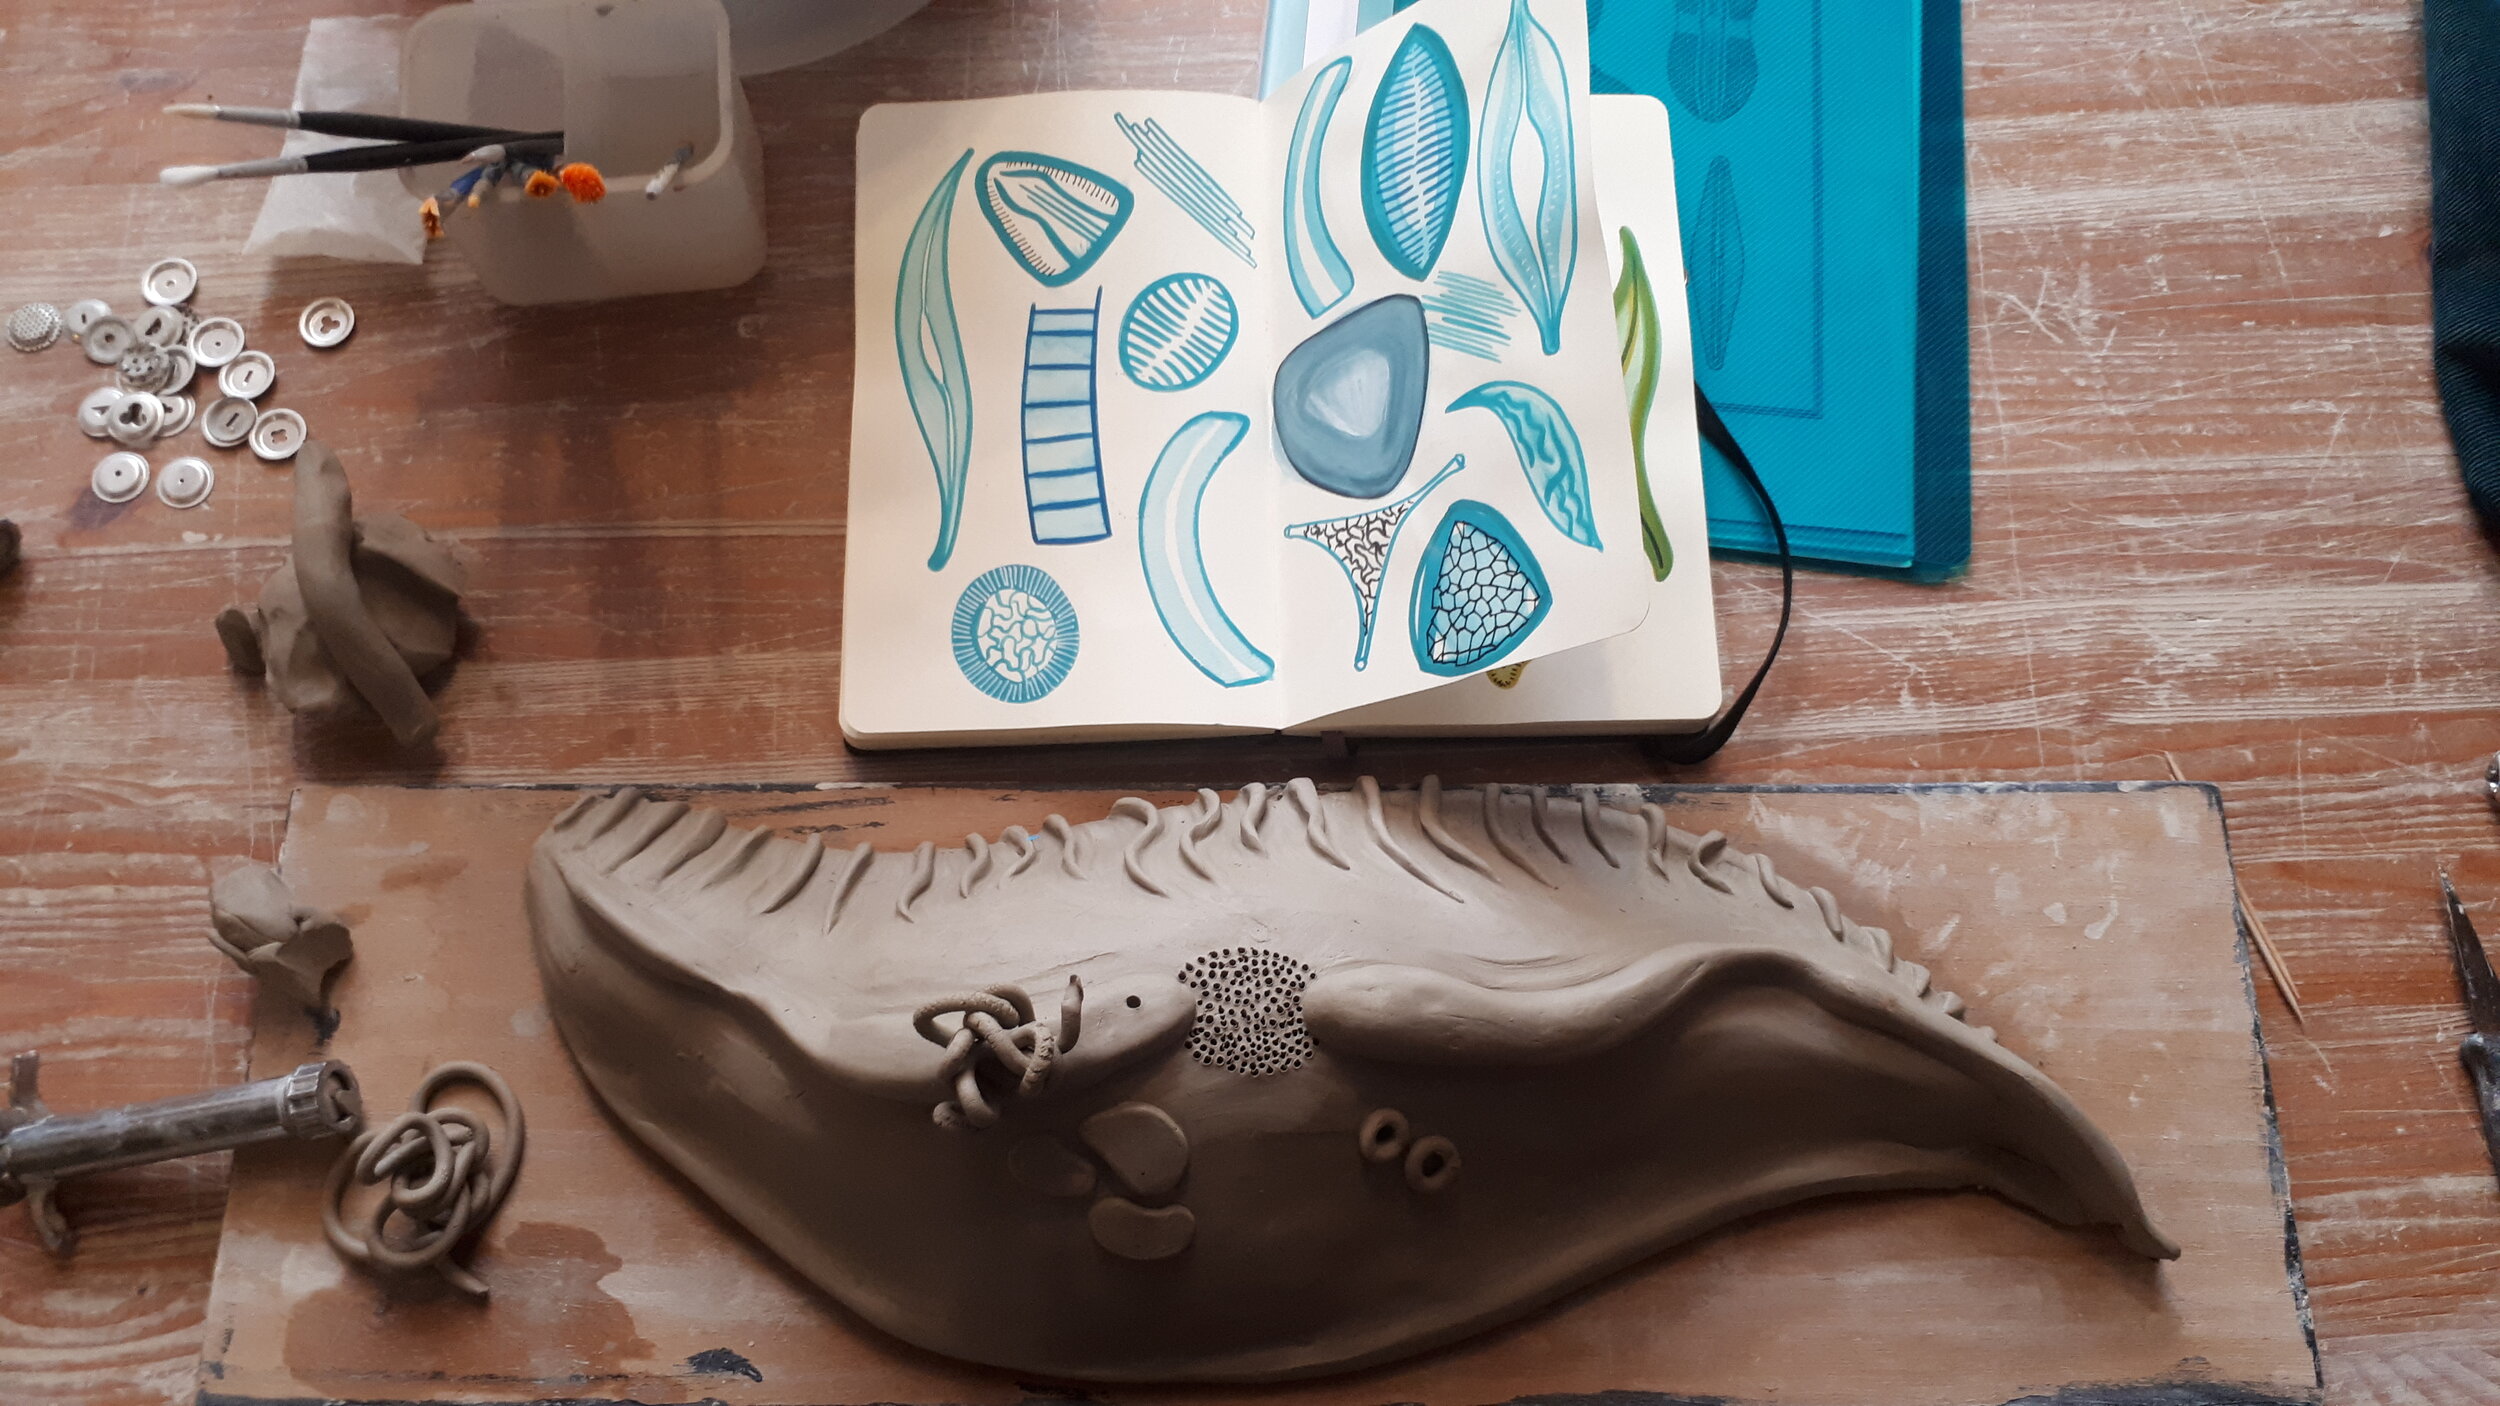
Clay samples
It’s really enjoyable working with the clay, experimenting with different techniques to create line and texture. Today I worked back into the piece I started last week, it had hardened slightly, so was less sticky and a bit easier to work with. I’m using this as a sample/test piece to see which techniques work best, and represent the line quality of my sketches.


Sketchbooks and Research


Details from sketchbooks
Emma Reynard ©
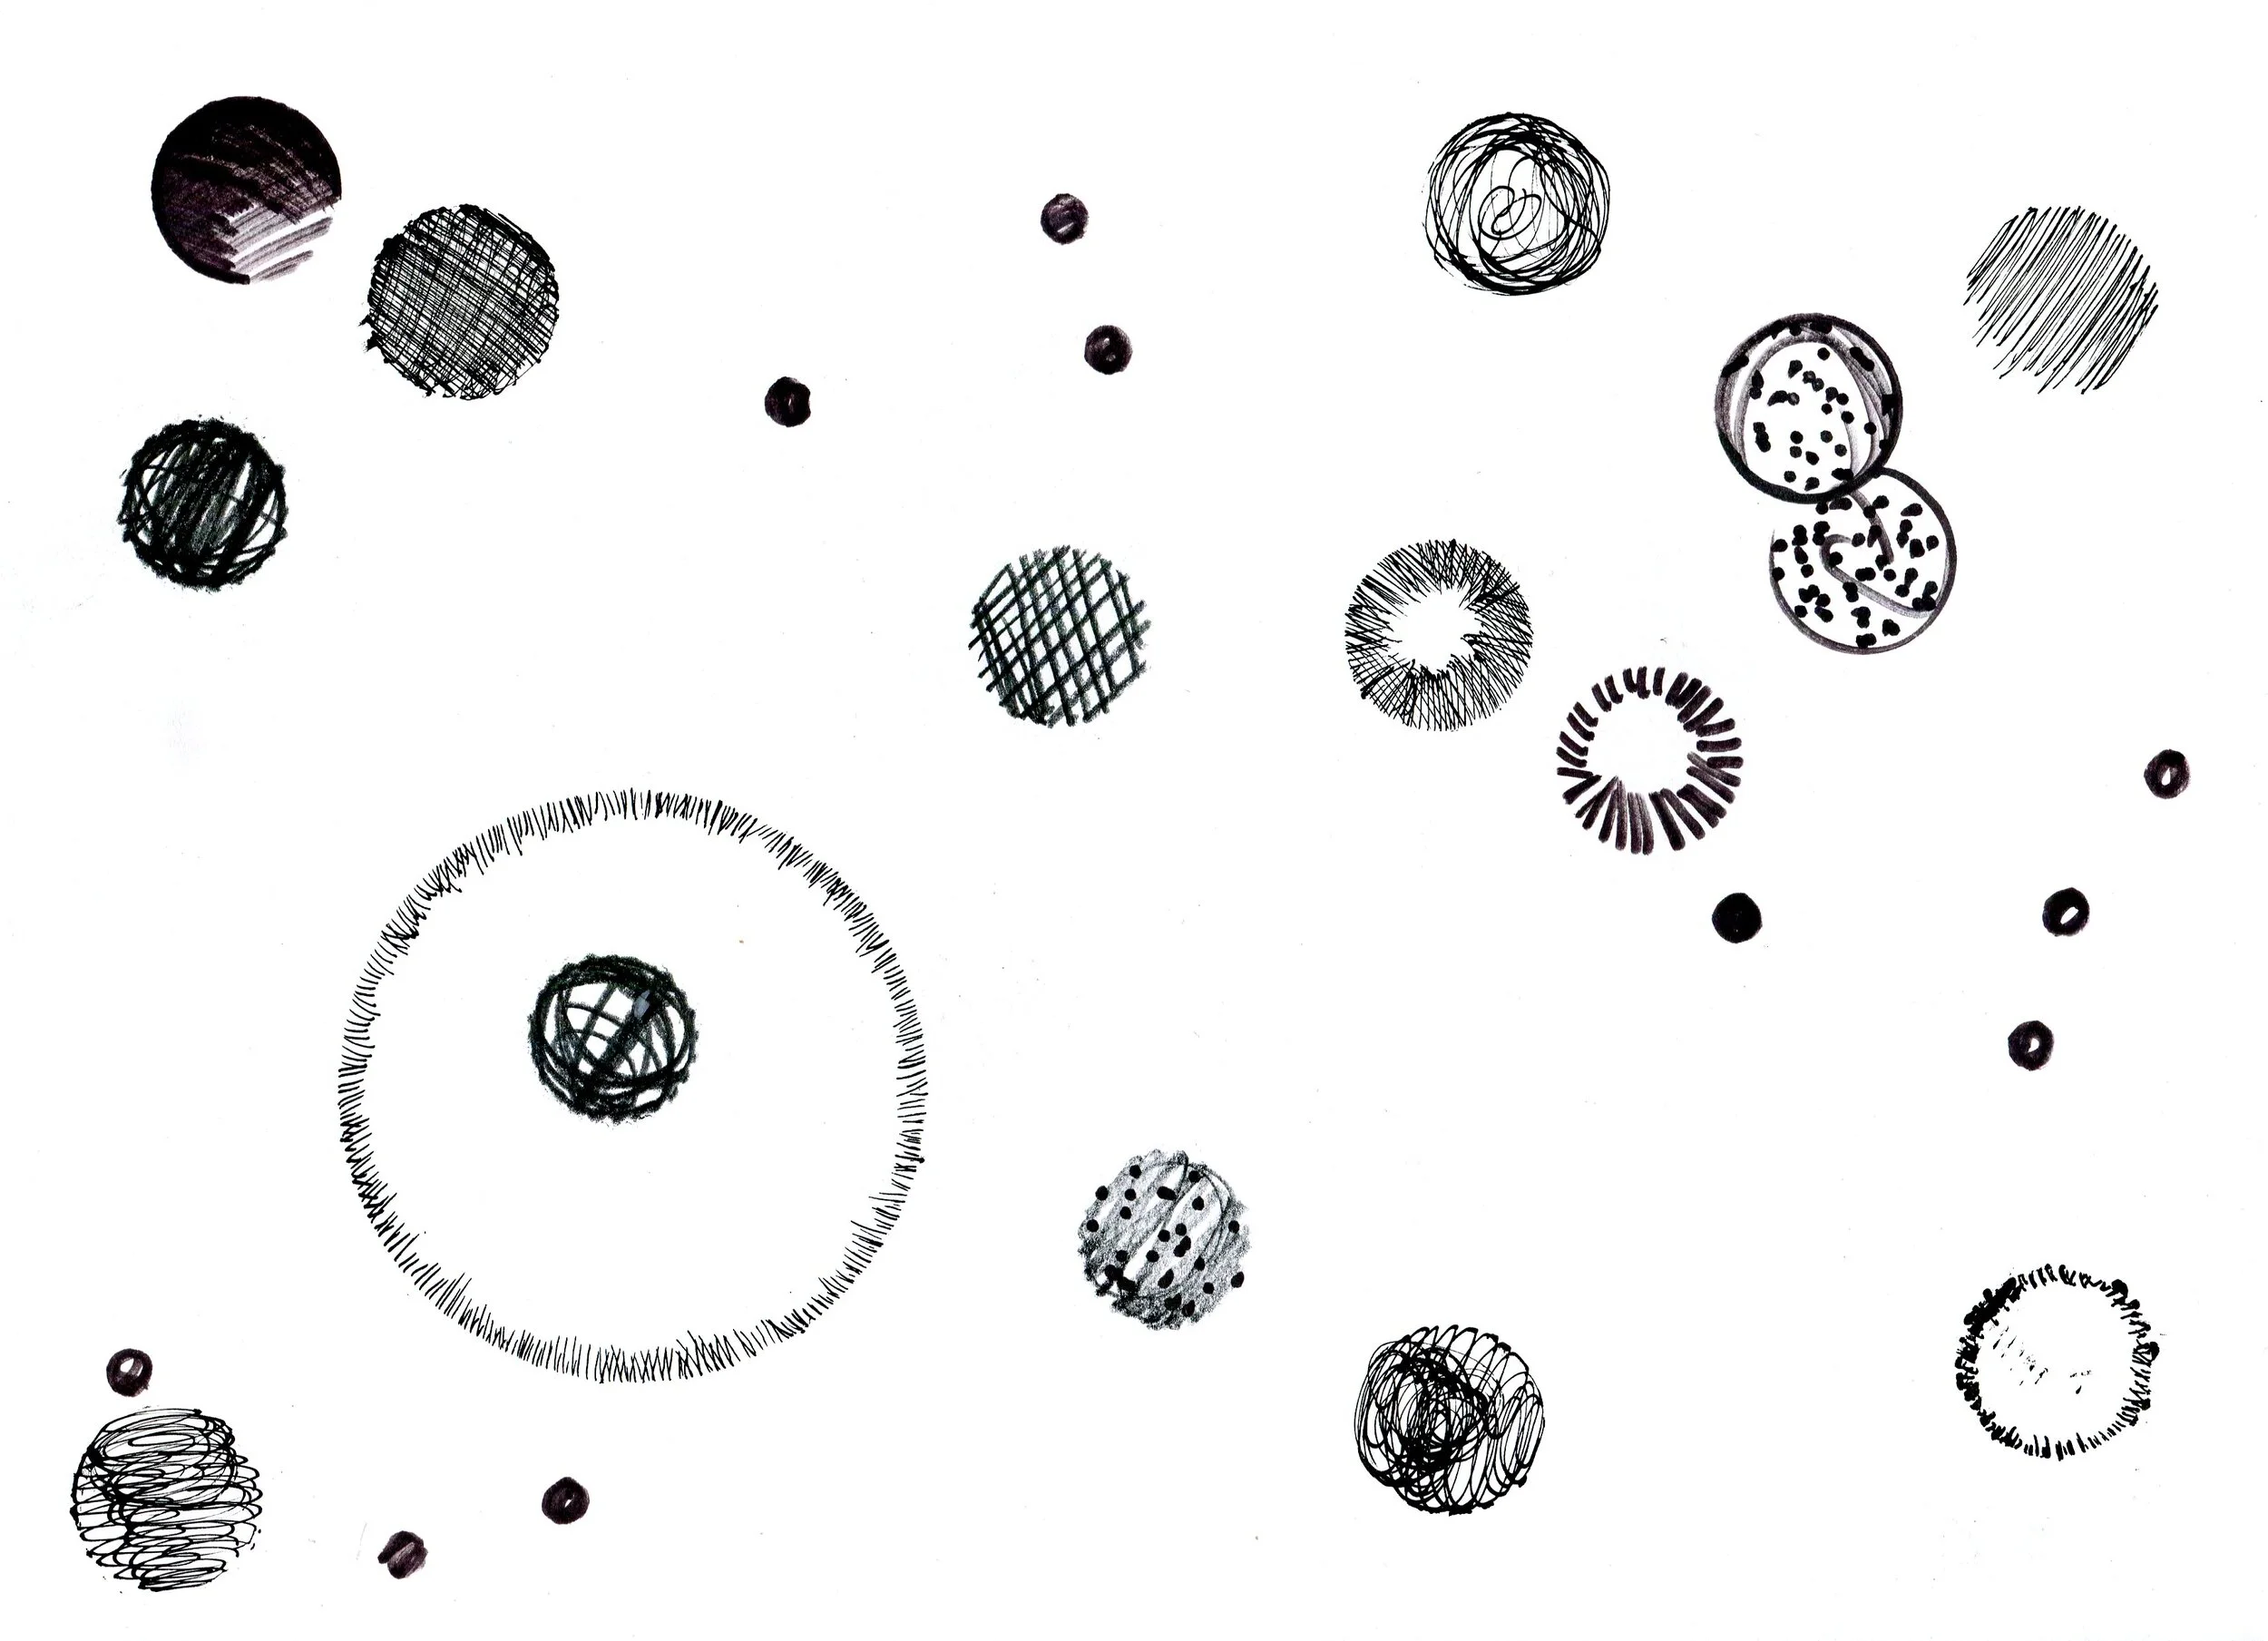
Throughout this development time, I will be keeping sketchbooks as a way to both document the process and also to play, experiment and research my ideas.
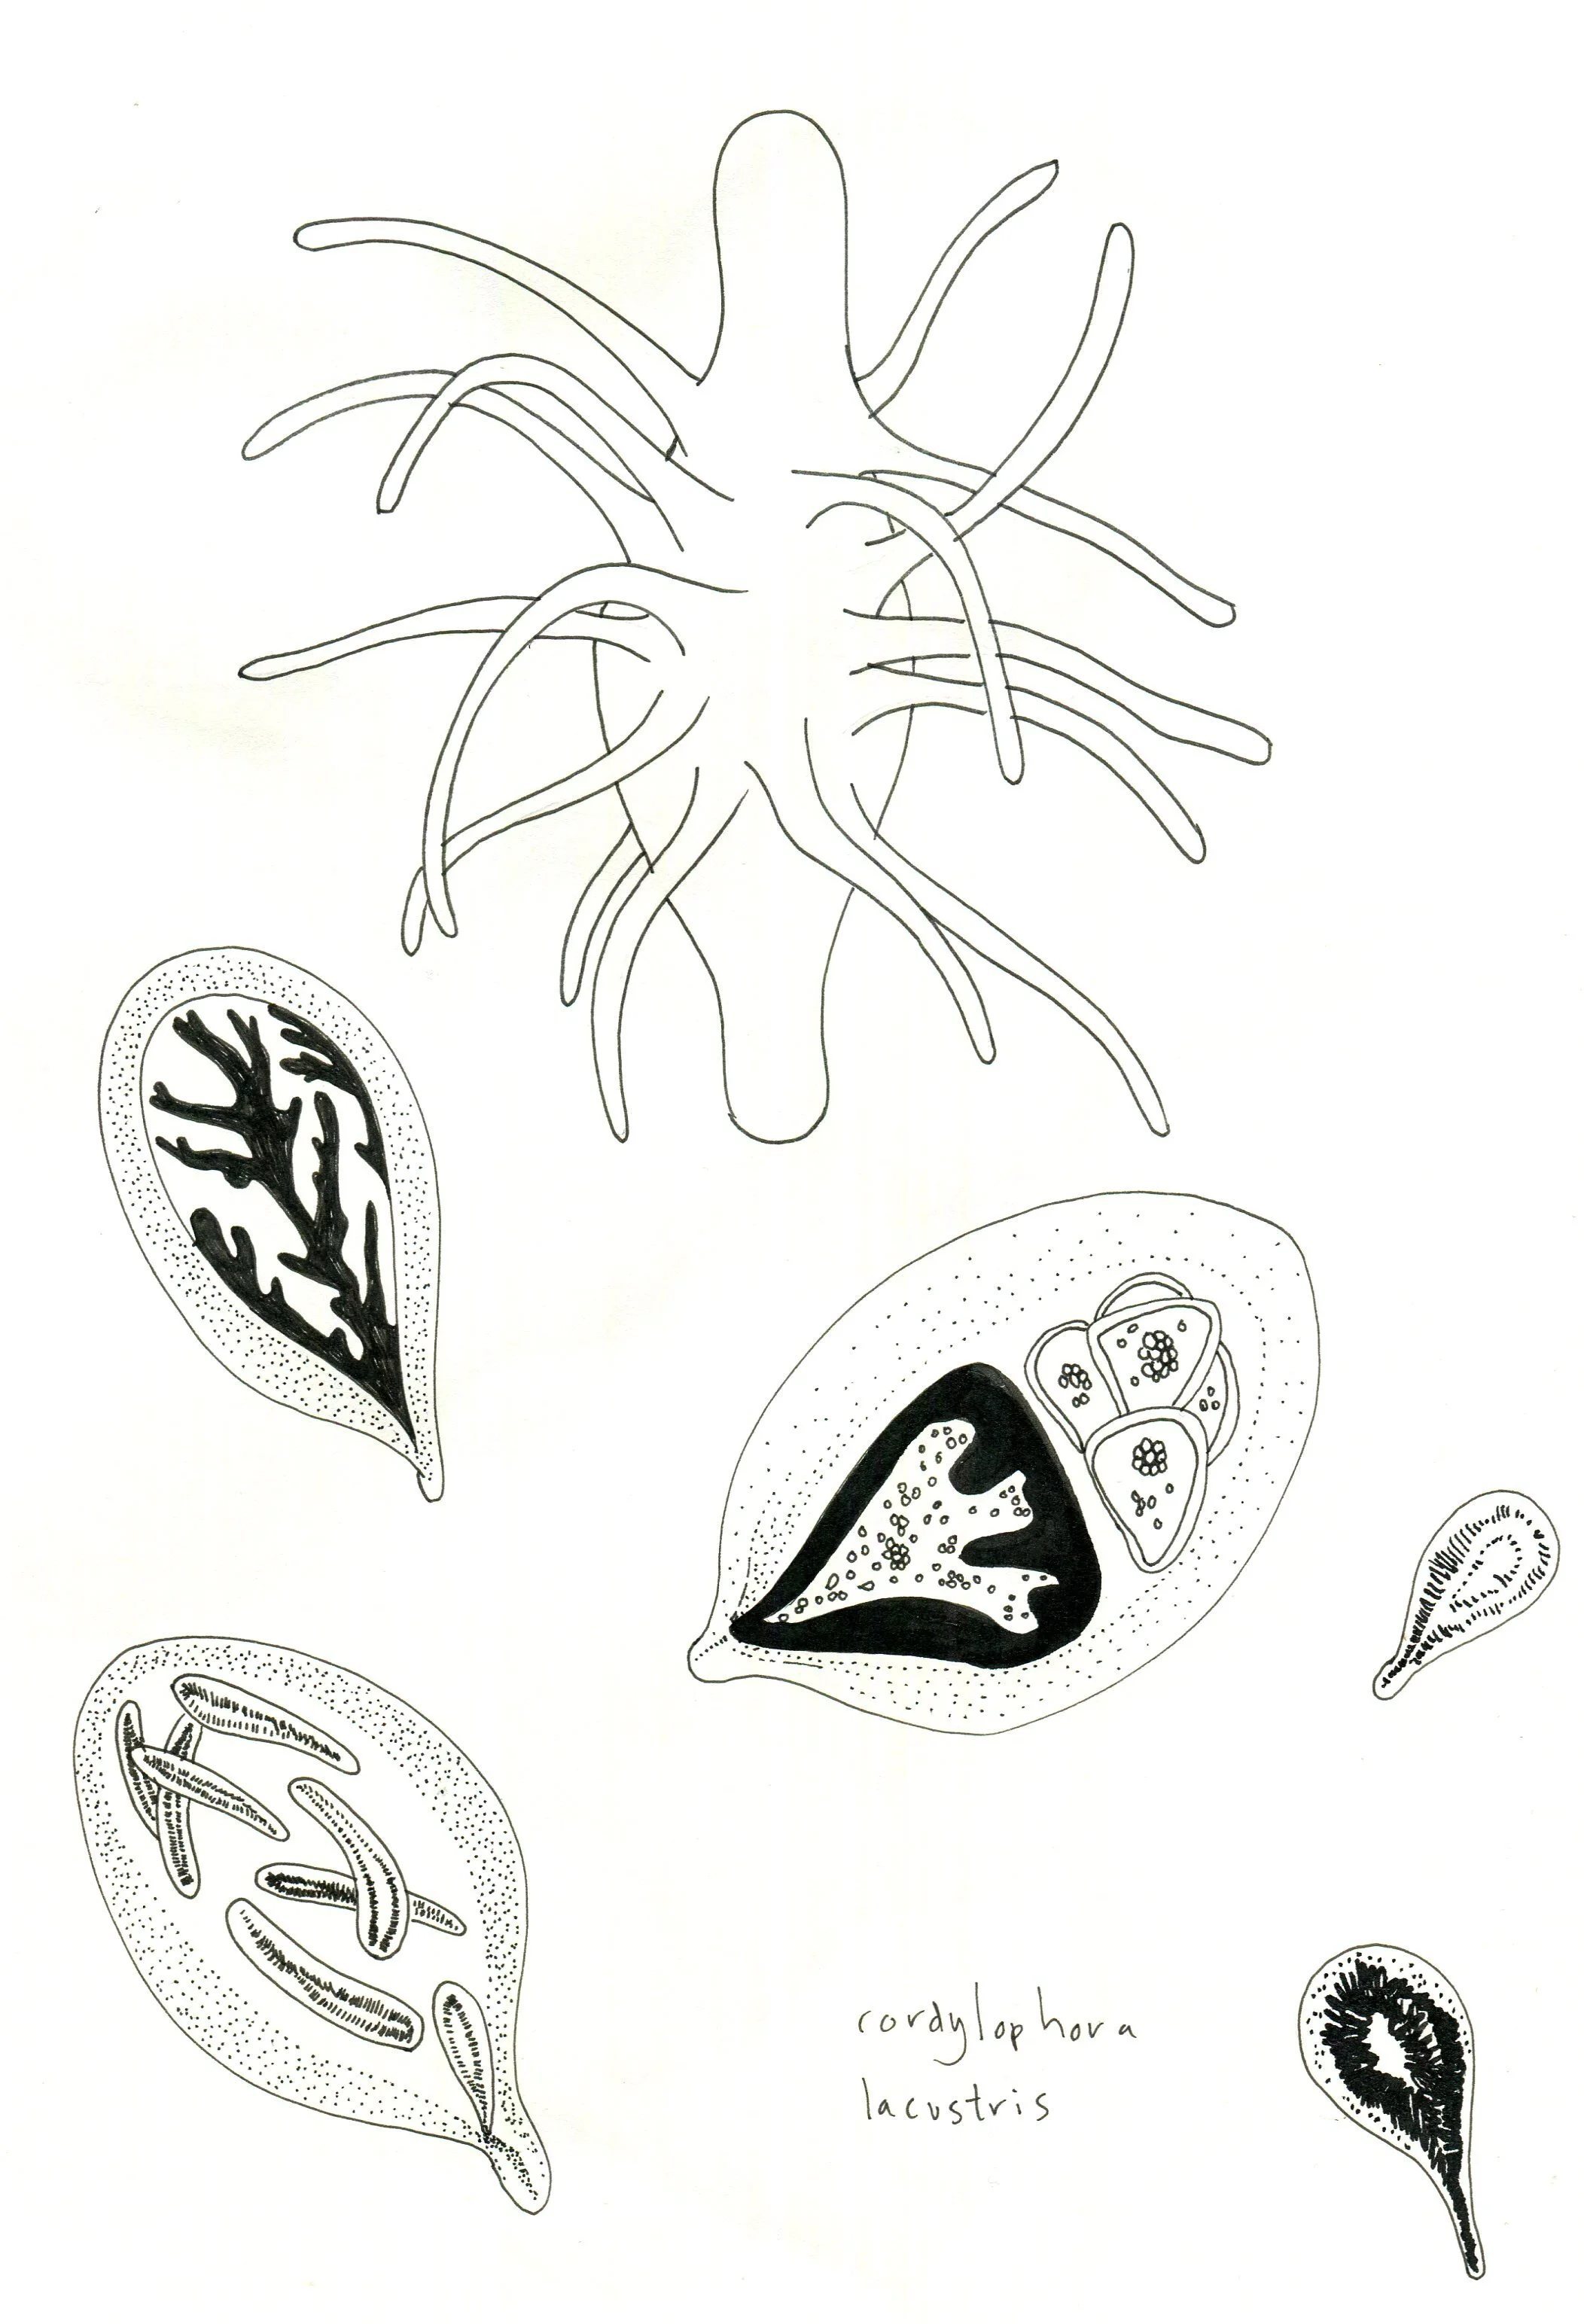
Not being a scientist, I was initially drawn to observing diatoms mainly for their outstanding beauty, however having researched further I have become keen to discover more about the species, identification and the importance of them to our environment. Therefore, I will be connecting with scientists who specialise in these areas to learn more about these intriguing organisms.
Fishing Floats
I have been thinking about the weighted glass and how it will float on water, and it made me wonder if I could get any inspiration from old fishing floats. Maybe this could be in the form or the way it is weighted. I’m looking forward to seeing how the blown glass diatom forms will react when placed into the water. Will be capture the air within a section of the glass? Will the glass be thicker in one part to create balance or off-balance? Will the glass extend under water to create balance and again, be a hidden element of the final concept.

1950’s Japanese glass fishing floats
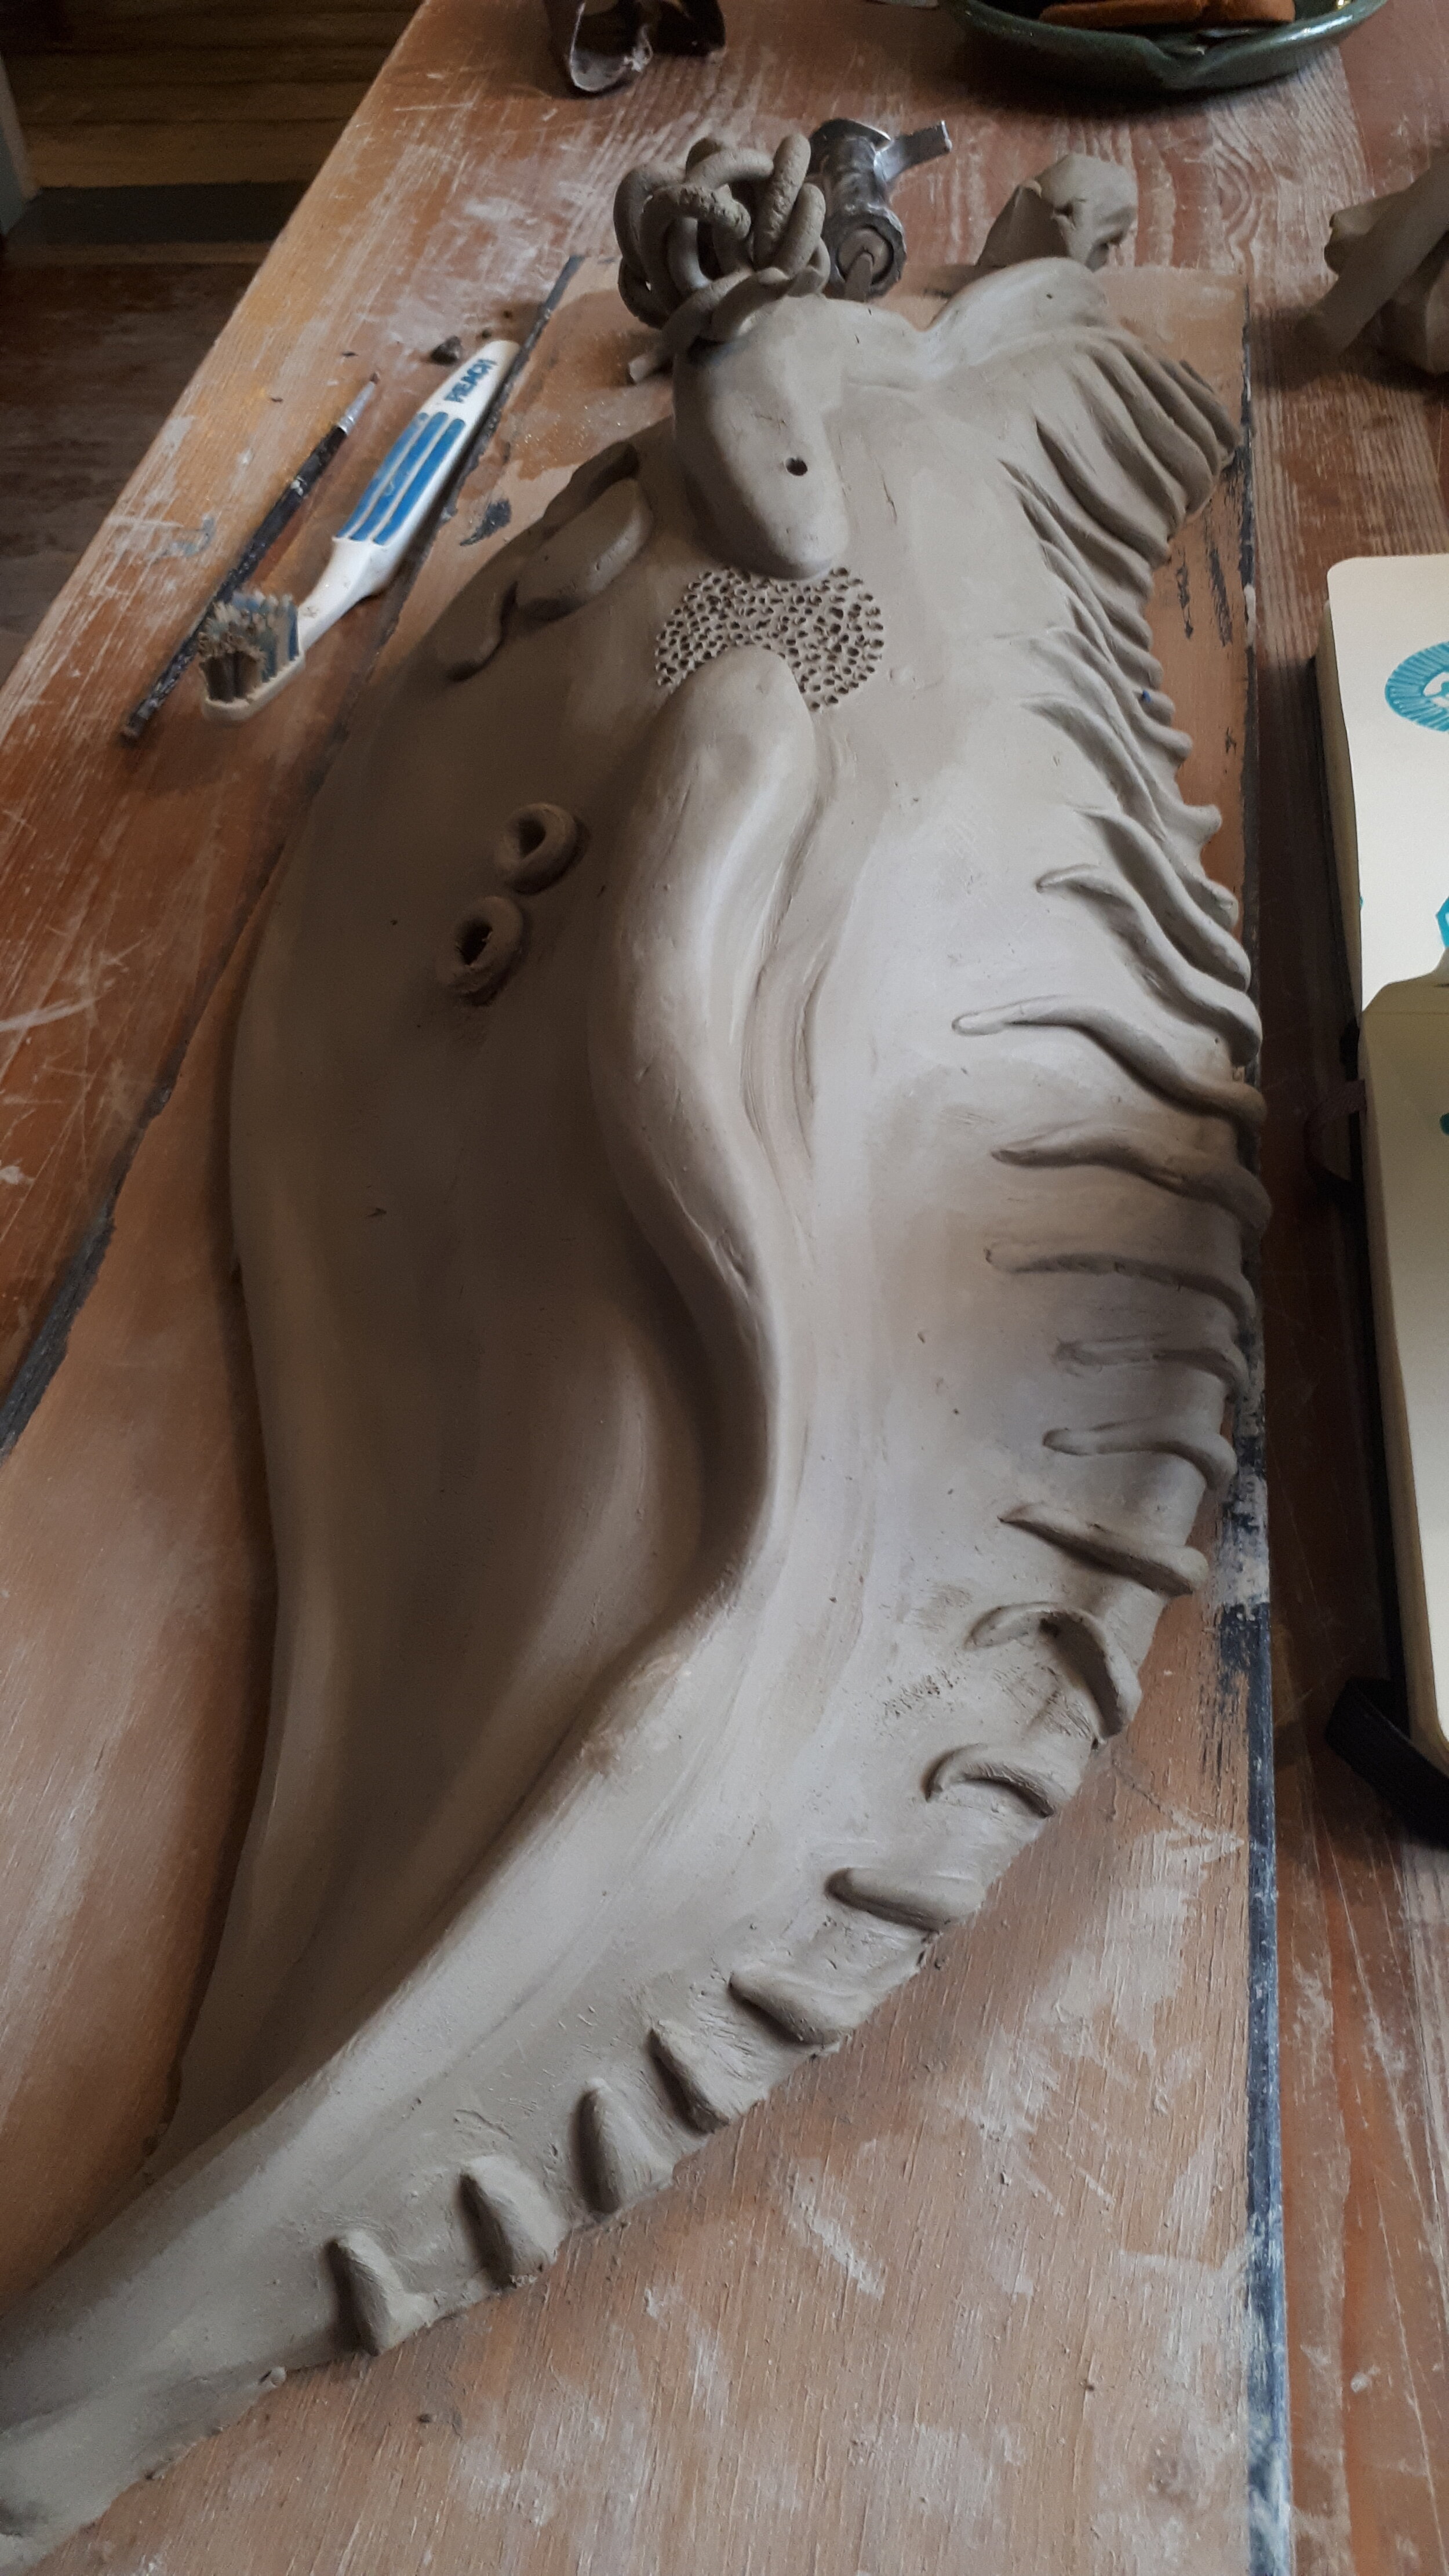
Working with Clay
I decided to start off the initial research and ideas by creating some clay forms inspired by my drawings of diatoms. Using B17C stoneware, I rolled out a slab and built up the underside with newspaper to create the curved form. I could then manipulate the wet clay and add texture. I'll pierce holes and refine the form when the clay is leather-hard. I will continue to develop this piece and use it as a sample/test for future ideas.

Manipulating the wet clay
Emma Reynard ©

Detail of textures inspired by Cymbellaceae
The Diatom Pleurosigma or Gyrosigma, depending upon which way the puncta runs, radial or parallel.
Emma Reynard ©
It's interesting to work three-dimensionally to play with concept ideas for the glass. Maybe some of the textures could evolve further with glass techniques. I might also experiment with hidden textures on the underside of this form, something similar to a geode. Again, this makes me think about hidden and secret beauties of nature.

A large geode with calcite and fluorite deposits
words to inspire
valves
protract
arched
elliptical
elongated
pores
curve
radiate
Leopold and Rudolf Blaschka (1857-1939)
I have been fascinated by the glass sculptures and models of Leopold and Rudolf Blaschka since seeing them in the NHM a few years ago. The detail and intricacy they have achieved using glass is astounding. Their scientific models of marine invertebrates look breathtakingly fragile and delicate. I am particularly in awe of the Portuguese man o’ war model which captures the translucency and textures of the jellyfish perfectly. Modelled smaller than life the glass both stained and painted to reveal structures of Physalia physalis, (see image below.)

A glass model of a Portuguese man o’ war, Leopold Blaschka (1822-1895), circa 1877. 8½ x 4 x 3 in (21.5 x 10 x 8 cm). Sold for £10,000 on 30 January 2019 at Christie’s in London
“The medium is certainly suitable for rendering such creatures. They have a translucence, which matches that of glass. But that’s to take nothing away from Leopold’s technical feat. It is his texture I find extraordinary: the way he achieved a gelatinous character that’s so lifelike and compelling.’”
The Blaschkas would make the models for scientific use only and would be sold to museums of natural history. Unlike the preserved invertebrates, the glass models would retain their colour, and therefore providing a more accurate representation of the living specimen. They also made models of microscopic radiolaria inspired by the drawings of Ernst Haeckel. The following video highlights some of the NHM collection of Blaschka models.

Diatoms by Ernst Haeckel in 'Kunstformen der Natur' 1904.
What are diatoms, and why the fascination?
Diatoms are single-celled algae
Diatoms are algae that live in houses made of glass. They are the only organism on the planet with cell walls composed of transparent, opaline silica. Diatom cell walls are ornamented by intricate and striking patterns of silica.
I first became fascinated by diatoms, after observing some water samples from my garden pond. Not being a scientist, I was transfixed by these strange, secret worlds which I could peer into. I wanted to be able to show everyone all the amazing things which aren’t visible to the naked eye, things that are taken for granted and unobserved by the majority; the beauty in a bee’s wing, the iridescent sheen on a fly, the complex structure of a tiny seed. I began to draw some of my discoveries viewed down my microscope, I was hooked.
This led me on to further research, including scientific illustrators, explorer’s sketchbooks, the works of Ernst Haeckel and the glassmakers Leopold and Rudolf Blaschka who made scientific glass models of invertebrates and plants. I became intrigued by Victorian artists who would arrange diatoms onto slides, creating complex, kaleidoscopic patterns, only visible through a microscope. THE DIATOMIST is a short documentary about Klaus Kemp, master of the Victorian art of diatom arrangement.
I can see why Klaus Kemp became obsessed with the beauty of diatoms, each individual structure is so intricate and beautiful. After spending time drawing these structures, I felt that the perfect media to explore these forms would be glass. I can’t make glass, but I knew someone who could, that’s were master glassmaker Ian Hankey comes in.
We received a small R&D grant to begin some experiments, working together to see what we could achieve. Due to the lockdown during the Covid pandemic, Ian was unable to get access to the furnaces for the blown glass, so we began with etched glass and looked at possibilities of introducing solar strips into the glass to create energy. I really loved this idea and I went slightly off-tangent imagining etched glass panels in a greenhouse, which had solar strips and could generate enough electricity to heat the greenhouse over winter (that’s an idea to return to at a later date!)
Once Ian was able to get access to the furnace, he created some blown glass forms inspired by my diatom drawings. This is what I had imagined when I thought about the glass diatom forms, and I was excited to see where this body of work could take us if we had the time to play and develop the work.
I applied for the DYCP funding through Arts Council England, and was overwhelmed to find out that my application had been successful. This meant that I would be able to collaborate with Ian and share our ideas and skills. We can become more ambitious, investigative and take creative risks during this 9 month development time.
We particularly want to develop the glass ‘diatom’ forms, pushing the concept of weighted glass to see how it affects the balance & stability of each piece in water. We will experiment with colour, transparencies, form & texture to further develop the aesthetics of the glass.
I’m excited to see where this collaboration will take us, and this blog will document our progress.
Further notes on diatoms
Diatoms turn energy from the sun into sugar
Diatoms have light-absorbing molecules (chlorophylls a and c) that collect energy from the sun and turn it into chemical energy through photosynthesis.
Diatoms produce 50% of the air we breathe
Through carbon fixation, diatoms remove carbon dioxide (CO2) from the atmosphere. The CO2 is converted to organic carbon in the form of sugar, and oxygen (O2) is released. We breathe the oxygen that diatoms release.
Diatoms feed the oceans, lakes and rivers
Diatoms produce long-chain fatty acids. Diatoms are an important source of these energy rich molecules that are food for the entire food web, from zooplankton to aquatic insects to fish to whales.
Diatoms are the most diverse protists on earth
Diatoms are eukaryotes, one of the Heterokont algae. Estimates of the number of diatom species range from 20,000 - 2 million. Scientists are discovering new species every year.
Diatoms tell us about the health of aquatic systems
Diatoms are particular about the quality of water in which they live. For example, species have distinct ranges of pH and salinity where they will grow. Diatoms also have ranges and tolerances for other environmental variables, including nutrient concentration, suspended sediment, flow regime, elevation, and for different types of human disturbance. As a result, diatoms are vital for assessment and monitoring biotic condition of waters.

Diatoms and Floating Glass
I was recently awarded DYCP funding from Arts Council England to develop my creative practice.
During the next 9 months I will be collaborating with master glassmaker Ian Hankey. We will create experimental new work from micro-organism observations of diatoms into floating, blown-glass sculptures.
This blog will document our progress.

Detail from sketchbook
Emma Reynard ©

-
June 2022
- Jun 8, 2022 Small Glass Houses - Diatoms and Floating Glass Jun 8, 2022
-
April 2022
- Apr 4, 2022 Finished pieces Apr 4, 2022
- Apr 4, 2022 Concept Designs Apr 4, 2022
-
February 2022
- Feb 8, 2022 Creating a stand and CAD Feb 8, 2022
- Feb 8, 2022 Millefiori experiments Feb 8, 2022
- Feb 8, 2022 Cold work and finishing Feb 8, 2022
-
December 2021
- Dec 10, 2021 Colour and cane Dec 10, 2021
- Dec 10, 2021 The World of Glass Dec 10, 2021
- Dec 7, 2021 Sketchbook Development Dec 7, 2021
- Dec 7, 2021 Hot Shop Dec 7, 2021
-
September 2021
- Sep 3, 2021 Clay samples Sep 3, 2021
- Sep 1, 2021 Sketchbooks and Research Sep 1, 2021
-
August 2021
- Aug 31, 2021 Fishing Floats Aug 31, 2021
- Aug 31, 2021 Working with Clay Aug 31, 2021
- Aug 31, 2021 Leopold and Rudolf Blaschka (1857-1939) Aug 31, 2021
- Aug 31, 2021 What are diatoms, and why the fascination? Aug 31, 2021
- Aug 31, 2021 Diatoms and Floating Glass Aug 31, 2021